Restoration of a class ii occluso-distal cavity with composite

Restoration of a class II occluso-distal cavity with composite

Case by Aleksandra Łyżwińska, DMD


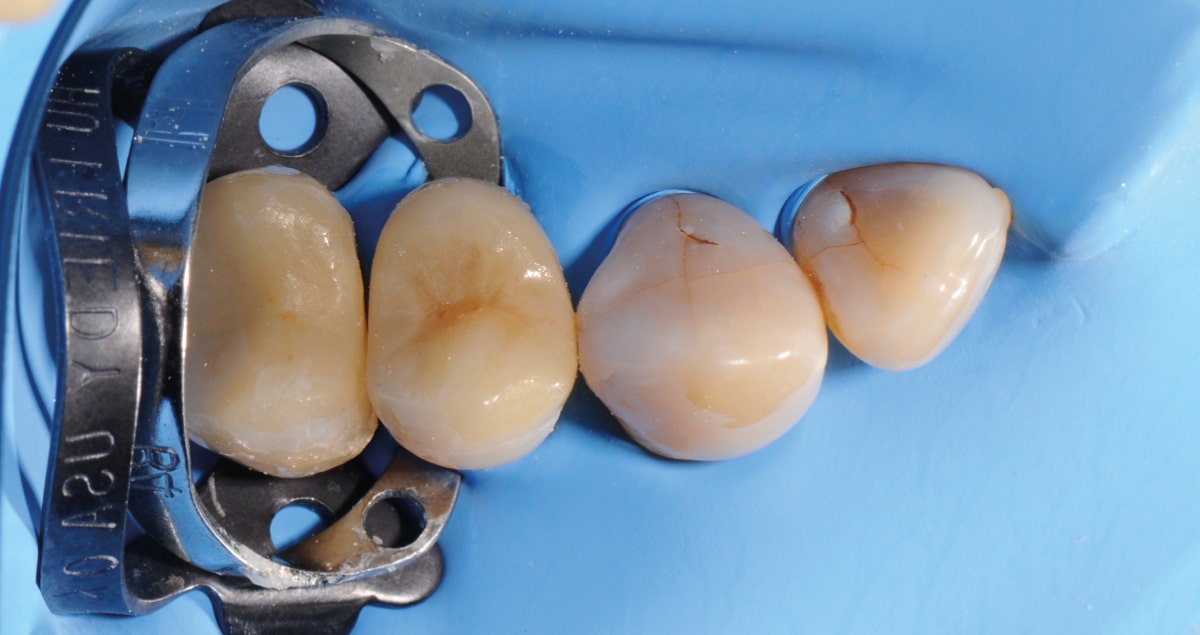
This clinical case concerns a patient with a lesion on the occluso-distal aspect of the mandibular left first premolar. We opted for a direct treatment approach with a combination of flowable and high-viscosity composite resin (CLEARFIL MAJESTY™ ES Flow - Super Low A2, CLEARFIL MAJESTY™ ES-2 Classic A2). In order to establish a strong bond between the tooth structure and the restorative material, we decided to selectively etch the enamel and then apply a clinically proven self-etch adhesive (CLEARFIL™ SE BOND 2).


Fig. 1. Initial clinical situation.


Fig. 2. Appearance of the premolar after caries removal.


Fig. 3. Placement of a sectional matrix for anatomical shaping, the establishing of tight interproximal contacts and protection of the adjacent tooth.


Fig. 4. Appearance of the tooth structure after selective enamel etching.


Fig. 5. Interproximal wall built up with CLEARFIL MAJESTY™ ES-2 Classic (A2 shade) and cavity filled with CLEARFIL MAJESTY™ ES Flow - Super Low A2.


Fig. 6. After initial polishing.


FINAL SITUATION


Fig. 7. Occlusal view of the treatment outcome after finishing and polishing.


Fig. 8. Follow up after 1 week.


Dentist:

ALEKSANDRA ŁYŻWIŃSKA
Warsaw, Poland


Aleksandra Łyżwińska, DMD, is a passionate aesthetic and adhesive dentist. Driven by Evidence Based Dentistry, her goal includes using modern composite materials and bonding agents in her clinical practise. In addition to her primary job, she worked as a lecturer and an assistant professor at the Department of Conservative Dentistry and Endodontics of Medical University of Warsaw, her alma mater.


Replacement of an amalgam restoration in a maxillary first molar

Replacement of an amalgam restoration in a maxillary first molar

Case by Dr. Michał Pokojski


Universal resin composites with a simplified shade concept are popular as they streamline direct restoration procedures. Unfortunately, many of the available products that claim to blend in well with the surrounding tooth structure independent of its shade need a blocker or opaquer to mask dark areas. According to Kuraray Noritake Dental, CLEARFIL MAJESTY™ ES-2 Universal is different. This is why I decided to test its Universal shade (U) designed for all kinds of restorations in the posterior region in the context of replacing an amalgam restoration.


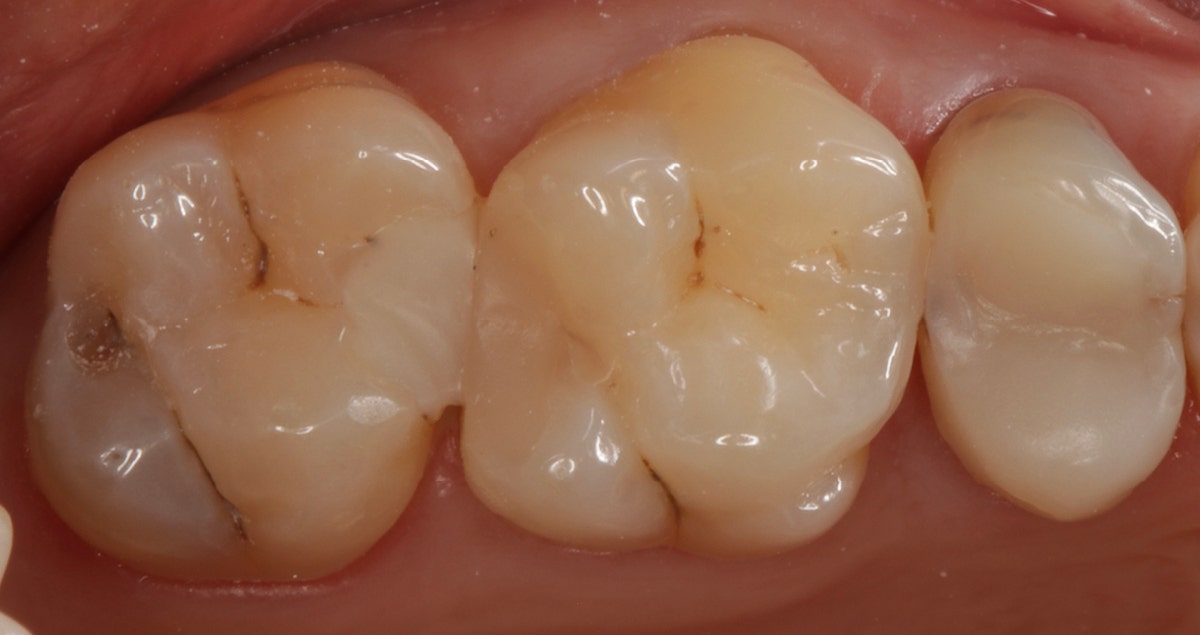
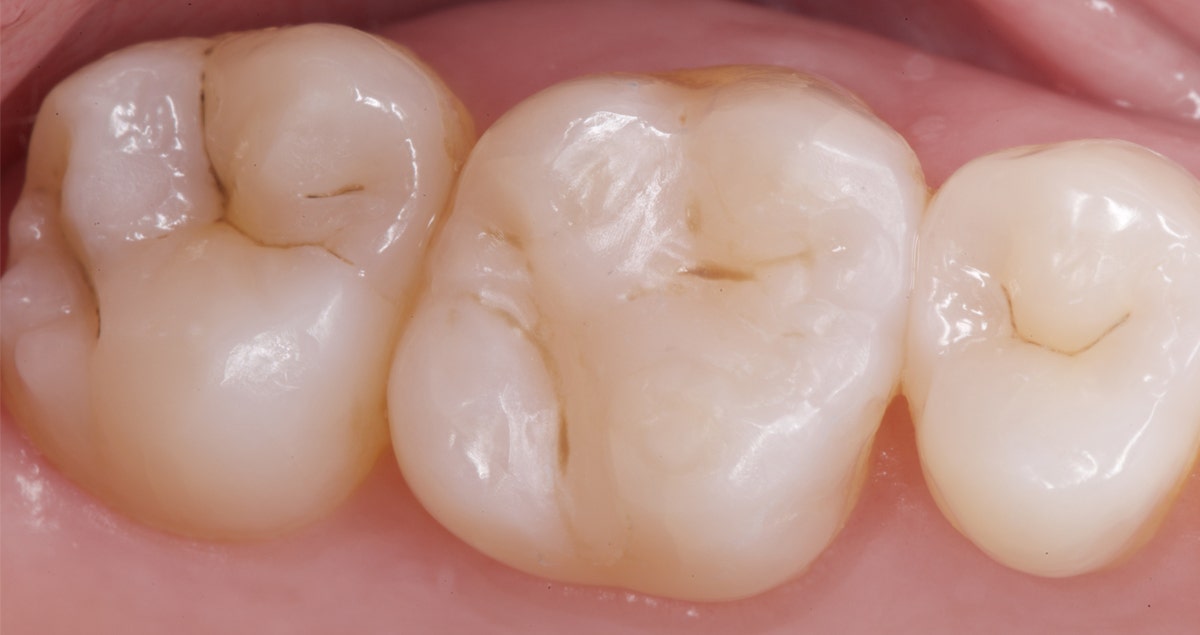
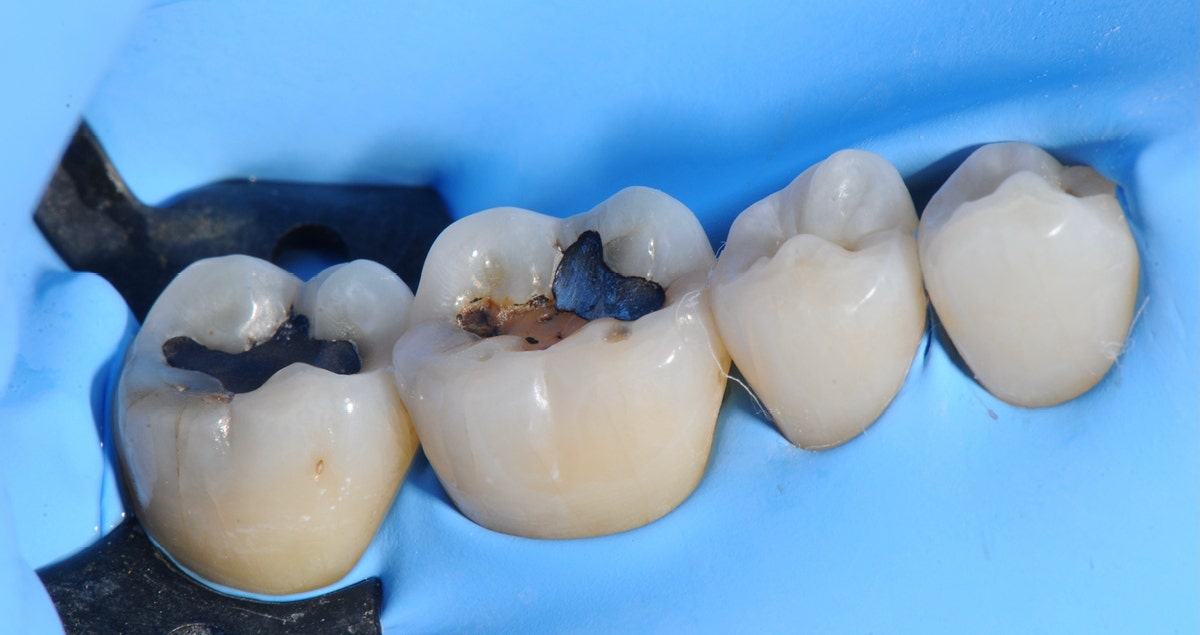
The restoration that needed to be replaced due to secondary caries was located in the maxillary molar region of a male patient. As usual under amalgam restorations, the remaining healthy tooth structure showed some discolouration. The cavity was prepared, the enamel etched and the whole bonding surface treated with CLEARFIL™ SE Bond. Subsequently, the restoration was built up using CLEARFIL MAJESTY™ ES-2 Universal in several layers. For a natural appearance, some brown tint was added to the fissures before finishing and polishing. The restoration shows a natural integration into the surrounding structure and is able to mask the discolouration on the cavity floor.


Fig. 1. Pre-operative image showing the amalgam restorations to be replaced.


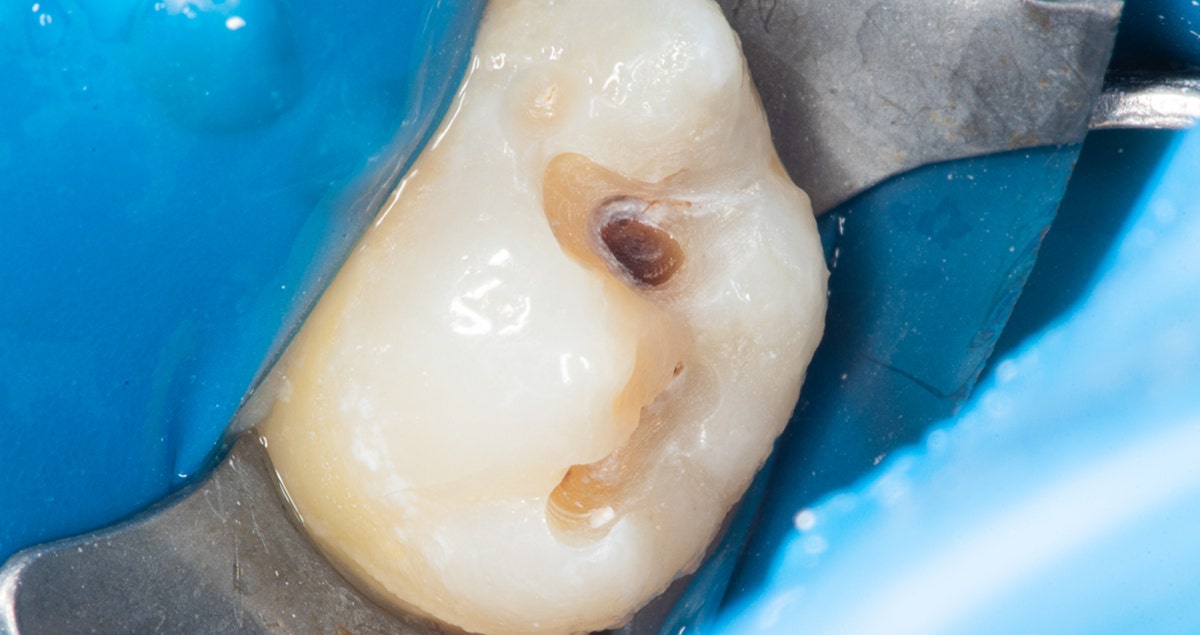
Fig. 2. Appearance of the tooth after removal of the amalgam, caries excavation and cavity preparation.


Fig. 3. Tooth built up with CLEARFIL MAJESTY™ ES-2 Universal (U shade).


FINAL SITUATION


Fig. 4. Immediate treatment outcome.


Dentist:

DR. MICHAŁ POKOJSKI


Dr. Michał Pokojski is a graduate of the Medical University of Łódź, Poland. He maintains his private practice in Starachowice, Świętokrzyskie Voivodeship. His passion is endodontics and esthetic conservative dentistry. In his everyday duties microscope and camera are his main tools to provide his patients with professional and precise procedures and to ensure proper level of communication and understanding. His practice was guided by EBD from the very beginning, because in his opinion knowledge, scientific facts and dedication for what you do are the fundamentals of medicine and dentistry as well. His goal is to treat patients at the highest level of quality using the best available materials, instruments and procedures. His cases are well-known in the world thanks to modern ways of communication like Facebook and Instagram.


Clinical case – Recontouring with CLEARFIL MAJESTY ES-2

Recontouring with CLEARFIL MAJESTY ES-2

Clinical case by Dr Salvatore Scolavino


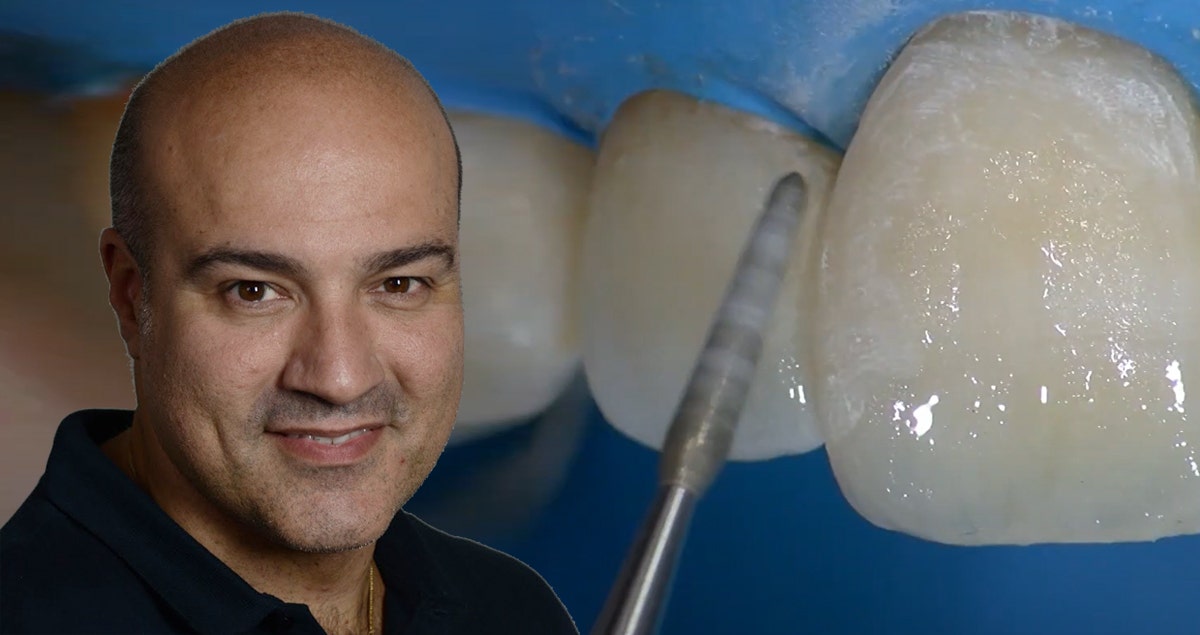
This video illustrates the recontouring treatment with dental light-cured restorative composite CLEARFIL MAJESTY ES-2.


Dentist:

DR SALVATORE SCOLAVINO


  • Specialist in Asthetic Dentistry from Naples, Italy
  • Member of the Styleitaliano group which focuses on minimally invasive dentistry techniques
  • Private practice in Nola (NA)
  • Active member SIDOC (Italian Society of Conservative Dentistry), IAED (Italian Academy of Esthetic Dentistry)
  • Author and co-author of scientific publications on national and international journals
  • Lecturer in national and international congresses and events


Posterior composite restoration

Posterior composite restoration

Case by Dr Adrien Lavenant


Introduction


The patient consulted for a follow-up examination and presented with recurrent caries at the maxillary right first molar. A direct treatment with composite needed to be performed. We decided to use Kuraray Noritake Dental Inc.´s CLEARFIL MAJESTY™ ES-2 Universal composite for several reasons: the efficiency of the treatment, favourable handling properties and ease of use.


The clinical case illustrations below show the step-by-step approach carried out during a 30-minute treatment session.


Fig. 1. Initial situation showing an occlusal caries lesion on the maxillary right first molar.


Fig. 2. Pre-operative X-ray.


Fig. 3. Isolation of the working field with rubber dam.


Fig. 4. Situation after caries excavation and tissue preparation.


Fig. 5. Cavity ready for the application of the universal composite: CLEARFIL™ Universal Bond Quick is visible on dentin and enamel and the cavity floor is covered by a thin layer of CLEARFIL MAJESTY™ ES Flow Low.


Fig. 6. Appearance of the tooth after buildup of the restoration with several layers of CLEARFIL MAJESTY™ ES-2 Universal composite (in the shade U developed for the posterior area).


Fig. 7. Stains applied in the occlusal fissures ensure an even more natural appearance.


Fig. 8. Final result after polishing with CLEARFIL™ Twist DIA and checking of the occlusion.


Fig. 9. Final result immediately after rubber dam removal.


Fig. 10. Post-operative X-ray.


FINAL SITUATION


Fig. 11. Check-up after 15 days with rehydrated dental tissues.


Dentist:

DR ADRIEN LAVENANT


Dr Adrien Lavenant obtained his DDS degree at the University of Aix-Marseille in 2010. He pursued his post-graduate education in the field of periodontology, restorative and aesthetic dentistry (University Aix-Marseille and Paris).


Dr Lavenant is a former member of the teaching staff of the University of Aix-Marseille since 2011 and he continues to teach in the postgraduate program in restorative and aesthetic dentistry.


Since 2010, he owns a private practice in Aix-en-Provence specialised in restorative, prosthetic and aesthetic implant dentistry. He has been part of the international Bio-emulation group since 2019 and shares his philosophy of patient care in accordance with the principles of biomimetic dentistry.


Amalgam replacement using an innovative resin composite

Amalgam replacement using an innovative resin composite

Case by Dr. Max Andrup


This patient presented with a fractured amalgam restoration in the occlusal aspect of the mandibular right first molar. The cavity was shallow resulting in a very favourable C-factor. The C-factor describes the relationship between bonded and unbonded restorative material surfaces and is used as an indicator for polymerization shrinkage stress development in a cavity. Hence, it is essential to manage this factor when working with resin composites.


Fig. 1. Initial situation with the fractured amalgam restoration. In the distal aspect of the restoration, some recurrent decay is also visible.


Fig. 2. First molar ready for a new restoration after removal of the amalgam and bevelling of the enamel.


Fig. 3. Selective etching of the enamel prior to the application of CLEARFIL™ SE Protect into the cavity. Selective etching is performed in order to maximize the bond strength to enamel (by etching) and to dentin (without etching).


FINAL SITUATION


Fig. 4. Final situation after restoration of the cavity with CLEARFIL MAJESTY™ ES-2 Universal in the shade U developed for posterior restorations. The favourable C-factor and the fact that the polymerization shrinkage stress produced by the selected material is very low provide the conditions for a good long-term behaviour of the new restoration.


Dentist:


Dr. Max Andrup graduated from the University of Umeå in 2010 and today runs his private practice in the city of Hudiksvall, Sweden. He has a passion for restorative dentistry with a biomimetic approach.


Treatment of primary caries in a third molar

Treatment of primary caries in a third molar

Case by Dr. Michał Pokojski


When restoring primary carious lesions in the posterior area with composite, I wish to use a material that allows me to produce high-quality outcomes in an efficient procedure. The most important qualities of the restoration are its perfect marginal integrity and reliable long-term behaviour, which set the stage for a long and healthy life of the otherwise healthy tooth.


Reliability paired with ease of use is what I expected from the selected material combination: CLEARFIL™ SE Bond 2, a popular self-etch adhesive containing the original MDP monomer, and CLEARFIL MAJESTY™ ES-2 Universal. According to Kuraray Noritake Dental, the innovative resin composite comes with a universal shade concept and mechanical properties such as shrinkage, wear resistance and colour stability similar to those of proven CLEARFIL MAJESTY™ products. As a single shade is available for the posterior region, the need for shade determination is eliminated, which allows the dental practitioner to focus on the clinical work steps. In this case, a small primary defect in a third molar was restored. The outcome speaks for itself.


Fig. 1. Situation during cavity preparation revealing the carious lesion.


Fig. 2. Prepared cavity after the application of the bonding agent.


FINAL SITUATION


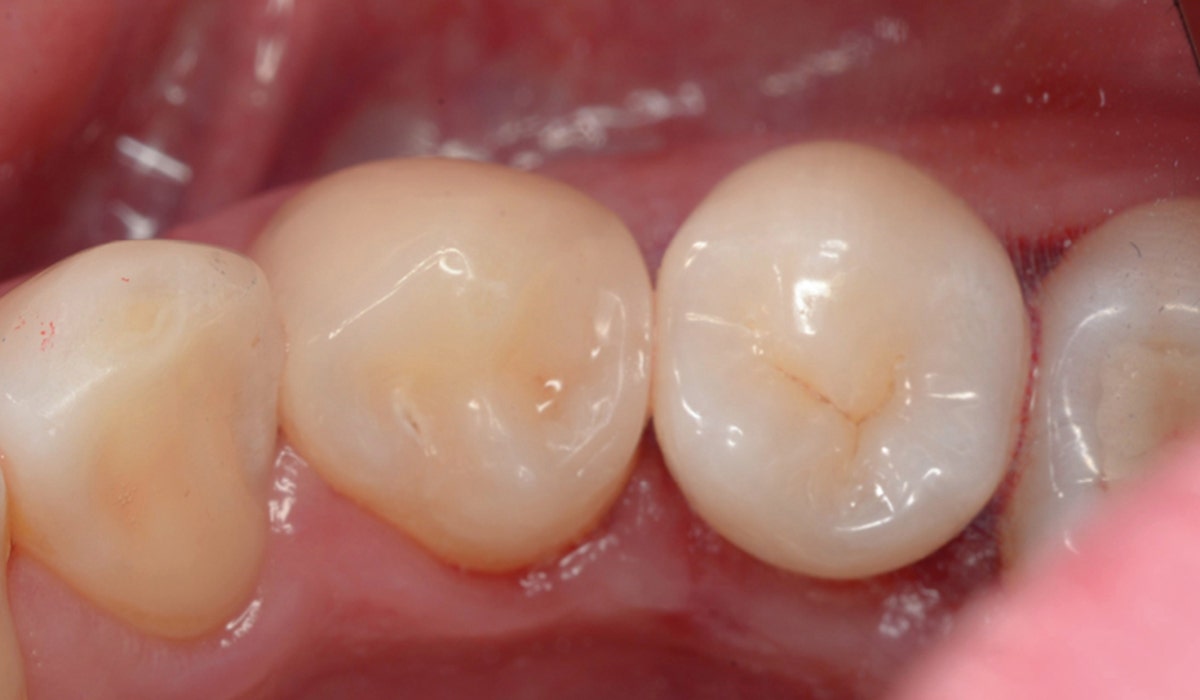
Fig. 3. Treatment outcome with the composite harmoniously integrated into the surrounding structure.


Dentist:

DR. MICHAŁ POKOJSKI


Dr. Michał Pokojski is a graduate of the Medical University of Łódź, Poland. He maintains his private practice in Starachowice, Świętokrzyskie Voivodeship. His passion is endodontics and esthetic conservative dentistry. In his everyday duties microscope and camera are his main tools to provide his patients with professional and precise procedures and to ensure proper level of communication and understanding. His practice was guided by EBD from the very beginning, because in his opinion knowledge, scientific facts and dedication for what you do are the fundamentals of medicine and dentistry as well. His goal is to treat patients at the highest level of quality using the best available materials, instruments and procedures. His cases are well-known in the world thanks to modern ways of communication like Facebook and Instagram.


Deep margin elevation and placement of an onlay using warmed resin composite

Deep margin elevation and placement of an onlay using warmed resin composite

Case by Max Andrup


The maxillary right first premolar of this patient had a huge defect on the lingual aspect extending subgingivally. In order to facilitate proper working field isolation for the placement of an onlay, it was decided to elevate the margin using the deep margin elevation (DME) technique. Moisture control is more easily handled with a matrix and composite compared to trying to keep a deep box dry at the placement of an indirect restoration. The preferred method used to maximize the bond strength to dentin was immediate dentin sealing combined with resin coating, while the luting material of choice was warmed light-curing resin composite (CLEARFIL™ AP-X). It shows a superior performance compared to dual-cure luting materials e.g. in terms of conversion of monomers to polymers, time available for excess removal, bio-mechanical properties and polymerization shrinkage stress.


Fig. 1. Pre-operative situaton with clearly visible deep distal margin. In reality, it was even deeper than the picture reveals. The Brinker Rubber Dam Clamp B4 placed here is a life saver in cases with subgingival margins. The buccal wall was still intact. We planned to reduce it to allow the onlay to cover it completely, allowing it to work under compression and thus increasing the fracture resistance.


Fig. 2. Situation after placement of a sectional matrix on thedistal aspect of the tooth. In order to retract the rubber dam mesially, PTFE tape was placed in this area. This allowed me to seal the dentin in a perfectly dry environment. For immediate dentin sealing, the smear layer developed on the dentin immediately after tooth preparation was compacted with the aid of air abrasion (50 μm alumina particles) to provide for the best possible bonding conditions, followed by the application of the bonding agent (CLEARFIL™ SE Protect). Afterwards, the bonded dentin was covered with a thin layer of flowable resin composite (CLEARFIL MAJESTY™ ES Flow). This resin coating ensures that the hybrid layer is thick enough and that the dentin is perfectly sealed.


Fig. 3. After immediate dentin sealing and resin coating. The hybrid layer was left to mature for approximately five minutes. This measure leads to an increased bond strength to dentin, which prevents issues that might occur due to the polymerization shrinkage stress occurring after composite placement. Subsequently, CLEARFIL™ AP-X was applied in small increments, starting in the distal box. In this way, the biobase was built up to the desired height. The main arguments for using CLEARFIL™ AP-X as a replacement for deep dentin are that the modulus of elasticity is within the same range as that of dentin and it exhibits an extraordinarily low polymerization shrinkage.


Fig. 4. Lateral view of the tooth at the day of delivery. View of the tooth at the day of delivery after rubber dam placement and prior to air-abrasion treatment of the biobase, which was performed to remove any remaining temporary cement. Following try-in, the lithium disilicate onlay was cleaned with KATANA™ Cleaner and pretreated with CLEARFIL™ Ceramic Primer. The biobase was sandblasted again for cleaning.


Fig. 5. Onlay in place after selective etching of the enamel with 35 % phosphoric acid etchant, and application of CLEARFIL™ SE Bond to the biobase and the intaglio of the onlay as well as luting with heated CLEARFIL™ AP-X. Excess composite was removed and the composite light cured.


FINAL SITUATION


Fig. 6. Occlusial view of the luted restoration.


Dentist:


Max Andrup graduated from the University of Umeå in 2010 and today runs his private practice in the city of Hudiksvall, Sweden. He has a passion for restorative dentistry with a biomimetic approach.


Clinical case with CLEARFIL™ MAJESTY ES-2 Universal

Clinical case with CLEARFIL™ MAJESTY ES-2 Universal

Case by Dr Paul Guicherit


A girl presented to the dental office after a bicycle accident. She had a traumatized maxillary left central incisor and an abrasion injury was visible on and above her upper lip.


The tooth was restored immediately using CLEARFIL™ MAJESTY ES-2 Universal in the shade UL (Universal Light).


The outcome was excellent due to a great optical integration and an invisible transition between the tooth and the resin composite.


Clinical photo credits: Dr Paul Guicherit


Fractured cusp treatment and amalgam replacement with a lithium disilicate crownlay

Fractured cusp treatment and amalgam replacement with a lithium disilicate crownlay

Case by Max Andrup


This is the story of cusp fracture due to cuspal tension. This is a common weakness of amalgam-restored teeth associated with expansion of the restorative material. The affected maxillary right first premolar was restored with a crownlay.


For seating of the crownlay, the use of warmed light-curing resin composite (CLEARFIL™ AP-X) has proven its worth. Compared to a dual-cure luting resin, the selected material offers many benefits including the fact that the heat assists in the conversion of monomers to polymers, the time available to remove excess is almost unlimited, and the composite offers better bio-mechanical properties as well as a lower polymerization shrinkage stress.


Fig. 1. Pre-operative situation. The patient requested for an emergency appointment, where we temporarily fixed the lost buccal cusp and made a new appointment for a crownlay preparation. After removing the amalgam and temporary filling, the remaining amount of tooth structure was quite beneficial with a large lingual cusp and a ring of enamel around the whole tooth.


Fig. 2. The decision was made to reduce the lingual cusp and to place a crownlay working in compression. As the thickness of the cusp was adequate for an onlay, this treatment option would have been equally suitable. After tooth preparation, immediate dentin sealing was performed: For this purpose, I air-abraded the dentin to remove the smear layer and give the adhesive the best condition for a strong bond to dentin. Then, CLEARFIL™ SE Protect was applied to the tooth surface and covered with a thin layer of flowable resin composite (CLEARFIL MAJESTY™ Flow) to ensure a total seal.


Fig. 3. The resin composite surface was air-abraded with 50 μm zirconia particles, followed by selective etching of the enamel with a 35-percent phosphoric acid etchant. After try-in of the crownlay made of lithium disilicate, the tooth surface and the restoration were cleaned with KATANA™ Cleaner.


FINAL SITUATION


Fig. 4. The cleaned crownlay was pre-treated with CLEARFIL™ Ceramic Primer, before warmed CLEARFIL™ AP-X was applied to both tooth structure and restoration for luting. The colour of the crownlay matched the colour of the adjacent premolar, while the visible part of the restored tooth’s remaining structure was stained from amalgam corrosion.


Dentist:


Max Andrup graduated from the University of Umeå in 2010 and today runs his private practice in the city of Hudiksvall, Sweden. He has a passion for restorative dentistry with a biomimetic approach.


Clinical case - Crowns on 12/11/21/22

By Dr Alessandro Devigus


This video illustrates the Cementation of Katana STML Crowns with Panavia V5.


Dentist:


DR. ALESSANDRO DEVIGUS


Dr. Alessandro Devigus received his degree from Zurich University, Switzerland, in 1987. Since 1990 his working in his own private practice with a focus on CAD CAM and Digital Dentistry. He is also CEREC Instructor at the Zurich Dental School.


Dr. Alessandro Devigus is an active member of the European Academy of Esthetic Dentistry (EAED), founder of the Swiss Society of Computerized Dentistry, Neue Gruppe member, ITI fellow and speaker.


Dr. Devigus is editor-in-chief of the International Journal of Esthetic Dentistry, author of various publications and an international lecturer.