Single-shade concept: an adequate option in direct posterior restorations

Case by Dr. Salvatore Scolavino


After decades of developing and improving the matrix chemistry and filler technology contained in resinbased composites, the products available for direct restorative procedures finally seemed technically mature. What remained challenging, however, was the management of the extremely wide range of tooth shades and opacities available for each product: The dentin, body and enamel masses had to be selected and combined in the right way to obtain a perfect colour match and optical integration with the surrounding tooth structure. The difficulties associated with shade selection and calibration of layer thicknesses (particularly the top enamel layer) required to obtain the desired optical (desaturation) effects have now also finally been overcome.


The reason is that further improvements of the composites’ optical properties, mainly achieved through a careful selection and combination of fillers, have enabled the production of materials with optimized light diffusion properties. These properties enable the restorations to blend in smoothly with the adjacent tooth structure, thus paving the way for a single-shade concept (SSC). This concept involves the use of a single mass of composite to restore the function and aesthetics compromised by the loss of dental structure.


This translates into a significant saving of chair time and a high predictability of aesthetic outcome. A composite material supporting a single-shade technique needs to have medium opacity and a technology ensuring that the incoming light is absorbed, reflected and scattered in the right way to merge effortlessly with the surrounding natural dentition and create a biomimetic effect. The following clinical case reveals how the Light Diffusion Technology used in the CLEARFIL MAJESTY™ ES-2 Universal composite system (Kuraray Noritake Dental Inc.) leads to a highly predictable aesthetic integration obtained using the SSC.


Case description


The 30-year-old female patient presented for a check-up, during which it appeared that her composite restorations in the second quadrant (the maxillary left first and second molar) needed to be replaced due to marginal leakage (Fig. 1). Once the rubber dam was in place (Fig. 2), the existing composite restorations were removed using a round multi-blade bur, which allowing for a selective removal of composite and carious tissue. The extension of the cavity was performed with a truncated cone diamond bur (fine). Once the cavity preparation was completed (Fig. 3), the enamel and dentin surfaces were cleaned by sandblasting with aluminium oxide (50 μm). Selective etching of the enamel was performed with K-ETCHANT Syringe (Kuraray Noritake Dental; Fig. 4), followed by thorough rinsing and drying of the tooth (Fig. 5). For the adhesive procedure with CLEARFIL™ SE BOND 2 (Kuraray Noritake Dental), the primer was applied first (Fig. 6), rubbed into the tooth surface for 40 seconds and air-dried. The bond was subsequently applied in the same manner (Fig. 7). After several seconds of air flowing to create homogeneous surface the adhesive was light-cured for 40 seconds (Fig. 8). As the last phase of the adhesive procedure, a 1-mm-thick layer of flowable composite (CLEARFIL MAJESTY™ ES-Flow Super Low A3, Kuraray Noritake Dental) was applied to cover the adhesive on the dentin (Figs. 9 and 10).


Fig. 1. Pre-operative clinical image.


Fig. 2. Isolation with rubber dam.


Fig. 3. First and second molar after cavity preparation.


Fig. 4. Selective etching of the enamel.


Fig. 5. Cavities ready for the adhesive procedure.


Fig. 6. Application of the tooth primer.


Fig. 7. Glossy appearance of the cavities after application of the bond.


Fig. 8. Light-curing of the adhesive layer.


Fig. 9. Application of flowable composite.


Fig. 10. Cusp-by-cusp modelling of the universal composite.


In the modelling phase, the posterior shade U of the composite CLEARFIL MAJESTY™ ES-2 Universal was placed using the cusp-by-cusp technique (Figs. 11 and 12). In order to improve the optical integration of the restorations, some brown stain (CHROMA ZONE™ COLOR STAIN Dark Brown, Kuraray Noritake Dental) was added to the fissures (Fig. 13). For finishing, we used a multi-blade ball-shaped bur and an Arkansas Flame abrasive stone (Fig. 14). Polishing of the restorations was accomplished with the TWIST™ DIA system (EVE; Fig. 15). After rubber dam removal, the occlusal check was performed with articulating paper (Fig. 16), minimal adjustments were made and the surfaces repolished. The integration of the restorations after 30 days fully meets the clinical expectations (Figs. 17 to 20).


Fig. 11. Glossy appearance of the cavities after application of the bond.


Fig. 12. Completed occlusal anatomy.


Fig. 13. Stained fissures.


Fig. 14. Matte surfaces after finishing.


Fig. 15. High-gloss surfaces after polishing.


FINAL SITUATION


Fig. 16. Whole quadrant after rubber dam removal and the occlusal check.


Fig. 17. Whole quadrant at the 1-month-recall.


Fig. 18. Occlusal view of the restorations …


Fig. 19. … after one month.


Conclusion


The innovative composite system CLEARFIL MAJESTY™ ES-2 Universal, which consists of two shades for the anterior and a single shade option for the posterior region, offers the properties needed for a successful implementation of the single shade technique. Used in the posterior region, the material is sufficiently opaque to mask optical irregularities of the underlying tooth structure, while it is translucent enough to provide for an imperceptible optical transition from the tooth structure to the restoration. Irrespective of the tooth shade, the restoration merges smoothly with the surrounding natural dentition, creating a harmonic overall picture.


Dentist:

DR. SALVATORE SCOLAVINO


Dr. Salvatore Scolavino, graduated with honors in Dentistry and Dental Prosthesis from the University of Naples. Dr. Salvatore is a specialist in aesthetics and direct and indirect anterior and posterior adhesive restorations. His focus lies with Conservation, Endodontics and Prosthetics in particular. He is an active member of prestigious academies and scientific societies: AIC -Italian Academy of Conservation, IAED -Italian Academy of Esthetic Dentistry and SIDOC (Italian Society of Conservative Dentistry. Since 2004, he has private practice Nola, Italy.


Dr. Scolavino is a founder of werestoreit.it, an inspiring site that offers abundance and variety of aesthetic clinical cases. Author of the book published by Quintessence Publishing „Direct Restorations in the posterior regions“, author of scientific publications in national and international journals, he is speaker at courses and conferences in Italy and abroad.


Clinical case with KATANA™ Zirconia HTML

Case by Daniele Rondoni, MDT


Evolution in the field of aesthetic dentistry never stops: KATANA™ Zirconia proves its aesthetic potential while also being great function-wise. The full zirconia palatal area is combined with an aesthetic buccal part where CZR Luster mass is only used.


Fig. 1. KATANA™ Zirconia HTML with vestibular cut-back opalescence bio-design.


Fig. 2. Palatal ”zirconia-free“ solution.


Fig. 3. Aesthetic vestibular layering with Luster porcelain.


Fig. 4. Manually polished palatal surface with Pearl Surface Z diamond paste.


Fig. 5. Self glazing in furnace for vestibular porcelain.


Fig. 6. Initial case.


Fig. 7. Hybrid solution.


Fig. 8. Palatal Zirconia free.


FINAL SITUATION


Fig. 9. 4 Years follow-up.


Dentist:

DANIELE RONDONI, MDT


Born in Savona in 1961 where he lives and has worked in his own laboratory since 1982 with his collaborators. Graduated from the dental technician school IPSIA “P. Gaslini” in Genoa in 1979. He continued his education by attending relevant workshops for the “Italian dental school“ and broadened his professional experience in Switzerland, Germany and Japan. Since 2011 Kuraray Noritake Dental International Instructor.


Re-establishing a stable occlusion in a tipped second molar

Case by Dr. Salvatore Scolavino


The establishing of a stable occlusal relationship is one of the biggest challenges dental practitioners are facing when restoring posterior teeth with resin composite, but it is a task with a decisive impact on the integrity of the masticatory apparatus. A poor static and dynamic occlusion may have a negative effect on the restored tooth, the periodontal apparatus, and also on the opposing dentition.1 Ideally, the occlusal anatomy of direct restorations is designed in a way that occlusal forces are directed along the long axis of the tooth, which is achieved when each cusp tip in occlusal contact touches a flat surface. Horizontally directed forces, on the other hand, should be avoided, as they tend to cause tipping and increase the risk of cuspal fracture, tooth mobility etc.


In cases concerning improper occlusal relationship involving tipping of restored teeth, it may be possible to stabilize the situation by replacing the restoration and re-establishing a proper occlusion. If carried out correctly and early enough, this restorative approach may be a way around orthodontic treatment. The following clinical case is used to demonstrate how to create a functional occlusal surface right away – without larger adjustments. The whole restorative procedure is simplified by the use of a universal composite with a single posterior shade that eliminates the need for shade determination and shade selection, while it produces lifelike treatment outcomes.


Case description


This patient presented with direct composite restorations in the mandibular left first and second molar that were lacking an elaborated occlusal morphology (Fig. 1). The second molar appeared to be tipped mesially towards the first molar (Figs. 2 and 3), which resulted in improper occlusal relationships and a decreased position of the mesial marginal ridge. In order to verify the clinical and radiographic observation of an improper occlusal relationship, the occlusal contacts were recorded with articulating paper (Fig. 4). As expected, there was an uneven distribution of occlusal contacts, which were exclusively located in the distobuccal area on the second molar, and not matching the tooth-restoration interface on both molars.


Fig. 1. Pre-operative clinical situation: Occlusal view.


Fig. 2. Pre-operative clinical situation: Lateral view revealing the tipping of the second molar.


Fig. 3. Pre-operative bite-wing radiograph confirming the tipping issue.


Fig. 4. Checking of the occlusal contacts.


Planned approach


As orthodontic treatment was not an option, it was decided to replace the composite restorations, thereby treating the Class I cavity of the second molar as if it were a Class II cavity. This would allow us to increase the height of the mesial marginal ridge and establish the proper occlusion.


Preliminary measures


Once the rubber dam was placed (Fig. 5), the existing composite restorations were removed and the cavity slightly extended with a diamond chamfer bur (Fig. 6). The result of this procedure is shown in Figure 7. In order to provide an anatomical build-up of the mesial wall, a sectional matrix was mounted with the aid of a wooden wedge and a separator ring (Fig. 8).


Fig. 5. Isolation with rubber dam, held in place with a clamp and a wedge.


Fig. 6. Tooth preparation with a diamond chamfer bur.


Fig. 7. Appearance of the teeth after preparation.


Fig. 8. Sectional matrix, wedge and separator ring in place.


Adhesive procedure


After selective etching of the enamel (K-ETCHANT GEL, Kuraray Noritake Dental Inc.) (Fig. 9), the enamel bonding surfaces had a chalky-white appearance, which indicates properties that are favourable for bonding (Fig. 10). The adhesive procedure was performed with CLEARFIL™ SE BOND 2 (Kuraray Noritake Dental; Fig. 11). In the first step, the primer of the system was applied and actively rubbed into the surface for 40 seconds, and air-dried. Subsequently, the bond was used in the same manner. After complete evaporation of the solvent, the bonding surface was light-cured for 40 seconds to ensure proper polymerisation. The cavity floor was then covered with a 1 mm thick layer of flowable composite (CLEARFIL MAJESTY™ ES FLOW SUPER LOW A3, Kuraray Noritake Dental).


Fig. 9. Selective etching of the enamel.


Fig. 10. Chalky-white enamel surfaces.


Fig. 11. Glossy appearance of the bonding surfaces after application of the tooth primer and bond.


Restoration procedure


Before starting to elevate the mesial wall of the second molar using the centripetal build-up technique2 (Fig. 12), we analyzed the height of the marginal ridge and anatomical details of the contralateral tooth, while the adjacent molar provided orientation as well. In general, knowledge not only about the tooth’s typical anatomy, but also about the patient-specific anatomical details of the adjacent and contralateral teeth as well as the antagonist is very useful for designing the occlusal anatomy. In addition, remaining anatomical structures should be read and used. In this particular case, the restorations were completed with CLEARFIL MAJESTY™ ES-2 Universal composite (Kuraray Noritake Dental) in the posterior shade U, using the cusp-by-cusp technique (Figs. 13 to 15). In most areas, it was possible to follow the inclination of the remaining cusps and the orientation of the grooves to produce an ideal surface anatomy. For those who would like to speed up the procedure, the simultaneous modeling technique3 may be an option. In this technique, the cusps are built up simultaneously from separate increments, which remain out of contact to each other until light-cured in a single curing cycle.


Fig. 12. Mesial wall built up with composite.


Fig. 13. Application of the first increment for cusp build-up. It is useful to limit the size of the increments for controllability.


Fig. 14. Cusp-by-cusp build-up completed on the second molar.


Fig. 15. Molars with restored occlusal surfaces.


In order to improve the already great optical integration of the restorations, some stain (Dark Brown, CHROMA ZONE™ COLOR STAIN, Kuraray Noritake Dental) was applied to the fissures. A multi-blade ball shaped bur and an Arkansas Flame abrasive stone were used for finishing. Final polishing was accomplished with the TWIST™ DIA system (EVE). The immediate treatment outcome is shown in Figure 16. The patient was released after rubber dam removal, checking the static and dynamic occlusion, and conducting a control radiograph (Fig. 17). The optical integration was even better at the recall after one month due to the rehydration of the surrounding tissues (Fig. 18), while the functional integration was excellent and no occlusal adjustments were required.


Fig. 16. Immediate treatment outcome with a nice optical integration of the restorations providing for a stable occlusal relationship.


Fig. 17. Control radiograph taken after the direct restoration procedure.


FINAL SITUATION


Fig. 18. Treatment outcome at recall after 30 days.


Conclusion


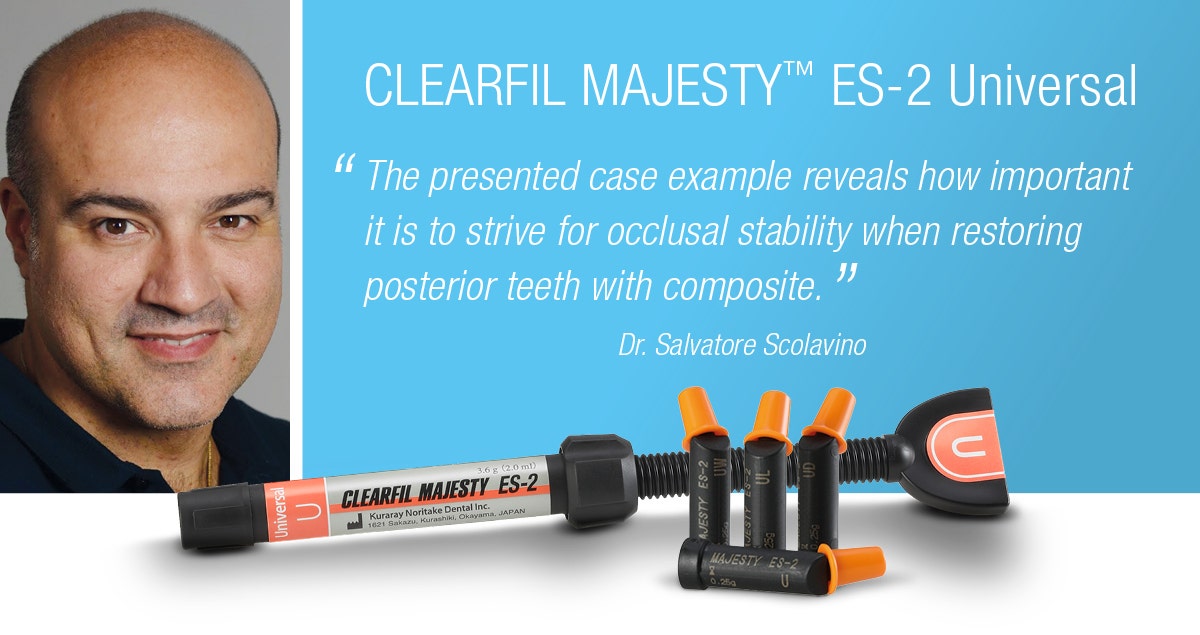
The presented case example reveals how important it is to strive for occlusal stability when restoring posterior teeth with composite. Furthermore, it demonstrates how it is possible to re-establish a stable occlusal relationship, even if some tipping has already occurred. In order to get it right the first time, it is essential to make use of the remaining anatomical structures, which guide the way toward an occlusal surface that ensures a favourable distribution of occlusal forces, and therefore provides optimal conditions for a long life of the freshly restored teeth. The combined use of the presented restorative techniques with innovative materials like CLEARFIL MAJESTY™ ES-2 Universal will make the procedures simpler and even more efficient.


References

1 Sandhu S, Lal J, Singh R, Sandhu R, Sra J. Significance of establishing occlusal anatomy in operative dentistry. Saint Int Dent J 2016;2:7-10.
2 Bichacho N. The centripetal build-up for composite resin posterior restorations. Pract Periodontics Aesthet Dent. 1994 Apr;6(3):17-23.
3 Scolavino S, Paolone G, Orsini G, Devoto W, Putignano A. The Simultaneous Modeling Technique: closing gaps in posteriors. Int J Esthet Dent. 2016 Spring;11(1):58-81.


Dentist:

DR. SALVATORE SCOLAVINO


Dr. Salvatore Scolavino, graduated with honors in Dentistry and Dental Prosthesis from the University of Naples. Dr. Salvatore is a specialist in aesthetics and direct and indirect anterior and posterior adhesive restorations. His focus lies with Conservation, Endodontics and Prosthetics in particular. He is an active member of prestigious academies and scientific societies: AIC -Italian Academy of Conservation, IAED -Italian Academy of Esthetic Dentistry and SIDOC (Italian Society of Conservative Dentistry. Since 2004, he has private practice Nola, Italy.


Dr. Scolavino is a founder of werestoreit.it, an inspiring site that offers abundance and variety of aesthetic clinical cases. Author of the book published by Quintessence Publishing „Direct Restorations in the posterior regions“, author of scientific publications in national and international journals, he is speaker at courses and conferences in Italy and abroad.


Restoring multiple teeth with a single multi-layer zirconia

Case by Marco Valenti, DDS and Angelo Canale, CDT


When dental zirconia evolved into a highly aesthetic material suitable for the production of restorations with a monolithic design or minimal labial cutback, the amount of hand work (ceramic layering) was reduced. At the same time, however, every dental laboratory needed to have more blanks available, and the need for an indication-specific material selection complicated the planning process.


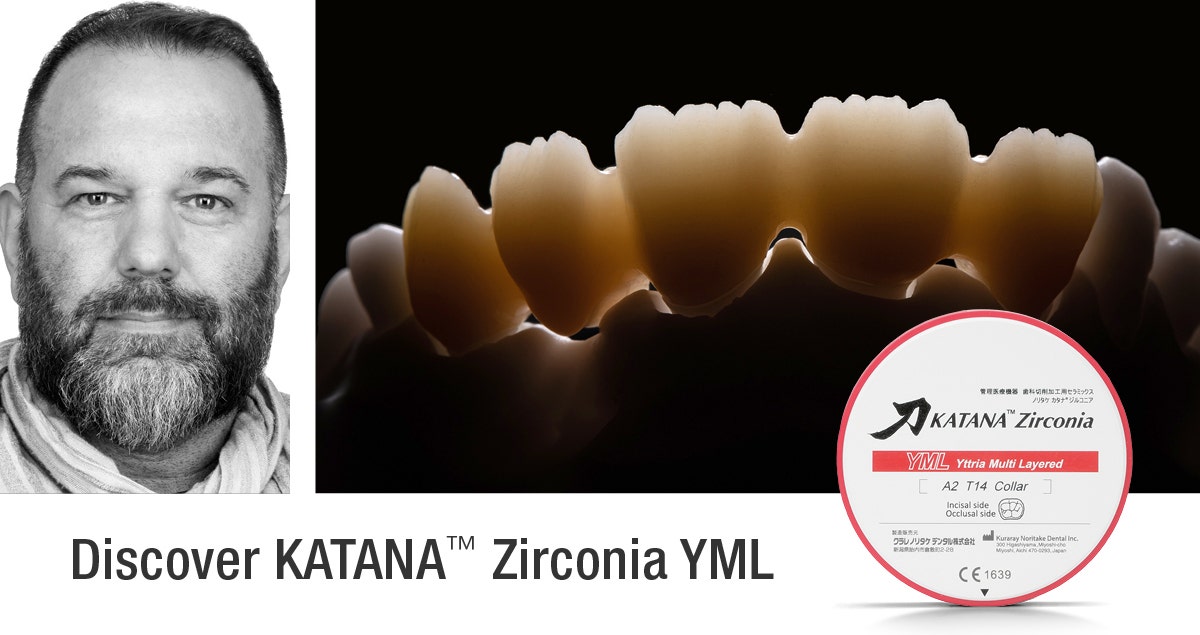
Some dental technicians love to play with different blanks and with a combination of automated and manual work steps to exactly meet the patient and indication-specific needs. Others, however, would like to take a faster and more standardized path to beauty. For the latter group, Kuraray Noritake Inc. has just introduced a true allrounder. KATANA™ Zirconia YML is based on newly developed raw materials with different yttria content integrated into the company’s multi-layer colour structure. As a consequence, KATANA™ Zirconia YML offers colour, translucency and strength gradation throughout the blank, resulting in an unlimited indication range.


That sounds promising, but does it really work in the laboratory and clinical environment? Are there any hidden challenges with regard to designing and manufacturing? And how beautiful are the outcomes? In order to assess the material’s properties in real life and to see how it performs in our hands, we decided to select a complex case and run a clinical test.


INITIAL SITUATION AND TREATMENT PLAN


This female patient was concerned about the aesthetics of her maxillary anterior teeth (Figs. 1 and 2). Several porcelain-fused-to-metal crowns in the anterior (both central incisors) and posterior region (three premolars) had unsightly dark margins and an unnaturally opaque core. The adjacent natural teeth appeared more translucent and their look was compromised by several composite restorations with discoloured margins. A missing right first molar had caused second molar to drift mesially (Fig. 3). In addition, the left canine was missing, but the space had been closed (Fig. 4). Figure 5 provides an occlusal view of the pre-operative situation.


Fig. 1. Facial view of the pre-operative clinical situation.


Fig. 2. Frontal intraoral view of the patient’s teeth.


Fig. 3. Lateral view of the upper and lower right quadrant.


Fig. 4. Lateral view of the upper and lower left quadrant.


Fig. 5. Occlusal view of the maxillary teeth.


All restorations in the maxilla needed to be replaced, and the patient set great value on a long-lasting aesthetic improvement of the situation. Hence, an all-ceramic material needed to be selected. An orthodontic correction of the malocclusion prior to restorative treatment was not an option, so that the restorations needed to be adjusted to the existing clinical situation. In order to provide for a smooth optical integration, we decided to use a single material for all restorations from the incisors up to the second premolars. This was a great chance to put the new KATANA™ Zirconia YML to a test! It was planned to use the material monolithically with zero cutback and to just paint on an ultra-thin layer of liquid ceramics (CERABIEN™ ZR FC Paste Stain).


CLINICAL PROCEDURE


The old restorations were removed and tooth preparation was carried out (Fig. 6). A minimally-invasive structure removal is supported by the fact that KATANA™ Zirconia YML has a minimum wall thickness of just 0.4 mm in the anterior and 0.5 mm in the posterior region. Then, a digital impression was taken with 3Shape TRIOS 3 (Fig. 7). The acquired data was matched with photographs of the patient’s face to design a virtual wax-up (Fig. 8) and mill a temporary restoration in the dental laboratory. The placement of this temporary allowed for an aesthetic and functional assessment as well as a clinical test drive of the planned definitive restorations (Fig. 9). In this set-up, the left first premolar took over the function and shape of the missing canine. The fact that the gingival margin was slightly higher in the region of the right compared to the left central incisor did not bother the patient, so that an alignment (gingivectomy) was not necessary.


Fig. 6. Situation after tooth preparation with a heavily discoloured central incisor.


Fig. 7. Digital impression taken after tooth preparation.


Fig. 8. Smile design for the production of the temporary.


Fig. 9. Temporary restoration in place.


PRODUCTION OF THE FINAL RESTORATIONS


After successful completion of the test drive, a digital impression was taken with the temporary in place (Fig. 10). Based on this impression and the information acquired during the test drive, four full-contour crowns, two partial crowns and one bridge were designed (Fig. 11 to 13). The bridge in the region of the right first premolar to first molar had a small cantilever pontic to fill the reduced space of the missing first molar.


The restorations were milled from KATANA™ Zirconia YML. Despite the varying levels of flexural strength within the blank, virtual positioning of the restorations in the disc is extraordinarily easy. For the restorations produced in this case, it is only necessary to respect the minimum wall thickness and connector cross section recommended by the manufacturer. When long-span restorations (with more than three units) are planned, half of the connector cross sectional area needs to be positioned in the lower half of the blank. This is the case if a restoration is placed in the middle of the disc, independent of its size.


Fig. 10. Digital impression taken with the temporary restoration in place.


Fig. 11. Computer-aided design of the final restorations.


Fig. 12. Aesthetic assessment of the virtual design.


Fig. 13. Functional assessment of the virtual design.


FINISHING


Figures 14 and 15 show the sintered restorations on the resin models after the addition of individual textural features with hand instruments. A seamless multi-layer structure without transition lines and with a warm body area is obtained. For an even more natural appearance, some individual effects and glaze were added using the CERABIEN™ ZR FC Paste Stain kit from Kuraray Noritake Dental Inc. (Fig. 16 to 19).


Fig. 14. Frontal view of the restorations on the resin models.


Fig. 15. Occlusal view of the restorations.


Fig. 16. Frontal view of the final restorations.


Fig. 17. Lateral view showing the bridge and the anterior crowns in the first quadrant.


Fig. 18. Lateral view showing the crowns in the second quadrant.


Fig. 19. Occlusal view of the lifelike restorations.


TREATMENT OUTCOME


The restorations were placed with the adhesive cementation system PANAVIA™ V5 (Kuraray Noritake Dental Inc.). Figure 20 shows the treatment outcome immediately after cementation. The material masks the discolouration of the underlying tooth structure very well and offers a nice translucency in the incisal area.


FINAL SITUATION


Fig. 20. Treatment outcome.


A TRUE ALLROUNDER


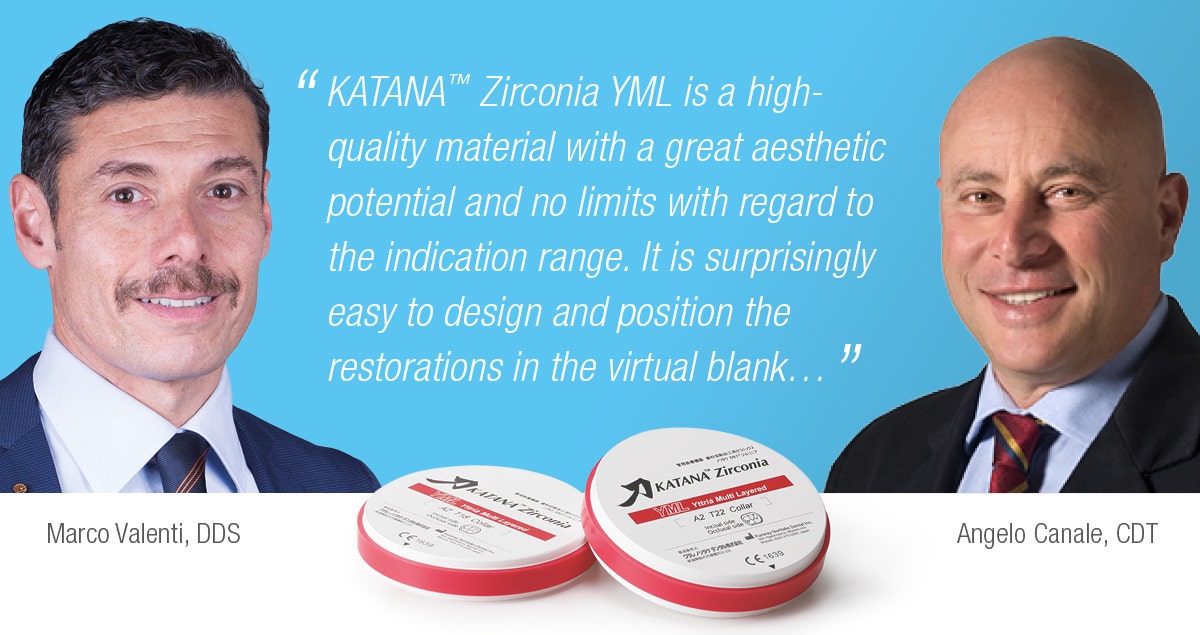
Our test project confirmed that KATANA™ Zirconia YML is a high-quality material with a great aesthetic potential and no limits with regard to the indication range. It is surprisingly easy to design and position the restorations in the virtual blank and after milling, the surfaces are smooth, the margins are sharp and stable, and the fit is accurate. Micro-layering with paste stain is often sufficient for lively outcomes. This makes the new KATANA™ Zirconia YML the material of choice for anyone placing great value on a high level of automation, the standardization of laboratory workflows and efficient and easy procedures.


Dentists:

MARCO VALENTI, DDS ANGELO CANALE, CDT


Cosmetic camouflage for a patient with periodontal disease

Case by Dt Giuliano Moustakis


When producing restorations for the upper anterior region, the first thing that comes to a dental technician’s mind is the selection of a material that matches the colour and translucency of the patient’s natural teeth. The aim behind this action is to provide a perfect optical integration of the restorations to be produced. In order to achieve this optical integration, however, dental technicians need to focus on the surface morphology as well. The following clinical case is used to demonstrate how restorations with the right colour, translucency and texture are able to create a stunning, natural smile, even in complex cases.


The female patient had a periodontally compromised dentition with a missing maxillary lateral incisor and mandibular prognathism. Spacing was present in both jaws, but the patient decided not to undergo orthodontic treatment due to the challenging periodontal situation and the associated risk of losing additional teeth. Instead, a cosmetic camouflage was planned. As the existing direct restorations on the upper central incisors were in need of replacement, the restoration of choice was an all-ceramic, five-unit bridge. Knowing that this situation would best be solved with a material that offers high flexural strength in the body area (strictly mandatory for five-unit bridges) and high translucency in the enamel part (required to imitate nature in the anterior region), the new KATANA™ Zirconia YML was selected. Thanks to its multi-layer structure with colour, translucency and flexural strength gradation (achieved through yttria content gradation), this material offers exactly the desired properties. We decided to use it with a slight vestibular cutback and microlayering with CERABIEN™ ZR (CZR) porcelain.


Fig. 1 Pre-operative clinical situation with a Class III Malocclusion, a missing lateral incisor, spacing and periodontally compromised teeth in both jaws.


Fig. 2 Lateral view of the pre-operative situation.


Fig. 3 Shade determination in the dental office.


Fig. 4 Maxillary central and lateral incisors and right canine after tooth preparation.


Fig. 5 Printed models of both jaws based on an intraoral scan. This view reveals the discrepancy between the upper and lower jaws that needs to be camouflaged.


Fig. 6 Vestibular and incisal reduction and surface texturing on the pre-sintered restorations made of KATANA™ Zirconia YML. Integration of mamelon structures with a round-end straight carbide bur.


Fig. 7 Integration of horizontal growth grooves with a coneshaped instrument (Panther Stone 040).


Fig. 8 Translucency of the reduced bridge after sintering.


Fig. 9 KATANA™ Zirconia YML structure on the model after sintering.


Fig. 10 Silicone index revealing the space generated in the cutback procedure.


Fig. 11 Evaluation of the camouflage effect.


Fig. 12 Try-in of the zirconia structure.


Fig. 13 Sandblasted bridge ready for microlayering.


Fig. 14 Bridge after the application of internal stains and a single layer of CERABIEN™ ZR Body (A3B) and CERABIEN™ ZR Luster Porcelain (LT1, LT Royal Blue, LTx and LT Coral mixed with Incisal Aureola).


Fig. 15 Chromatic map of the microlayering procedure.


Fig. 16 Palatal view of the restoration.


Fig. 17 Bridge after the first bake and the addition of LT1.


Fig. 18 Finished restoration. In order to optimize the look of tooth and gingiva parts, a final layer of CERABIEN™ ZR FC Paste Stain and Glaze was added.


Fig. 19 Palatal view of the restoration after finishing.


Fig. 20 Try-in of the bridge for aesthetic and functional evaluation.


FINAL SITUATION


Fig. 21 Treatment outcome.


CONCLUSION


This clinical case shows that KATANA™ Zirconia is an innovative material with high aesthetic potential. Despite flexural strength gradation, there are no severe design restrictions that limit the indication range. Instead, it is easy to design and produce even long-span bridges. Furthermore, due to the material’s high aesthetic potential, a monolithic design with zero cutback and paste staining with liquid ceramics is often an option. If users want to add a porcelain layer, a simplified and time-efficient microlayering approach is highly recommended. In any case, a natural surface morphology should be integrated, as it is essential for an aesthetic outcome.


Dentist:

DT GIULIANO MOUSTAKIS


Monolithic chairside restorations in the posterior area - effective and efficient

Case by Dr. Hendrik Zellerhoff


Not all zirconia is created equal. This finding presented by Prof. Martin Rosentritt7 back in 2014 has lost none of its actuality and even appears to be increasingly relevant these days. This is because dental practitioners are spoilt for choice between various zirconia blanks, which differ widely in terms of quality, flexural strength, shade appearance, translucency and production complexity. Hence, each material has its own specific processing requirements and range of indications6. Profound knowledge of the available zirconia options is therefore an absolute prerequisite for long-term success of every full contour restoration produced in a time-efficient and economic procedure.


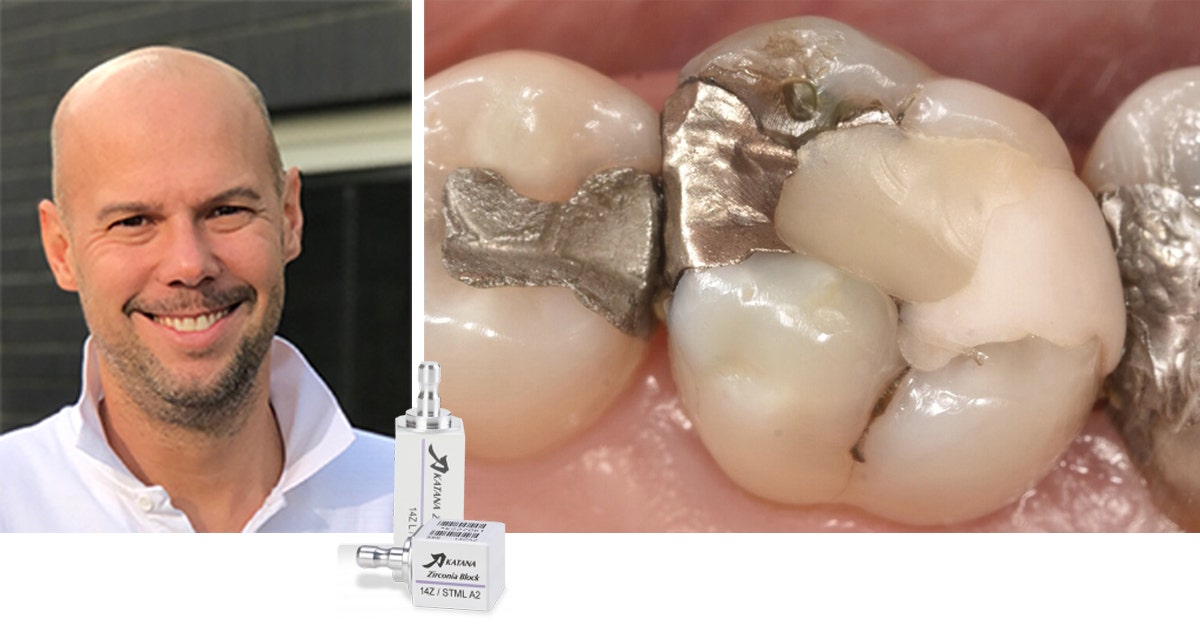
While in the early years of zirconia manufacturing in dentistry, the dental practitioner’s choice was limited to industrially milled zirconia frameworks hand-veneered by the dental technician, a wide range of material variants for chairside CAD/CAM production is nowadays available. Material-specific improvements are one of the reasons for the fact that every single zirconia has its specific indications and its own material parameters6. Zirconia milling blocks for monolithic restorations are in principle very well suited for the chairside production of single crowns for the anterior and specifically the load bearing posterior area. This is due to their stability and the reduced processing effort compared to hand- veneered crowns. However, the material in use needs to fulfil high demands with regard to strength, translucency, and shading – parameters that also need to be balanced against each other2 (Fig. 1 to 4).


Fig. 1. Initial situation with multiple insufficient fillings.


Fig. 2. Crown milled from a KATANA™ Zirconia Block (Kuraray Noritake Dental Inc., Tokyo, Japan).


Fig. 3. Crown glazed after sintering, with fissures characterized using stains.


Fig. 4. Adhesively cemented crown with the appearance of a natural molar.


NOT ALL ZIRCONIA IS CREATED EQUAL


Due to their high flexural strength of more than 1,000 MPa, tetragonal zirconia variants (3Y-TZP) of the first and second generation are perfectly suited as framework materials. However, they lack the translucency required for monolithic use. It is theoretically possible to improve the translucency of 3Y-TZP materials by increasing the sintering temperature, however, this would result in restorations with insufficient strength. This is different for the third and fourth generations of cubic-tetragonal zirconia (5- TZP and 4-TZP). Due to the increased yttria content in the formulation, cubic crystals grow in the crystal microstructure. These cubic crystals have a larger volume, which leads to reduced scattering at the grain boundaries and improved light transmission. In addition, cubic crystal structures are more isotropic than tetragonal structures, so that incoming light is spread more evenly into all directions8. The combination of a high flexural strength and a high translucency in the fourth generation zirconia sets the stage for monolithic use of the material. This, in turn, eliminates the risk of chipping of the veneering porcelain.


PREMISES OF MONOLITHIC CHAIRSIDE RESTORATIONS


In order to ensure the desired long-term stability, intraoral functionality and aesthetics of a monolithic restoration on one hand and a time- and cost-efficient chairside workflow on the other, two factors are crucial. One is a proper functional occlusal adjustment of the restorations, the other is knowledge about the material parameters of the zirconia blocks in use.


Hardness and abrasion

Clinically, monolithic zirconia shows virtually no abrasion and an antagonist-friendly behaviour - provided that the occlusal surface is polished properly, is free of sharp edges and is covered with glaze. In order to leverage this effect and to avoid improper occlusal contacts as factors triggering parafunctions, the dental practitioner should carefully carry out an occlusal and functional analysis. This analysis should include an examination of the vertical dimension and of different jaw movement like protrusion, retrusion, laterotrusion and mediotrusion. Based on the results, a precise dynamic occlusal adjustment is possible. Any retrospective adjustment – even in case of minimal irregularities – is impossible or, more specifically, restricted to the glazing layer. If the surfaces, especially the cusps, are not polished to a high gloss, any wear of the glaze would lead to the exposure of a rough abrasive zirconia surface. Material-specific high-gloss polishing and glazing, however, effectively avoids abrasive wear of the antagonist3,4,5.


Strength, translucency and shade

Under these premises, 5Y-TZP materials like KATANA™ Zirconia UTML (Ultra Translucent Multi Layered) with a flexural strength of 557 MP and a translucency of 43 percent are particularly well suited for the production of highly aesthetic anterior crown or veneer restorations. In the load-bearing posterior area, however, higher flexural strength values are necessary. Using 4Y-TZP materials like KATANA™ Zirconia Block (Super Translucent Multi Layered) with a flexural strength of 763 MPa provides more stability of the restoration, which is required for the posterior region. The product offers a translucency of 38 percent and is suitable for the chairside production of aesthetically and functionally demanding restorations with high stability even in case of a reduced wall thickness. Thanks to the colour gradient, light shines through in the incisal area in an enamel-like way, while in the cervical area, the level of translucency is similar to dentin. The imitation of a colour gradient found in natural teeth, which ensures that the restoration will blend in perfectly with the adjacent teeth, is obtained with a multi-layered, polychromatic structure with a smooth shade transition from the incisal to the cervical part. This feature eliminates the need for a time-consuming manual application of shades prior to sintering. A patient- specific post-sintering characterisation with stains is optional. As shade, form and effects are already visible during application, the dental practitioner gains full control over aesthetics at all times (Fig. 5 to 8).


Fig. 5. Comparison of flexural strength and translucency.


Fig. 6. Smooth shade transition from the enamel to the dentin and cervical area.


Fig. 7. Comparison of the translucency exhibited by different ceramics.


Fig. 8. Range of shades of KATANA™ Zirconia Single Unit Blocks.


KATANA™ ZIRCONIA BLOCK IN THE CEREC WORKFLOW


Reliable material properties are imperative for a smooth production workflow leading to a consistent high quality of the restorations. They are only obtained with industrially produced zirconia blanks, which offer a defect-free, homogeneous grain structure1,10. At Kuraray Noritake Dental, the whole manufacturing process of zirconia products is carried out in-house, including the production of the raw materials. Therefore, it is possible to optimize the material parameters of KATANA™ Zirconia Blocks for chairside production and with high-speed sintering process. Using these components, the dental practitioner can reduce the time needed for the production of a monolithic zirconia restoration including scanning, milling and sintering to less than an hour.


Design

For this purpose, the teeth to be restored are prepared and captured together with the adjacent and antagonist teeth using an intraoral scanner (Omnicam or Primescan, Dentsply Sirona). The digital data set is then imported into the CEREC software. The software extracts the required information from the data and generates a design proposal for the restoration. Usually, this proposal may be accepted without major modifications. Due to the high mechanical properties of KATANA™ Zirconia, a wall thickness of 1.0 mm is sufficient for a posterior crown. This design has two positive effects: it optimizes the translucency of the restoration and supports a minimal preparation, which also facilitates clinical procedures in situations with limited space conditions. The shade and translucency of the restoration is also customizable via virtual positioning of the designed crown in the multi-layer block. This enables the dental practitioner to harmonize the brightness and translucency with the parameters of the adjacent teeth (Fig. 9 to 13).


Fig. 9. Initial situation with insufficient porcelain layer.


Fig. 10. Abutment teeth after preparation prior to digital impression taking.


Fig. 11. Restorations after polishing, occlusal and cervical characterization and glaze firing.


Fig. 12 - 13. Final restorations in place - occlusal and frontal view.


Sintering

The designed crown is milled from the KATANA™ Zirconia Block with the CEREC milling machine. Subsequently, finishing steps are carried out and the sintering process is started using the induction furnace CEREC SpeedFire. This furnace reaches a maximum heating rate of 300° C per minute. Neither pre-heating is required nor holding temperatures needed. As the material properties of KATANA™ Zirconia Block are optimally aligned with the CEREC SpeedFire programme, the user can be sure that the device adheres to all sintering parameters. This, in turn, is important for the growth of the crystals as well as phase transformation and stabilization9, which affect the natural shade results after sintering (Fig. 14 to 18).


Fig. 14 - 15. Labial and palatal view of the initial situation with restorations on the lateral incisor and canine.


Fig. 16. Varying shade and translucency gradient depending on the position of the restoration in the multi-layer block.


Fig. 17. Crowns with a natural colour gradient from the incisal to the cervical area merely glazed after sintering (without any additional adjustment).


Fig. 18. Natural aesthetic appearance of the KATANA™ Zirconia crowns even in the esthetic zone.


Individualisation and characterization

After sintering, dental practitioners may individualize or characterize KATANA™ Zirconia Block restorations if desired. This requires only a few simple work steps. The marginal ridges, mamelons, fissures or enamel cracks are imitated controllably using paste stains (CERABIEN™ ZR FC Paste Stain, Kuraray Noritake Dental), as the shade, shape and effects created are already visible during application. For the final glaze firing process with Glaze or Clear Glaze (Kuraray Noritake Dental), the SpeedFire induction furnace is used again (Fig. 19 to 25).


Fig. 19. Initial situation with secondary caries below the amalgam restoration on the maxillary left second premolar (tooth #25).


Fig. 20. Tooth prepared for a core build-up after caries excavation and proximal modification of the adjacent premolar (tooth #24).


Fig. 21. Crown milled from the block before …


Fig. 22. … and after sintering (at try-in).


Fig. 23. Fissures with age-specific characterization.


Fig. 24. Functional contact point created in consideration of the adjacent teeth.


Fig. 25. Final crown after glazing and adhesive cementation with PANAVIA™ V5 (Kuraray Noritake Dental).


Conditioning and placement of the restoration

Prior to restoration placement, the inner surface of the crown is sandblasted with Al2O3 (grain size: 50 μm, pressure: 1 bar) and treated with CLEARFIL™ Ceramic Primer Plus (Kuraray Noritake Dental), whereas PANAVIA™ V5 Tooth Primer (Kuraray Noritake Dental) is applied to the prepared tooth structure. Finally, PANAVIA™ V5 (Kuraray Noritake Dental) is applied for adhesive luting of the crown. The MDP monomer contained in the primer establishes a stable chemical bond and eliminates the need for additional conditioning. The fact that PANAVIA™ V5 is free of amines ensures long-term colour stability of the restoration.


CONCLUSION


With its combination of a high translucency and a high flexural strength, chairside dentists may use KATANA™ Zirconia Block for monolithic restorations with confidence. Restorations made of KATANA™ Zirconia offer the required long-term stability and fulfil the high aesthetic standards demanded from it to be able to serve as an alternative not only to cast metal and PFM crowns, but also to glass ceramic restorations. Due to the lack of a porcelain layer, the risk of chipping does not exist. Optimally aligned components enable dental practitioners to make use of a simplified and constantly monitored digital workflow that offers a high process reliability. Aesthetic functional restorations for the load-bearing posterior and the anterior area can be produced and placed within a single appointment. This is an important factor, which greatly affects patient satisfaction.


Dentist:


DR. HENDRIK ZELLERHOFF


References

1. Edelhoff D, Beuer F, Schweiger J, Brix O, Stimmelmayr M, Güth JF. CAD/CAM-generated high-density polymer restorations for the pretreatment of complex cases: a case report. Quintessence Int 2012;43:457–467.
2. Güth JF, Magne P. Optische Integration von CAD/CAM-Materialien. Int J Esthet Dent 2016;11:380–395.
3. Preis V, Behr M, Handel G, Schneider-Feyrer S, Hahnel S, Rosentritt M. Wear performance of dental ceramics after grinding and polishing treatments. J Mech Behav Biomed Mater 10 (2012); 13-22.
4. Preis V, Weiser F, Handel G, Rosentritt M. Wear performance of monolithic dental ceramics with different surface treatments. Quintessence Int 44 (2013);393-405.
5. Rosentritt M, Behr M, Strasser T, Preis V. Zirkonoxide als Implantatwerkstoff? Quintessenz 2018; 69 (12): 1420–1430.
6. Rosentritt M, Kieschnick A, Hahnel S, Stawarczyk B. Werkstoffkunde-Kompendium. Zirkonoxid. Berlin: Apple ibook; 2018.
7. Rosentritt M. Studie zum Verschleißverhalten von Zirkonoxid – Zirkonoxid ist nicht gleich Zirkonoxid. ZWR 2014;123(11):570-571.
8. Stawarczyk B, Keul C, Eichberger M, Figge D, Edelhoff D, Lümkemann N. Werkstoffkunde-Update: Zirkonoxid und seine Generationen – von verblendet bis monolithisch. Quintessenz Zahntech 2016;42(6):740–765.
9. Stawarczyk B, Özcan M, Hallmann L et al. The effect of zirconia sintering temperature on flexural strength, grain size, and contrast ratio. Clin Oral Investig 2013; 269–274.
10. Stober T, Bermejo JL, Rammelsberg P, Schmitter M. Enamel wear caused by monolithic zirconia crowns after 6 months of clinical use. J Oral Rehabil 2014;41:314–322.


Streamlined posterior restoration procedure using universal composite

Case by Daniel Vasquez, DDS


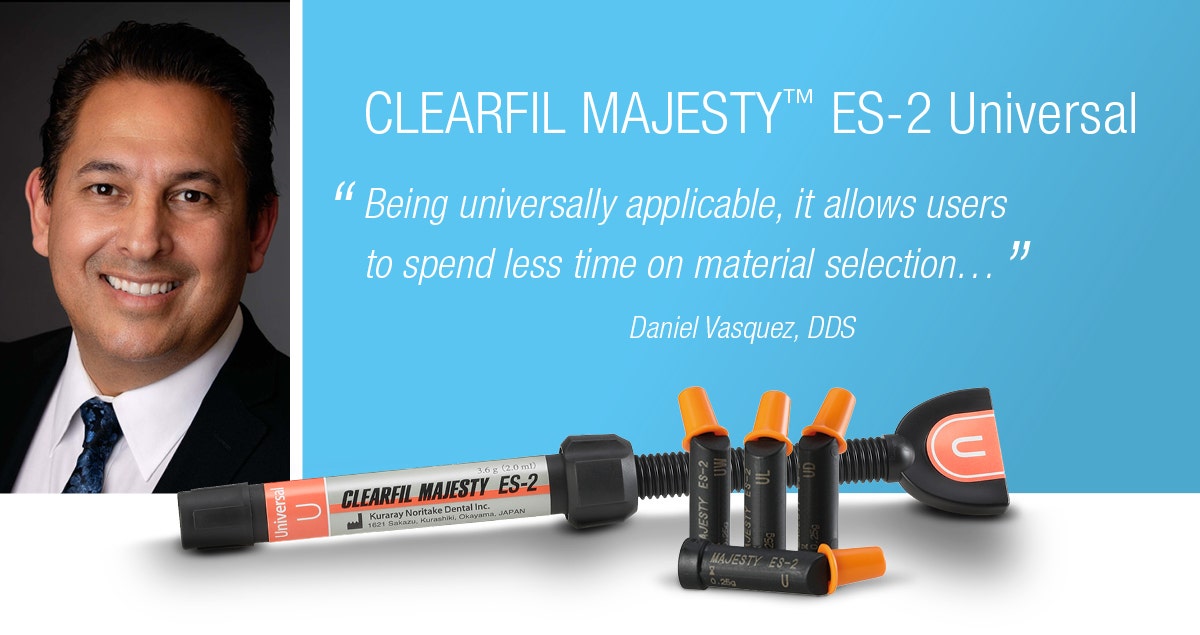
The dental practitioner’s time is the most valuable factor in the dental practice. Hence, it should be well spent, and saved wherever possible. In the context of placing direct posterior restorations, the universal composite CLEARFIL MAJESTY™ ES-2 Universal provides valuable support to anyone who would like to achieve this goal - being universally applicable, it allows users to spend less time on material selection. With its universal shade concept consisting of a single posterior shade and two anterior shade options, it eliminates the need for shade determination. This gives users more time to focus on fulfilling their patient’s needs. The following clinical case illustrates the use of the innovative material in the posterior region.


Fig. 1. Pre-operative situation with multiple carious lesions in the second premolar and both molars.


Fig. 2. Isolated working field.


Fig. 3. View of the quadrant after cavity preparation.


Fig. 4. Selective etching of the enamel with phosphoric acid gel.


Fig. 5. Dispensing of the universal adhesive CLEARFIL™ Universal Bond Quick into a mixing dish.


Fig. 6. Application of the universal adhesive to the enamel and dentin after etching, rinsing and air-drying.


Fig. 7. Lining up of the cavity floors with of a thin layer of flowable composite (CLEARFIL MAJESTY™ Flow).


Fig. 8. Immediate treatment outcome after the placement of several layers of CLEARFIL MAJESTY™ ES-2 Universal in the shade Universal.


FINAL SITUATION


Fig. 9. Post-operative image taken after rubber dam removal.


Dentist:

DANIEL VASQUEZ, DDS


Highly aesthetic class IV composite restoration

Case by Dr. Matthieu Gilli


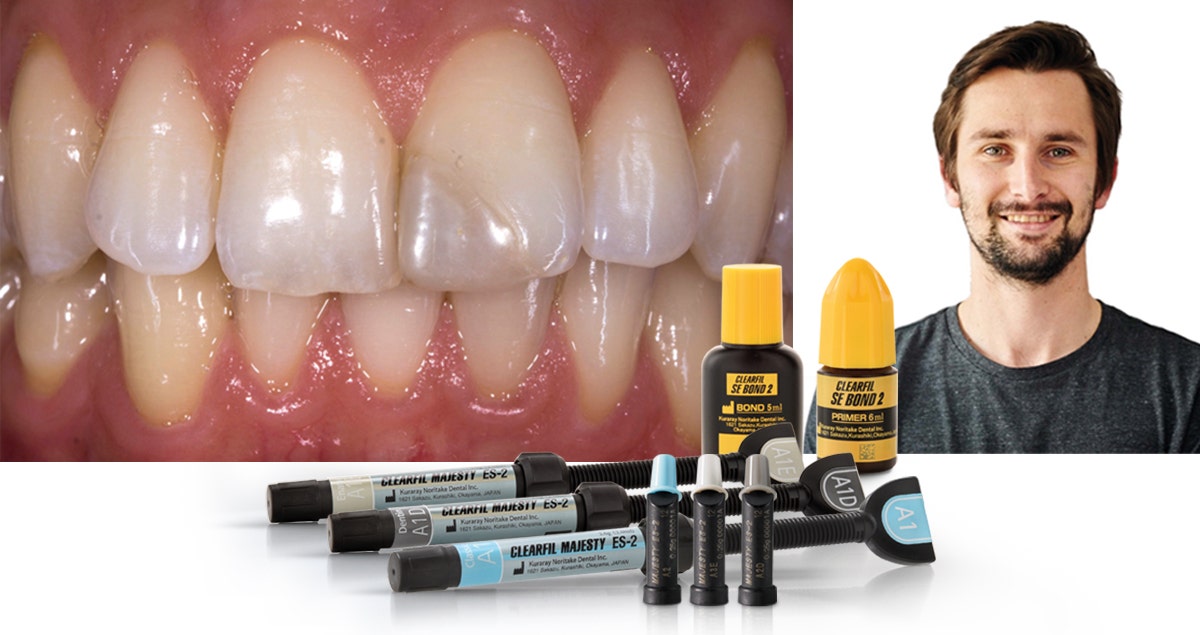
Fig. 1. A 25 years old female patient was dissatisfied with the aesthetics of the existing composite filling in tooth 21.


Fig. 2. Shade determination of the cervical and middle third of the tooth. By using small amounts of different shades of CLEARFIL MAJESTY™ ES-2 Premium Dentin.


Fig. 3. Contrast increase allows for:

- a better picture of dentinal structure
- dentin shade selection with more accuracy


Fig. 4. Two spheres of two different Premium Enamel shades are put at the incisal edge and the photo turned to black and white to optimise the evaluation of the translucency.


Fig. 5. To allow for the creation of a suitable palatal index, a large isolation field is necessary.


Fig. 6. Since the shape of the existing restoration is still correct the putty index can be made directly in the mouth.


Fig. 7. To improve both adhesion and optical integration, a bevel of 2 mm, 45° has been made as recommended by XU et al. (Eur J Oral Sci 2012).


Fig. 8. Selective enamel etching with 30% phosphoric acid for 30 sec. followed by rinsing and drying.


Fig. 9.

Left: Self-etch primer on dentin followed by bonding with CLEARFIL™ SE Bond.
Middle: 20 sec., 1000 mW/cm2 polymerisation of the bonding.
Right: Completed adhesive procedure with CLEARFIL™ SE Bond.


Fig. 10. Palatal shell made of A1E shade with the aid of the palatal putty index.


Fig. 11. Proximal matrix in place.


Fig. 12. Dentin replaced with CLEARFIL MAJESTY™ ES-2 PREMIUM A2D.


Fig. 13. To create the incisal halo, a small amount of A1D has been applied at the incisal edge.


Fig. 14. A tiny amount of CLEARFIL MAJESTY™ ES-2 Premium Translucent Blue is placed between the mamelons to create translucency.


Fig. 15. A white spot is created with a white opaque staining material to complete internal characterisation.


Fig. 16. A small amount of CLEARFIL MAJESTY™ ES-2 PREMIUM A1E is applied as a final covering layer.


Fig. 17. Secondary anatomy is marked with a pencil as a polishing area guide.


Fig. 18. 2 week follow-up.


FINAL SITUATION


Dentist:

DR. MATTHIEU GILLI


Dr. Matthieu Gilli graduated in 2014 as a dentist from the Université Catholique de Louvain, Brussels. Currently he is completing his PhD study in Service of conservative dentistry, at the same university.


A new formula for aesthetic monolithic long-span restorations

Case by MDT Daniele Rondoni


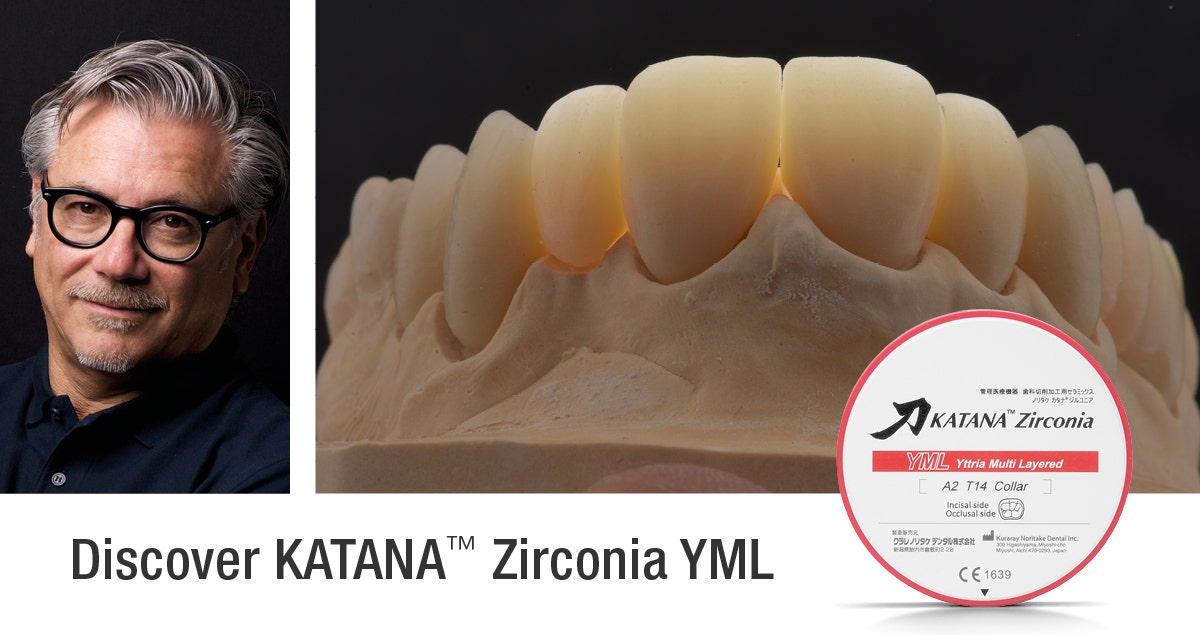
Usually, the aesthetic potential of a dental ceramic material – specifically its translucency – may be increased only at the expense of a decreased flexural strength. The new KATANA™ Zirconia YML from Kuraray Noritake Dental Inc. is different. With its high flexural strength of 1,100 MPa in the lower half of the blank and high translucency in the upper body and incisal areas, it has a high aesthetic potential and an unlimited indication range, as shown using the following case example.


Fig. 1. KATANA™ Zirconia YML 4-unit and 6-unit bridges after milling and sintering. A natural vestibular surface texture plays a decisive role in the creation of aesthetic monolithic restorations.


Fig. 2. The two bridges on the model after ultra-micro layering with CERABIEN™ ZR FC Paste Stain Kuraray Noritake Dental Inc.).


Fig. 3. Stained and glazed restorations and their translucency in transmitted light.


FINAL SITUATION


Fig. 4. Buccal view of the 6-unit bridge cemented in the patient’s mouth.


Fig. 5. Buccal view of the 4-unit bridge cemented in the patient’s mouth.


With this new type of multi-layered zirconia, it is possible to produce aesthetic monolithic restorations suitable even for use in the anterior area. A high design flexibility is offered despite strength gradation, and the high translucency in the incisal area is responsible for a natural look after sintering. Ultra-micro layering and glazing on the monolithic surface will be sufficient to produce outcomes to our patients’ satisfaction.


Dentist:

DANIELE RONDONI, MDT


Born in Savona in 1961 where he lives and has worked in his own laboratory since 1982 with his collaborators. Graduated from the dental technician school IPSIA “P. Gaslini” in Genoa in 1979. He continued his education by attending relevant workshops for the “Italian dental school“ and broadened his professional experience in Switzerland, Germany and Japan. Since 2011 Kuraray Noritake Dental International Instructor.


Replacement of an unsound occlusal restoration in the molar region

Case by Dr. Aleksandra Łyżwińska, DMD


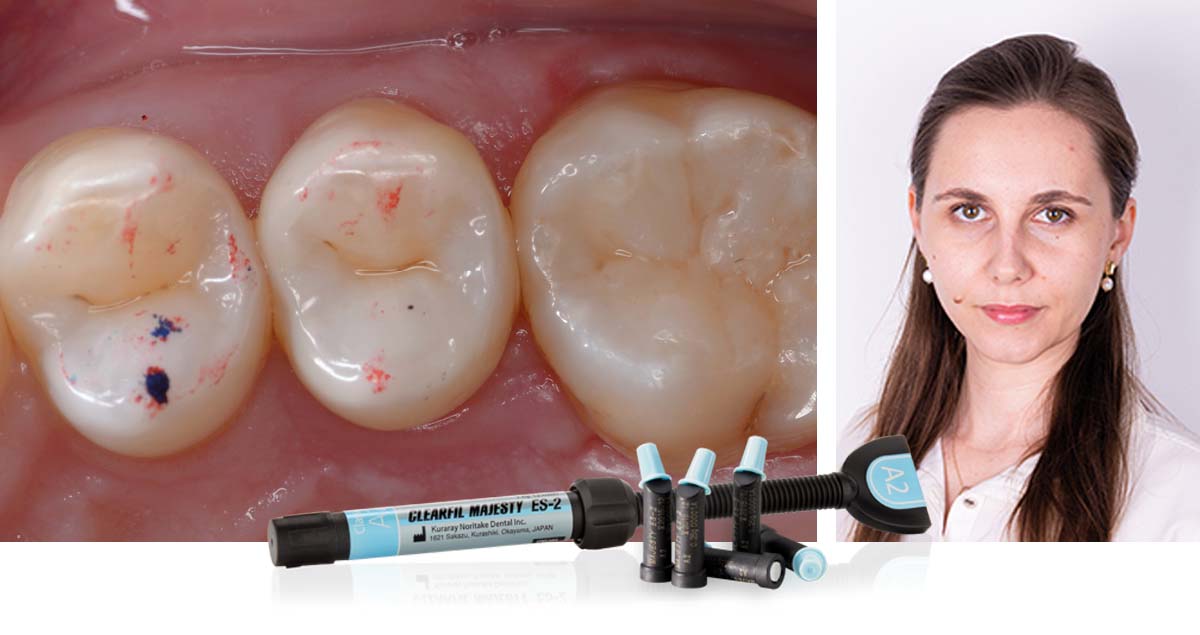
The maxillary left first molar had a Class I cavity on the occlusal surface restored with resin composite many years ago. The restoration needed to be replaced due to severe signs of wear and discolouration, as well as, the occurrence of secondary caries. After removal of the existing restoration and caries excavation, CLEARFIL™ SE BOND 2 was applied to the cavity to establish a stong and long-lasting chemical adhesion to the available enamel and dentin. Containing the original MDP monomer, the bonding agent is able to fulfill this task reliably. Subequently, the bottom of the cavity was filled with CLEARFIL MAJESTY™ ES Flow - Super Low A2, which shows an excellent marginal adaptation and provides for an even surface. The occlusal surface was built up with CLEARFIL MAJESTY™ ES-2 Classic A2 that blends in very well with the adjacent tooth structure, and characterized with some tints for an even more natural appearance.


Fig. 1. Initial intraoral photograph showing the defective restoration on the maxillary first molar after isolation with rubber dam.


Fig. 2. Occluso-lingual view of the initial situation revealing the wear effect.


Fig. 3. Tooth cavity with a matte surface after cavity preparation.


Fig. 4. Glossy cavity surface after application of CLEARFIL™ SE BOND 2.


Fig. 5. Appearance of the molar immediately after placement of a bottom layer of CLEARFIL MAJESTY™ ES Flow - Super Low A2 and modelling of the occlusal surface anatomy with CLEARFIL MAJESTY™ ES-2 Classic A2.


Fig. 6. Linguo-occlusal view of the situation.


Fig. 7. Appearance of the molar …


Fig. 8. … after the application of some tints.


Fig. 9. Result of the finishing …


Fig. 10. … and polishing procedure.


FINAL SITUATION


Fig. 11. Aesthetic treatment outcome after rubber dam removal …


Fig. 12. … and checking of the occlusal contact points.


Dentist:

DR. ALEKSANDRA ŁYŻWIŃSKA
Warsaw, Poland


Dr. Aleksandra Łyżwińska, DMD, is a passionate aesthetic and adhesive dentist. Driven by Evidence Based Dentistry, her goal includes using modern composite materials and bonding agents in her clinical practise. In addition to her primary job, she worked as a lecturer and an assistant professor at the Department of Conservative Dentistry and Endodontics of Medical University of Warsaw, her alma mater.