The go-to solution for small to moderate-sized direct posterior restorations

Case by Dr. Michael Morgan, DDS


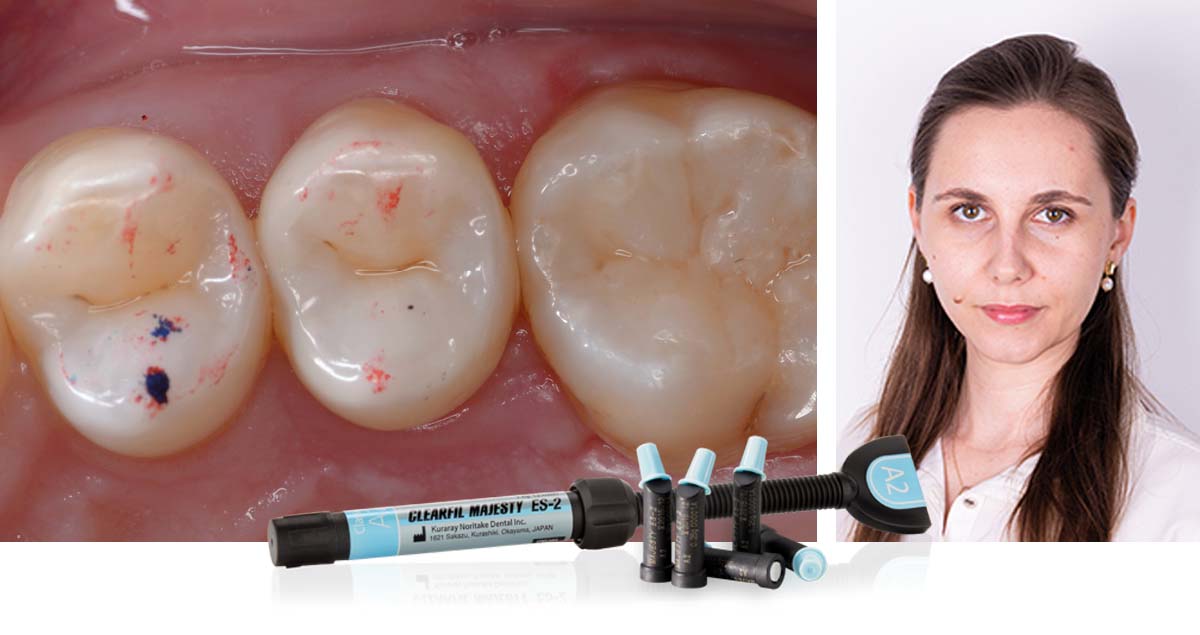
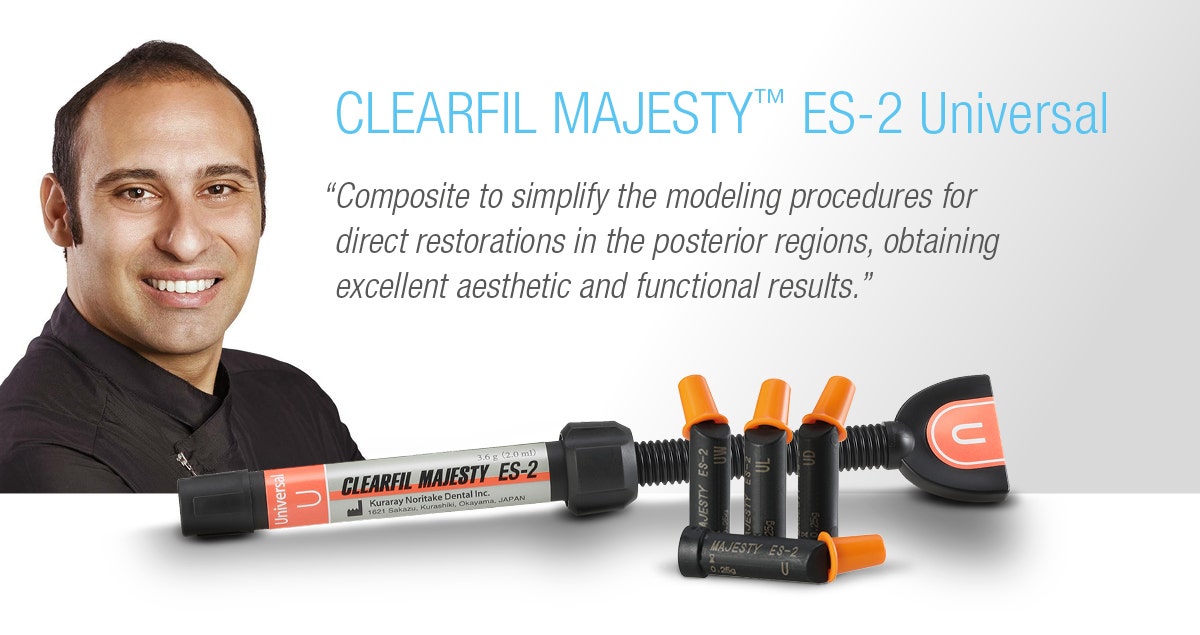
Small to moderate-sized posterior restorations are the bread-and-butter of every dental practice. In a procedure that is carried out so frequently, it is particularly useful to work with a restorative material that handles well and has excellent optical properties that blend in a variety of clinical situations – like CLEARFIL MAJESTY™ ES-2 Universal. The product is available in a single universal shade for the posterior region, which enables users to increase their efficiency and eliminates the need for shade determination or laborious multi-shade layering.


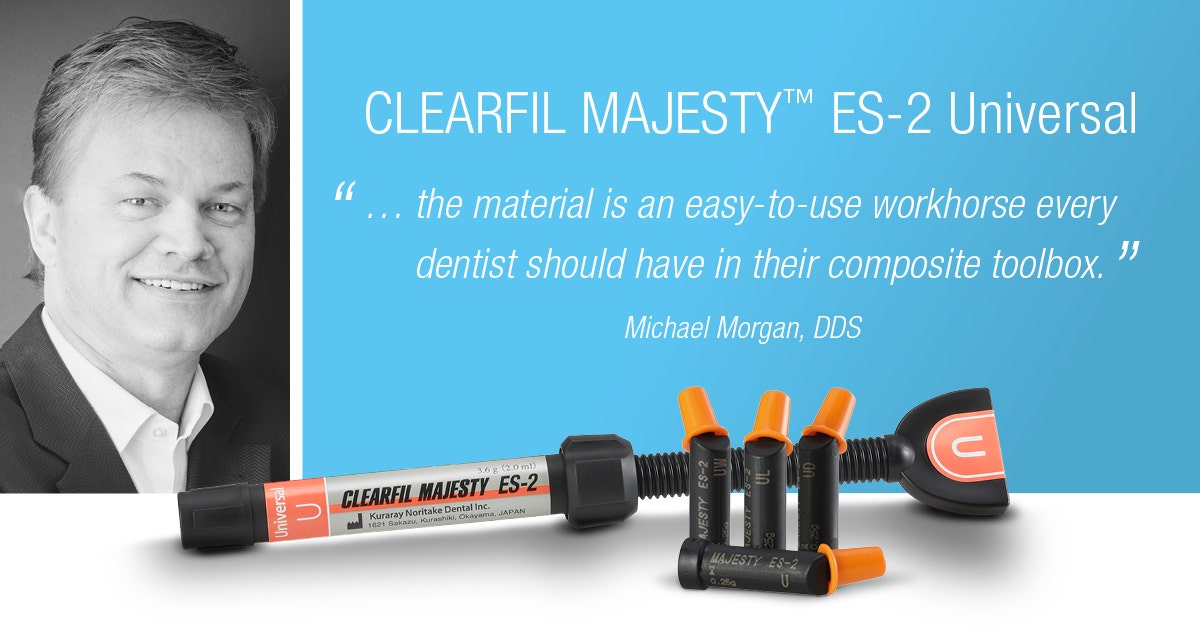
When used with CLEARFIL™ SE Protect adhesive and CLEARFIL MAJESTY™ ES Flow, the innovative universal restorative allows me to confidently restore 70 to 80 percent of my simple posterior composite restorations. It handles extremely well, being slightly soft but not sticky, which allows quick shaping and anatomy formation. The procedure is fast and simple, and it leads to natural outcomes, as shown using the following case example. Anyone who has tested CLEARFIL MAJESTY™ ES-2 Universal in the clinical environment will most likely agree that the material is an easy-to-use workhorse every dentist should have in their composite toolbox.


Fig. 1 Initial clinical situation. Second premolar with a composite restoration and first molar with an amalgam restoration in need of replacement.


Fig. 2 Immediate post-operative image.


Fig. 3 Image taken one week after the treatment showing rehydrated tissues and a smooth optical integration of the direct restorations.


Dentist:


DR. MICHAEL MORGAN, DDS


Direct pulp capping and restoration of class II cavities with resin composite

Case by Dr. Aleksandra Łyżwińska, DMD


One tooth. Two appointments. Two lesions appeared in the upper right second premolar of this 17-year-old patient. We decided to restore the mesial lesions first. Caries was excavated and, due to pulp exposure, direct pulp capping performed with mineral trioxide aggregate (MTA). Chemical adhesion to dentin and the biomaterial was established with the 10-MDP-containing universal adhesive CLEARFIL™ Universal Bond Quick, used in the self-etch mode. One benefit of this material is related to the fact that no extensive rubbing onto the surface is required. Blue composite was placed to mark the region of the exposed pulp, and CLEARFIL MAJESTY™ ES Flow - Super Low A2 was applied to the bottom of the cavity. Due to its high flexural strength, this material is a perfect dentin replacement. The rest of the tooth was restored with temporization material. To fill up the core, bulk-fill flowable composite OliBulk MD was used.


For the second appointment, the temporary was removed and caries was excavated in the distal area of the tooth as well. Following cavity preparation, CLEARFIL™ SE BOND 2 was applied to obtain a strong bond to the remaining composite material and the tooth structure. Both cavities were restored with a combination of CLEARFIL MAJESTY™ ES Flow - Super Low A2 and CLEARFIL MAJESTY™ ES-2 Classic A2.


Fig. 1. Intraoral photograph of the initial situation after isolation with rubber dam.


Fig. 2. Situation after cavity preparation and pulp exposure.


Fig. 3. Mineral trioxide aggregate (MTA) applied to cover and protect the exposed pulp tissue.


Fig. 4. Marking of the exposed pulp area with blue composite.


Fig. 5. Appearance of the cavity after application of the universal adhesive in the self-etch mode.


Fig. 6. Cavity filled up to the level of the interproximal enamel wall with CLEARFIL MAJESTY™ ES Flow - Super Low A2.


Fig. 7. Second visit: Prepared cavities.


Fig. 8. Situation after bonding, build-up of the interproximal walls with paste-like composite, filling with flowable material and coverage with a final layer of paste-like CLEARFIL MAJESTY™ ES-2 Classic A2.


Fig. 9. Appearance of the restored tooth before contouring.


Fig. 10. Result of the polishing procedure …


Fig. 11. … carried out with a rubber polisher and the CLEARFIL™ Twist DIA System.


FINAL SITUATION


Fig. 12. Treatment outcome …


Fig. 13. … immediately after rubber dam removal.


Dentist:

DR. ALEKSANDRA ŁYŻWIŃSKA
Warsaw, Poland


Dr. Aleksandra Łyżwińska, DMD, is a passionate aesthetic and adhesive dentist. Driven by Evidence Based Dentistry, her goal includes using modern composite materials and bonding agents in her clinical practise. In addition to her primary job, she worked as a lecturer and an assistant professor at the Department of Conservative Dentistry and Endodontics of Medical University of Warsaw, her alma mater.


Restorations blending in nicely with the surrounding tissues

Case by Dr. Jorge F. Zapata, DDS


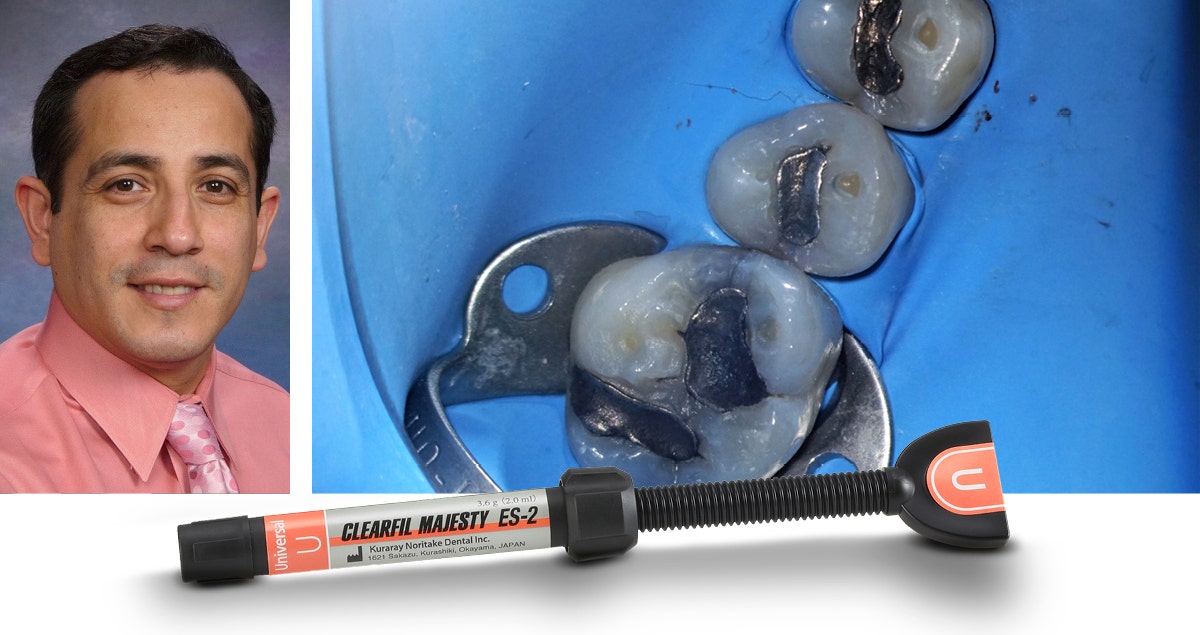
When replacing amalgam restorations, we often see that the remaining tooth structure is severely stained. Nevertheless, a defect-oriented preparation is preferable over a procedure that involves the removal of healthy, but stained dentin as well. Long-lasting direct restorations with a natural look are obtained by using the universal adhesive CLEARFIL™ Universal Bond Quick, CLEARFIL MAJESTY™ Flow as a cavity liner, CLEARFIL MAJESTY™ ES-2 Premium Dentin to mask the stained areas and a final layer of CLEARFIL MAJESTY™ ES-2 Universal. The following case example confirms that this product combination leads to a nice optical integration.


Fig. 1 Pre-operative image: Maxillary second premolar and first molar with amalgam restorations in need of replacement.


Fig. 2 Situation after removal of the existing amalgam restorations.


Fig. 3 Immediate treatment outcome.


Dentist:

DR. JORGE F. ZAPATA, DDS


Replacement of two direct restorations in the anterior region

Case by Dr. Aleksandra Łyżwińska, DMD


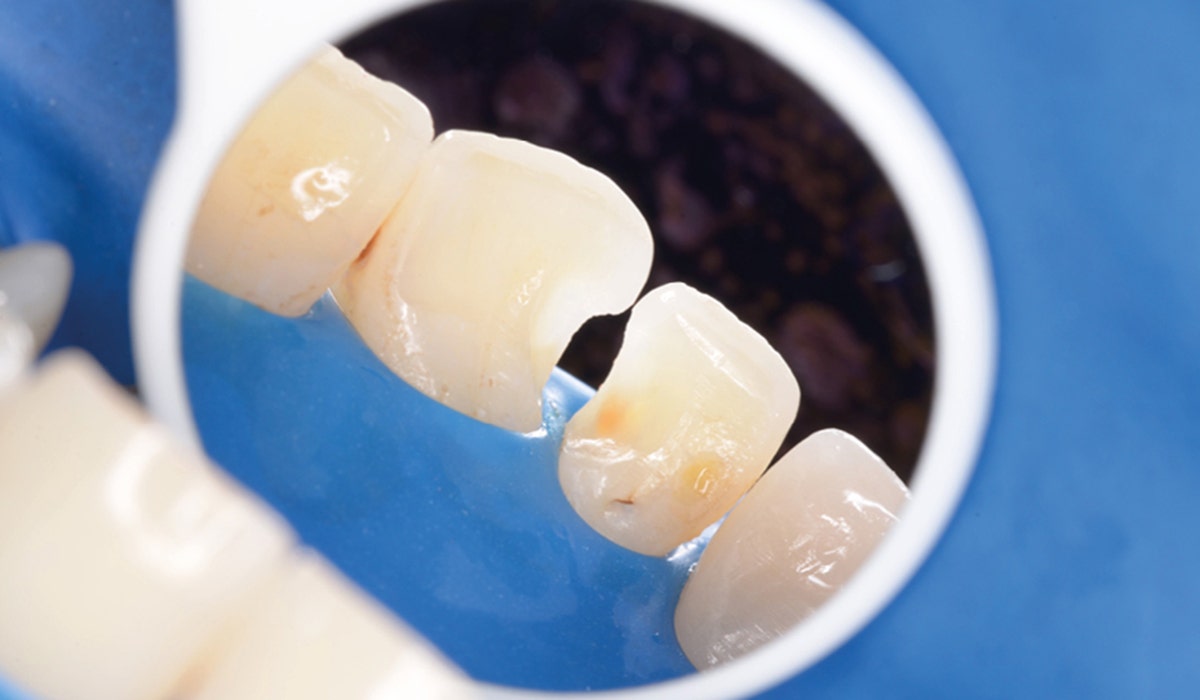
The case presented is regarding a patient with two discoloured composite restorations located in the distal aspect of the maxillary right central incisor and the mesial aspect of the adjacent lateral incisor. A replacement of these restorations was planned due to marginal leakage and for aesthetic reasons. During cavity preparation, a vestibular bevel was created in the enamel of the lateral incisor to provide for a smooth blend-in of the restoration and to improve adhesion. After selective etching of the enamel with phosphoric acid gel, CLEARFIL™ SE BOND 2 was applied. The adhesive contains the original 10-MDP monomer, which establishes a strong bond by adhering to dentin chemically. The restorations were created with CLEARFIL MAJESTY™ ES Flow - Low A2 and CLEARFIL MAJESTY™ ES-2 Classic in the shade A2. Final polishing was accomplished in a four-step procedure with abrasive discs, an aluminum oxide rubber polisher, and the two-disc CLEARFIL™ Twist DIA polishing system.


Fig. 1. Initial clinical situation after rubber dam placement.


Fig. 2. Detailed view of the teeth with a discoloured resin composite restoration visible in the mesial aspect of the lateral incisor.


Fig. 3. Palatal view of the teeth revealing marginal staining of the restoration in the distal aspect of the central incisor.


Fig. 4. Palatal view of the teeth after removal of the restorations and cavity preparation.


Fig. 5. Frontal view of the teeth after removal of the restorations and tooth preparation including beveling of the enamel.


Fig. 6. Upright placement of two sectional contoured matrices designed for the posterior region – palatal view.


Fig. 7. Frontal view of the sectional matrices fixed with a wedge.


Fig. 8. Palatal view of the teeth after selective enamel etching, bonding, and the application and light-curing of CLEARFIL MAJESTY™ ES Flow - Low A2 and CLEARFIL MAJESTY™ ES-2 Classic – A2.


Fig. 9. Frontal view of the situation - a concave “emergence profile” caused by matrix bending.


Fig. 10. Final layer of CLEARFIL MAJESTY™ ES Flow - Low A2 applied to the mesio-labial aspect of the lateral incisor.


Fig. 11. Occlusal view of the final composite layer prior to finishing.


Fig. 12. Polishing with the pre-polisher of the CLEARFIL™ Twist DIA system.


Fig. 13. Polishing with the high-shine polisher of the CLEARFIL™ Twist DIA system.


FINAL SITUATION


Fig. 14. Outcome of the polishing procedure.


Dentist:

DR. ALEKSANDRA ŁYŻWIŃSKA
Warsaw, Poland


Dr. Aleksandra Łyżwińska, DMD, is a passionate aesthetic and adhesive dentist. Driven by Evidence Based Dentistry, her goal includes using modern composite materials and bonding agents in her clinical practise. In addition to her primary job, she worked as a lecturer and an assistant professor at the Department of Conservative Dentistry and Endodontics of Medical University of Warsaw, her alma mater.


3 Clinical cases - Diastema closure with a game-changing composite

By Dr. Jusuf Lukarcanin


Direct resin composite restorations are a great option for diastema closure, shape correction and even an optical alignment of anterior teeth. The treatment approach is conservative with no or only minimal tooth preparation required, and with the right materials, it is possible to obtain beautiful outcomes, which is decisive in the aesthetically demanding anterior region. In this context, one might assume that a wide range of available shades and a meticulous shade selection process are important preconditions for a successful shade match. The following case examples show, however, that great outcomes can also be achieved in a simplified way using CLEARFIL MAJESTY™ ES-2 Universal, a game-changing resin composite with only two shade options for the anterior region.


CLINICAL CASE 1


Fig. 1 Initial situation of a young patient with maxillary and mandibular diastemata to be closed.


Fig. 2 Treatment outcome after direct diastema closure with CLEARFIL MAJESTY™ ES-2 Universal in the shade UL (Universal Light). A precise colour match and a natural gloss are obtained. Apart from the fact that the procedure is simplified be eliminating the need for shade determination and selection, the workflow is the same as with traditional composites.


Fig. 3 Close-up view of the initial and the final situation. A smooth transition from the teeth to the restorations is obtained.


CLINICAL CASE 2


Fig. 1 Female patient with multiple diastemata asking for a minimally-invasive, aesthetic treatment option.


Fig. 2 Treatment outcome after composite veneering with CLEARFIL MAJESTY™ ES-2 Universal in the shade UL (Universal Light).


Fig. 3 The patient’s smile - her teeth have a natural, lighter appearance.


CLINICAL CASE 3


Fig. 1 Young patient with malpositioned maxillary central and lateral incisors.


Fig. 2 Irregularities visible when the patient is smiling. She opted for composite veneering instead of an orthodontic approach.


Fig. 3 Treatment outcome after optical alignment and correction of teeth’s shapes using CLEARFIL MAJESTY™ ES-2 Universal in the shade UL (Universal Light).


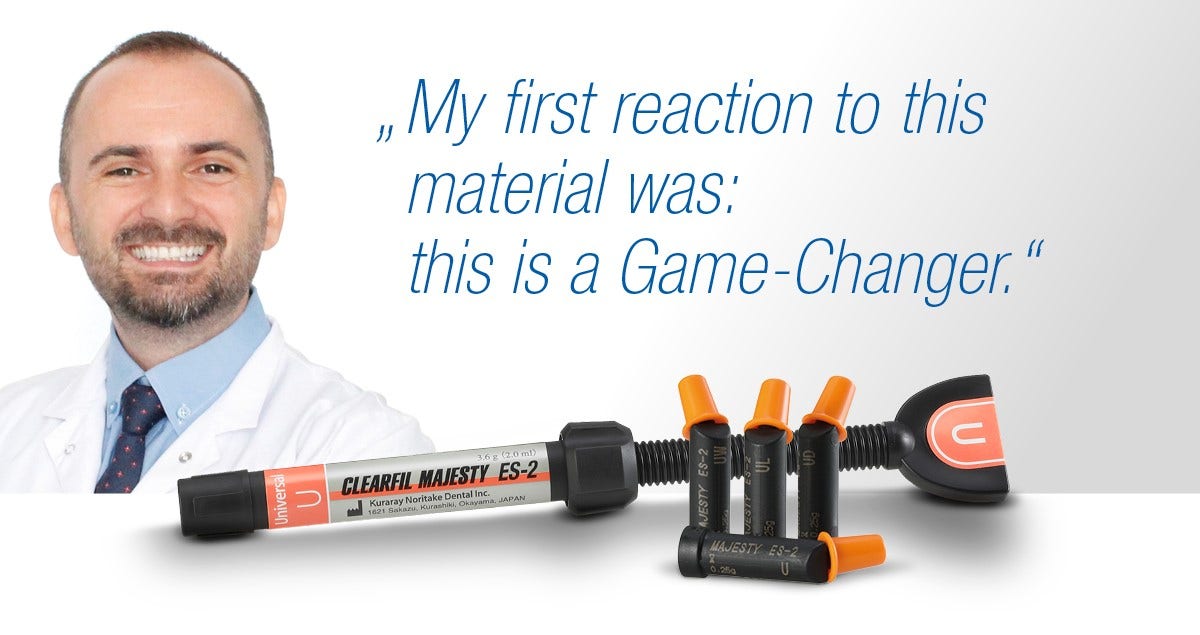
„My first reaction to this material was: this is a Game-Changer.“


The results are magical. Smoother and easy handling properties, high-gloss, natural light distribution and the process is simple. Aside from being able to skip the shade selection step, your workflow remains the same as with traditional composites. At first, I might have been a little skeptical about replacing all the different shades of composites we use in office every day. But after a couple of tries I discovered that it indeed works every time, in most cases even without the use of a blocker. Simply ingenious!


Dr. Jusuf Lukarcanin


Dentist:

DR. JUSUF LUKARCANIN


Dr. Jusuf Lukarcanin is a Certified Dental Technician (DCT) and a Doctor of Dental Science (DDS). He studied dentistry at the Ege University Dental Faculty in Izmir, Turkey, where he obtained a Master‘s degree in 2011. In 2017, he received a Ph.D. degree from the Department of Restorative Dentistry of the same university. Between 2012 and 2019, Dr. Lukarcanin was the head doctor and general manager at a private clinic in Izmir. Between 2019 and 2020, he worked at Tinaztepe GALEN Hospital as a Restorative Dentistry specialist, between 2020-2022 he worked at MEDICANA International Hospital Izmir as a Restorative Dentistry specialist. Currently he is an owner of a private clinic for aesthetics and cosmetics in Izmir.


Clinical case - Hybrid Ceramic Block for Chair Side

Case by Dr. Cyril Gaillard


In the past few years, the number of patients diagnosed with sleep apnea has increased. Fortunately, we can propose different options of treatments today, which can provide positive clinical results and improve the quality of life of our patients.


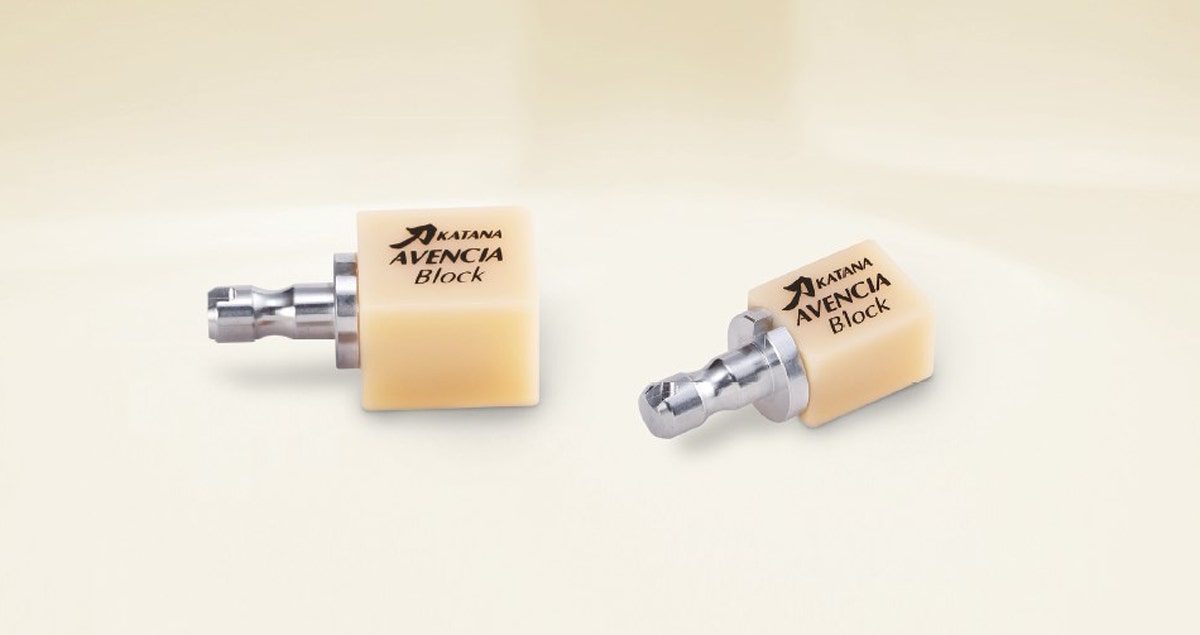
This clinical case presents the use of a new CAD-CAM material, KATANA™ AVENCIA™ block, produced using the unique manufacturing method of Kuraray Noritake Dental, which offers remarkable mechanical properties.


The goals of the treatment are:

  • Biological and minimally invasive, when it comes to teeth (non-invasive), periodontics, and occlusion (muscular and articular).
  • To maintain health on the long-term (ease of hygiene).
  • To re-establish an effective function (mastication) without compromising aesthetics.


This article presents the rehabilitation of a patient suffering from sleep apnea, integrating the concept of minimally invasive and adhesive dentistry with most importantly, functional dentistry by identifying precisely the occlusal concept and mandibular position given to the patient.


The forty-year-old patient came to the office for his annual check-up. During initial examination, we discussed his problem of sleep apnea and the fact that he feels uncomfortable with his occlusion.


The extra-oral exam revealed a largely reduced lower face area. We noted the presence of a crown in the place of tooth #46 and amalgams on the molars. The crown had to be removed and the root extracted, one implant would be placed.


The patient told us he did not suffer from muscle spasms nor from articular pain, but conveyed an increasing discomfort during mastication and a constant search for the right position to his mandible.


Based on my diagnosis, it was judged that the treatment with KATANA™ AVENCIA™ is within the scope of indications since the occlusion problem is a minor issue.


TREATMENT PLAN


To create the treatment plan, we always follow the same steps:

  • Discussion with the patient to identify his or her wishes and limitations in terms of treatment.
  • Occlusal planning, search for the appropriate mandibular position in order to determine the quantity of destroyed dental tissue; this is done by TENS machine.
  • Periodontic diagnosis and support teeth.


We proceed in the following manner for the treatment:

  • Cleaning of all teeth.
  • Complete in-mouth mock-up for the lower arch.
  • The mock-up will be left in the mouth in order to validate the new occlusion.
  • Use of CAD-CAM technology to create the definitive prostheses, integrating the concept of minimally invasive dentistry. We will use KATANA™ AVENCIA™ block as material for the overlays.


Initial situation with occlusion troubles causing discomfort during mastication.


Once the mock-up had been placed in the mouth, it was necessary to test the new occlusion and adjust if needed. The mock-up was milled in PMMA by Roland DG Corporation milling machine.


The teeth are prepared through the mock-up to be as minimally invasive as possible. The thickness is 1,5 mm for occlusal and 1 mm for buccal surface.


Overlays and crown(s) on implant were designed by 3Shape software (3Shape A/S) and milled by Roland milling machine. The final restorations were created using two digital impressions. On the impression of the preparations, the cervical limits were marked. Next, the software matched the two impressions by subtraction and proposed the shape of the restorations to be milled.

These restorations are the exact copy (morphology) of what the patient wore in his mouth for two months. If the work is done by section, it is easier for the computer to match the impressions.


KATANA™ AVENCIA™ block was milled.


Polishing of the restoration with CLEARFIL™ TWIST DIA.


After milling, the restorations were stained using a 3D staining technique. 3D staining requires a specific sequence to create 3D optical illusions.


Final esthetic results after staining.


A classic bonding procedure was followed with PANAVIA™ V5. To begin, all KATANA™ AVENCIA™ elements were tried one by one for validation and adjustment, then all together to check the contact points.


Rubber dam was placed on the mandible. The intrados of the elements were blasted with alumina power, then we applied K-Etchant gel, rinsed well and dried. A layer of silane was applied (CLEARFIL™ CERAMIC PRIMER PLUS) for 60 seconds* then dried.


Application of K-Etchant gel for 30 seconds on enamel. Surfaces were rinsed, dried, and the adhesive PANAVIA™ V5 Tooth Primer was applied, left for 20 seconds, then dried.


Restorations were bonded one by one with PANAVIA™ V5 Paste. The excess was removed and the final photo-polymerization using glycerin was performed.


A final polishing was performed with CLEARFIL™ TWIST DIA.


To conclude, the occlusion was verified in static position with cuspfossa contact, then laterality, propulsion, and finally mastication.


Final situation. We can observe a good and esthetic integration of the restorations. A long term follow-up should be necessary to confirm the success of the treatment.


FINAL SITUATION


“KATANA™ AVENCIA™ MAKES MY DAILY WORK EASIER… AND MY PATIENTS ARE HAPPY”


Dentist:

DR. CYRIL GAILLARD
DENTAL SURGEON AND CEO OF GAD-CENTER
PRIVATE PRACTICE, BORDEAUX


1998 Graduated from the University of Bordeaux
2000 CES Fixed Prostheses
2002 DU of Implantology, University of Bordeaux
2002 SAPO Implant
2003 Certificate Bone grafting
2006 of Maxillo Faciale Surgical Rehabilitation, Paris VII
CES of Anatomy Physiology
CES of Removable Prostheses


Quadrant restoration with a single-shade composite with CLEARFIL MAJESTY™ ES-2 Universal

Case by Dr. Vincenzo Picciariello


Innovative single-shade composites are an attractive option at least for posterior restorations, as they allow clinicians to skip laborious steps and save time. Nevertheless, the aesthetic and functional demands are high. The following case example demonstrates how CLEARFIL MAJESTY™ ES-2 Universal performs in the clinical environment and reveals how well the material blends in with surrounding tooth structure.


A 33-year-old female patient came to the clinic with a request to replace amalgam restorations in the upper right quadrant (Fig. 1). The second molar had an occlusal carious lesion, while the amalgam restoration on the first molar showed marginal leakage most likely leading to secondary caries. After the placement of rubber dam (Fig. 2), the existing restorations were removed, revealing secondary caries in the first molar and the second premolar (Fig. 3). The cavities were finished using fine-grained diamond burrs and sonic instruments and subsequently sandblasted with 50-micron aluminium oxide in order to facilitate the adhesive procedures (Fig. 4). In this way, the surface energy, bonding surface area, and surface roughness are increased and the wetting ability of the adhesive is improved for a high-quality bond with the enamel and dentin.


Fig. 1. Pre-operative image.


Fig. 2. Isolation of the working field with rubber dam.


Fig. 3. Secondary caries visible after removal of the amalgam restorations.


Fig. 4. Completed cavity preparation with air-abraded bonding surfaces.


Wooden wedges, sectional matrices and relative separator rings were placed to transform the Class II MOD cavity of the first molar into a Class I cavity by means of the centripetal build-up technique (Fig. 5). On each tooth, selective etching of the enamel was performed with 35% phosphoric acid etching gel (K-ETCHANT Syringe, Kuraray Noritake Dental Inc.), which was removed by thorough rinsing and drying, before applying the two components of CLEARFIL™ SE BOND – the self-etching primer and the light-curing bonding agent. The bond was treated with a gentle stream of air to make a uniform surface and finally, the adhesive layer was light cured for 40 seconds. The procedure was completed with immediate dentin sealing using a flowable composite (CLEARFIL MAJESTY™ ES-FLOW Low in the shade A3) in controlled thicknesses.


The restoration of the cavities was completed using CLEARFIL MAJESTY™ ES-2 Universal (Kuraray Noritake Dental Inc.) in the only available posterior shade Universal. In order to characterize the fissures and enhance the appearance of the occlusal morphology, staining agent in the shade dark-brown was applied. CLEARFIL™ Twist DIA (Kuraray Noritake Dental Inc.) was the polishing system of choice. After polishing, the difference in colour between the restorations and the visibly dehydrated enamel surfaces could be observed (Fig. 6). Upon inspection after 30 days, the restorations showed adequate and satisfactory chromatic integration (Fig. 7).


Fig. 5. Wedges, sectional matrices and rings placed for build-up of the first molar’s proximal walls.


Fig. 6. Image taken immediately after polishing with dehydrated enamel and the rubber dam still in place.


FINAL SITUATION


Fig. 7. Picture of the treatment outcome taken after 30 days.


The treatment of this quadrant demonstrates how CLEARFIL MAJESTY™ ES-2 Universal composite is an integrative innovation to the Kuraray Noritake Dental Inc. line of composites that allows the clinician to simplify the modeling procedures for direct restorations in the posterior regions, obtaining excellent aesthetic and functional results.


Dentist:

DR. VINCENZO PICCIARIELLO


Graduated from the faculty of dentistry and dental prostheses of Bari in 2009; specialized in direct and indirect conservative dentistry. Completed his training in aesthetic adhesive restorative dentistry in Geneva by attending the Anterior Bio-Esthetic Restorations Master Program of Dr. Didier Dietschi. He perfected himself under the guidance of Dr. Salvatore Scolavino and Dr. Gaetano Paolone at WeRestore in Rome. Member of the Italian Academy of Conservative Dentistry. Author of national and international publications.


Speaker at national and international conferences on adhesive dentistry topics. Since 2009, he has been working as a freelancer in Bitonto, dedicating himself mainly to implant and periodontal surgery and to adhesive aesthetic restorative-prosthetic dentistry.


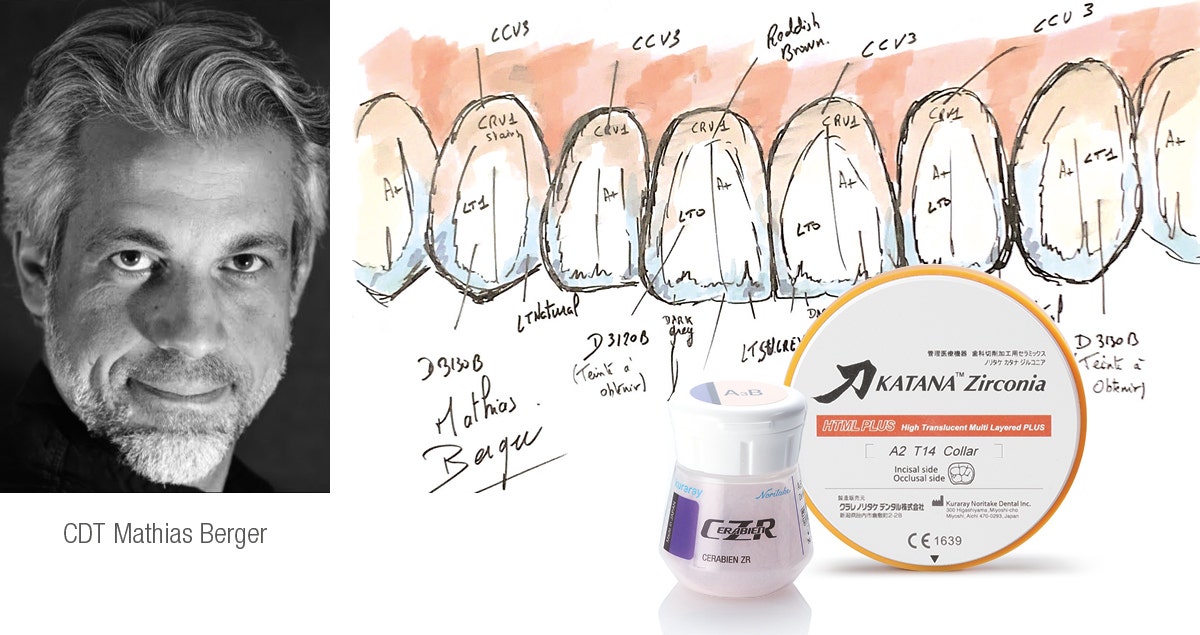
Full zirconia HTML A1 & FC Paste Stain

Case by Dr. Daniele Rondoni, RDT


Check out how beautiful zirconia restorations are finalized using CERABIEN™ ZR FC Paste Stain, take a look at the color palette used by Dr. Daniele Rondoni to achieve outstanding aesthetic results.


“CERABIEN™ ZR Paste Stain is a material developed for micro-layering on the full-contour zirconia surface. With it, natural, true-to-life optical effects are created in an efficient way. I apply the pastes in the esthetic areas, while the functional parts of the restorations are only polished.”


Dentist:

DR. DANIELE RONDONI, RDT


Born in Savona in 1961 where he lives and has worked in his own laboratory since 1982 with his collaborators. Graduated from the dental technician school IPSIA “P. Gaslini” in Genoa in 1979. He continued his education by attending relevant workshops for the “Italian dental school“ and broadened his professional experience in Switzerland, Germany and Japan. Since 2011 Kuraray Noritake Dental International Instructor.


Molar case with CLEARFIL MAJESTY™ ES-2 Universal

Fig. 1. Initial situation: caries lesions and insufficient restorations are detected on the occlusal surface of the second molar.


Fig. 2. Situation after placement of rubber dam for moisture control.


Fig. 3. Appearance of the teeth following caries removal and placement of sectional matrix.


Fig. 4. Etch-and-Rinse technique (Enamel for 30 sec. and Dentin for 15 sec.).


Fig. 5. Situation after rinsing. Etch patterns are visible in the enamel.


Fig. 6. Appearance of the teeth following application of CLEARFIL™ Universal Bond Quick.


Fig. 7. Cavity lining with a layer of flowable composite (CLEARFIL MAJESTY™ ES-Flow Low, A2).


Fig. 8. Occlusal view of the final restorations produced with CLEARFIL MAJESTY™ ES-2 Universal (U shade).


Fig. 9. Situation after rubber dam removal and occlusal adjustments.


FINAL SITUATION


Fig. 10. Follow-up after 7 days.


New Paradigm in Aesthetic Restoration

Case by Francesco Ferretti and Marco Nicastro


Aesthetic restoration of anterior teeth using KATANA™ UTML Full anatomical crowns, with vestibular stratification and BOPT*1.

*1 Biologically Oriented Preparation Technique


Initial situation


Final result

Shows excellent aesthetic properties of KATANA™ UTML and the perfect integration in harmony with pink tissues.


Figure 1. The patient requested a solution for an aesthetic problem due to unnatural look of old restorations and black triangles coming from past history of periodontitis. The resulting retraction of the tissues had left the margins of the prosthesis clearly visible, and the loss of the papilla peaks, together with the numerous black spaces between the crowns, required a complex therapeutic approach.


Figure 2. The treatment plan for the periodontal problems con-sisted of a non-surgical approach, with scaling and root planing, and the replacement of the previously fixed prostheses to recondition the marginal tissues and facilitate the restoration of a new, aesthetically pleasing gingival architecture.


Figure 3. From a functional point of view, we decided to reduce the deep frontal bite to restore a correct overjet-overbite ratio. This reduction was also important from an aesthetic point of view, as it allowed us to shape the various elements correctly.


Figure 4. We usually remove old prostheses before beginning a periodontal treatment, and make a first, provisional restoration to create an environment in which the soft tissues can heal. If we have to work beyond the cement enamel joint (CEJ), we prefer a vertical preparation for posts, and the purpose of the provisional restoration is to condition the marginal tissues using Dr. Loi’s BOPT.


Figure 5. For the BOPT, the vertical preparation of the post has a finish line that extends inside the gingival sulcus. The temporary conditioning of the tissues induced by the provisional prosthesis allows us to modify the level of the gingival parables to a certain extent.


Figure 6. The image on the left shows the clinical healing of the tissues one month after the initial periodontal treatment. The role of the provisional restoration, appropriately realigned, is clear. The conditioning of the tissue has been achieved by means of the provisional restoration, which has modified the level and shape of the marginal tissue. Once filled with correctly fitted crowns, the interproximal spaces will be further reduced after the definitive restoration.


Figure 7. The correct management of the provisional restoration is crucial for the healing of the tissues. The placement of a provisional restoration before the periodontal therapy has allowed us to create the right environment for complete healing. At the same time, the vertical preparation has allowed us to gradually condition the marginal gingival tissue by shortening or lengthening the provisional restoration as necessary.


Figure 8. One of the advantages of a vertical preparation is that taking the final impression is easy, because the absence of a horizontal finish line greatly simplifies the procedure. On the other hand, the BOPT also requires the taking of an impression of the sub-gingival portion of the preparation. The dental technician will have to decide marginal shape of restorations according to the position of the gingival line in consultation of the clinician, and based on the tests conducted with the provisional restoration.


Figure 9. After the casting of the model, we prepared the gingival area to accommodate an ideal configuration of gingival parables.


Figure 10. After making a wax model, we assessed whether the height of the gingival zenith level could be further corrected. This photo shows that gingival level of 21 was not yet ideal, so we stretched it distally.


Figure 11. Once the wax model was complete, we extracted the element from the model and evaluated its protrusion. It was only after joining the gingival protrusion to the arbitrary margin of the preparation that we proceeded to a scan and milled the crowns.


Figure 12. The restoration was carried out with Katana™ UTML zirconia based on the new formulation of cubic zirconium oxide. This ultra tralucent material was chosen because we were working with light and non-discolored posts.


Figure 13. We finished the crowns on a positional impression to help to improve the gingival adaptation; we had some dispersion of the tissues in the first precision impression due to the use of retractors. We finished the crowns with CZR FC Paste Stain colours and glaze.


Figure 14. The surface colours and the slight contrast created are highlighted in this black-and-white image taken with a blue filter.


Figure 15. In this translucent image, we can see the natural translucent effect of KATANA™ UTML and invisible fusion between abutments and crowns.


Figure 16. Clinical image one year after cementation made with PANAVIA V5; this shows the good clinical condition of the marginal tissue, with no signs of inflammation or bleeding. The BOPT allowed us to optimise the level of the gingiva without resorting to periodontal surgery, while the shape of the new crowns has made it possible to close all interproximal spaces for an optimally aesthetic result.


Figure 17. The brightness of the restorations (thanks to the use of a particularly translucent zirconia) combined with the shape of the incisors, has greatly im-proved the aesthetic of the restoration, even though the condition initially appeared to be particularly unfavourable.


Figure 18. Compared to the previous prostheses, the incisal reduction allowed not only for the optimisation of the functional phase by reducing the overbite, but also made it possible to achieve a more natural aesthetic, with the contour of the incisal margins following that of the lower lip.


Dentists:


FRANCESCO FERRETTI


Born in Rome on 15th March 1957, Francesco Ferretti gets his degree as dental technician at the Institute “Edmondo de Amicis”, in Rome. In 1980, he starts working and, from 1987 to 1994, he cooperates with IVOCLAR VIVADENT giving consulting as ceramist. In 1992 he starts working exclusively with Prof. Mario MARTIGNONI.


  • After one year cooperation with Prof. Martignoni, he starts working with the ORAL DESIGN CENTER founded in Rome by Mr. Willi Geller, and becomes a partner, improving prosthesis esthetics.
  • Is registered outside the course of dentistry at the University of Rome Tor Vergata.
  • In 2001, he founds ESTECH DENTAL STUDIOS, in cooperation with Pentron for technical training and consulting.
  • He has published articles and studies in Italian and American magazines. He is interested in Metal Free techniques.
  • Winner of the 2004 Polcan Aiop.
  • He is a member of: ANTLO LAZIO ( National Association of Lab Owners) with the president of the Lazio region 2013-2014.
  • National cultural manager ANTLO 2017-2020.
  • Teacher of prosthetics perfectioning at the University of Chieti for the year 2002, he has been re-confirmed for the year 2003, 2004, 2005 to deal with Metal Free.
  • Teacher of prosthetics perfectioning at the University of Naples 2006.
  • He has participated as a speaker at numerous conferences in Italy. ESCD member has participated as a speaker at ten in Florence 2009 and Turin 2013.


MARCO NICASTRO


Marco Nicastro takes a degree in “Odontoiatria e Protesi Dentaria (Dentistry and Dental Prosthesis) at the University of Rome “ La Sapienza in 1989. Since the beginning he is interested in prosthesis restoration dentistry and aesthetic problems.


  • From 1990 to 1996 he attends Prof. Martignoni’s studio, where he develops his prosthesis knowledge.
  • From 1993 to 1998 he cooperates as lecturer with the Oral Design Centre in Rome, directed by Mr. Ferretti and Mr. Felli, giving lectures and courses about aesthetic restoration either in Italy or in foreign countries. In the same period he enlarges his experience in aesthetics, attending training courses at the University of Geneva, in Switzerland.
  • Since 1993 he has been cooperating with Mr. Francesco Ferretti in the organization of Courses and Conferences, paying particular attention to metal free methodology.
  • Vice President of the European Society of Cosmetic Dentistry (ESCD).
  • Founding member and active member of Gimnasium interdisciplinary CAD-CAM (GICC).
  • Active member of the Italian Society of Conservative Dentistry (SIDOC).
  • Partner of the Italian Academy of Prosthetic Dentistry (AIOP).
  • President of Like Mine Dental Education in Rome since 2001.
  • He won, with Francesco Ferretti, the Polcan award of the Italian Accademy of Prosthetic Dentistry in 2004.