Optimizing functional and esthetic parameters in veneer cementation
By Dr. Clarence Tam, HBSC, DDS, AAACD, FIADFE
The use of both porcelain veneers to improve and restore the shape, shade and visual position of anterior teeth is a common technique in esthetic dentistry. The biomimetic aim in the restoration of teeth is not only the cosmetic domain, but also functional considerations. It is critical to note that the intact enamel shell of the palatal and facial walls with respect to anterior teeth are responsible for its innate flexural resistance. When dental structure has been violated by endodontic access, caries and/or trauma, every effort must be made to preserve the residual structure and strive to restore or exceed the baseline performance levels of a virgin tooth.
BACKGROUND
A 55 year old ASA II female with a medical history significant only for controlled hypertension presented to the practice for teeth whitening. It was foreseen that dental bleaching would not have an effect on the shade of a pre-existing porcelain veneer on tooth 1.2, and that this would need to be retreated following the procedure especially if the shade value changes were significant. The patient started with a baseline shade of VITA* 1M1:2M1; 50:50 ratio in the upper anterior region and 1M1 in the lower anterior region. Following a nightguard bleaching protocol with 10% carbamide peroxide worn overnight for 3-4 weeks, the patient succeeded in achieving a VITA* 0M3 shade in both upper and lower arches. As a result, there was a significant value discrepancy between the veneered tooth 1.2 and the adjacent teeth, and also increased chroma noted on the contralateral tooth 2.2 due to a facially-involved Class III composite restoration. This latter tooth also did not match the contralateral tooth in dimension and thus the decision was made to treat both lateral incisors with bonded lithium disilicate laminate veneers. The canine adjacent (2.3) featured localized mild to moderate cusp tip attrition, but the patient did not want to address this until following the currently-discussed veneers were placed. The goal of smile design at this stage is to ultimately establish bilateral harmony with the view to place an additional indirect restoration restoring the facial volume and cusp tip deficiency of tooth 2.3 in the near future.
PROCEDURE
A digital smile design protocol was not required for the initial intention, which was individual treatment of the lateral incisors, as slight variation is permitted in this tooth type, being a personality and gender marker of the smile. Prior to anesthesia, the target shade was selected using retracted photos featuring both polarized and unpolarized selections. The photographs were prepared for digital shade calibration by taking reference views with an 18% neutral gray white balance card (Fig. 1).
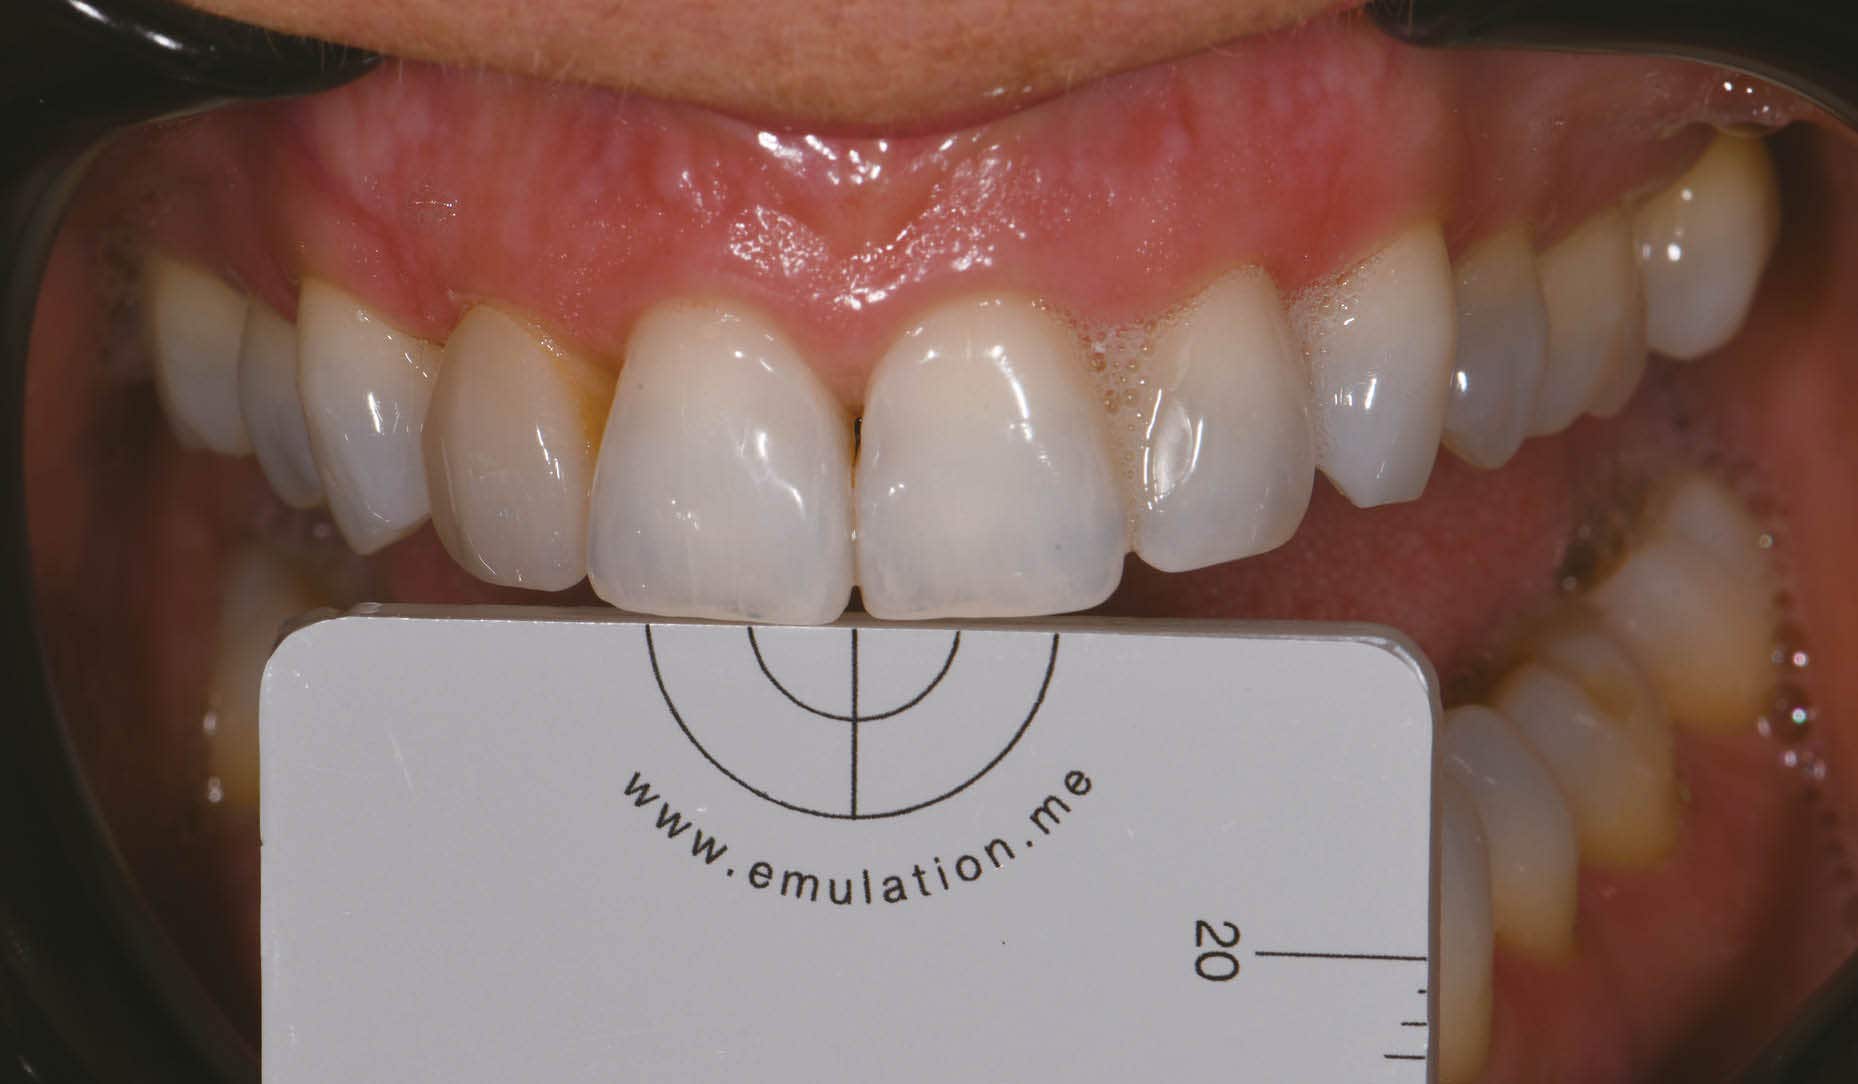
Fig. 1. Reference photograph taken with a 18% neutral gray card.
The basic body shade was VITA* 0M2 with an ingot shade of BL2. The patient was anesthetized using 1.5 carpules of a 2% Lignocaine solution with 1:100,000 epinephrine before affixing a rubber dam in a split dam orientation. The veneer on tooth 1.2 was sectioned and removed from tooth 1.2 and a minimally-invasive veneer preparation completed on tooth 2.2 (Fig. 2). Partial replacement of the old composite resin restoration was completed on the mesioincisobuccopalatal aspect of tooth 12 with the intact segment maintained. Adhesion to old composite was achieved using both micro particle abrasion and a silane coupling agent (CLEARFIL™ CERAMIC PRIMER PLUS, Kuraray Noritake Dental Inc.). Margins were refined and retraction cords soaked in an aluminum chloride solution and packed. Preparation stump shades were recorded. Final impressions were taken using both light and heavy body polyvinylsiloxane in a metal tray. The patient was provisionalized and sent away with instructions to verify the shade at the laboratory at the bisque bake stage. The models prepared by the laboratory verify the minimally-invasive nature of the case.
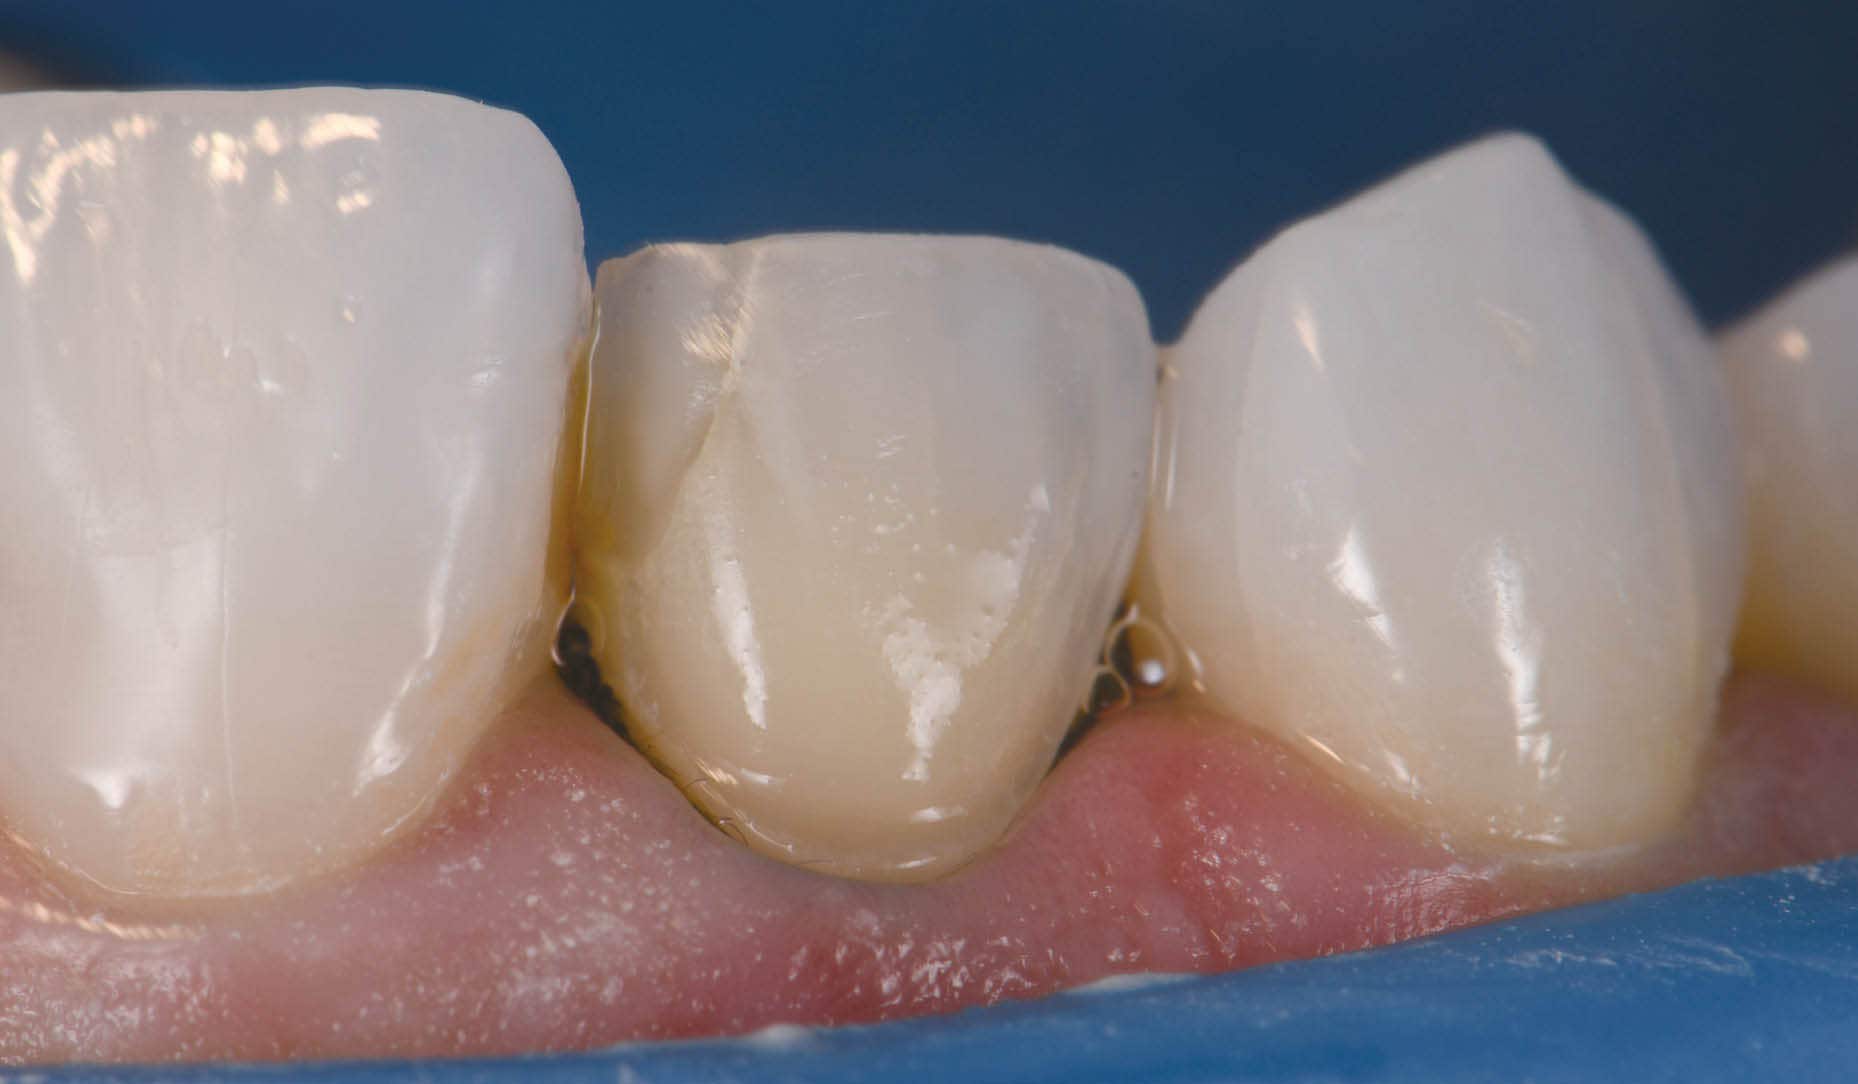
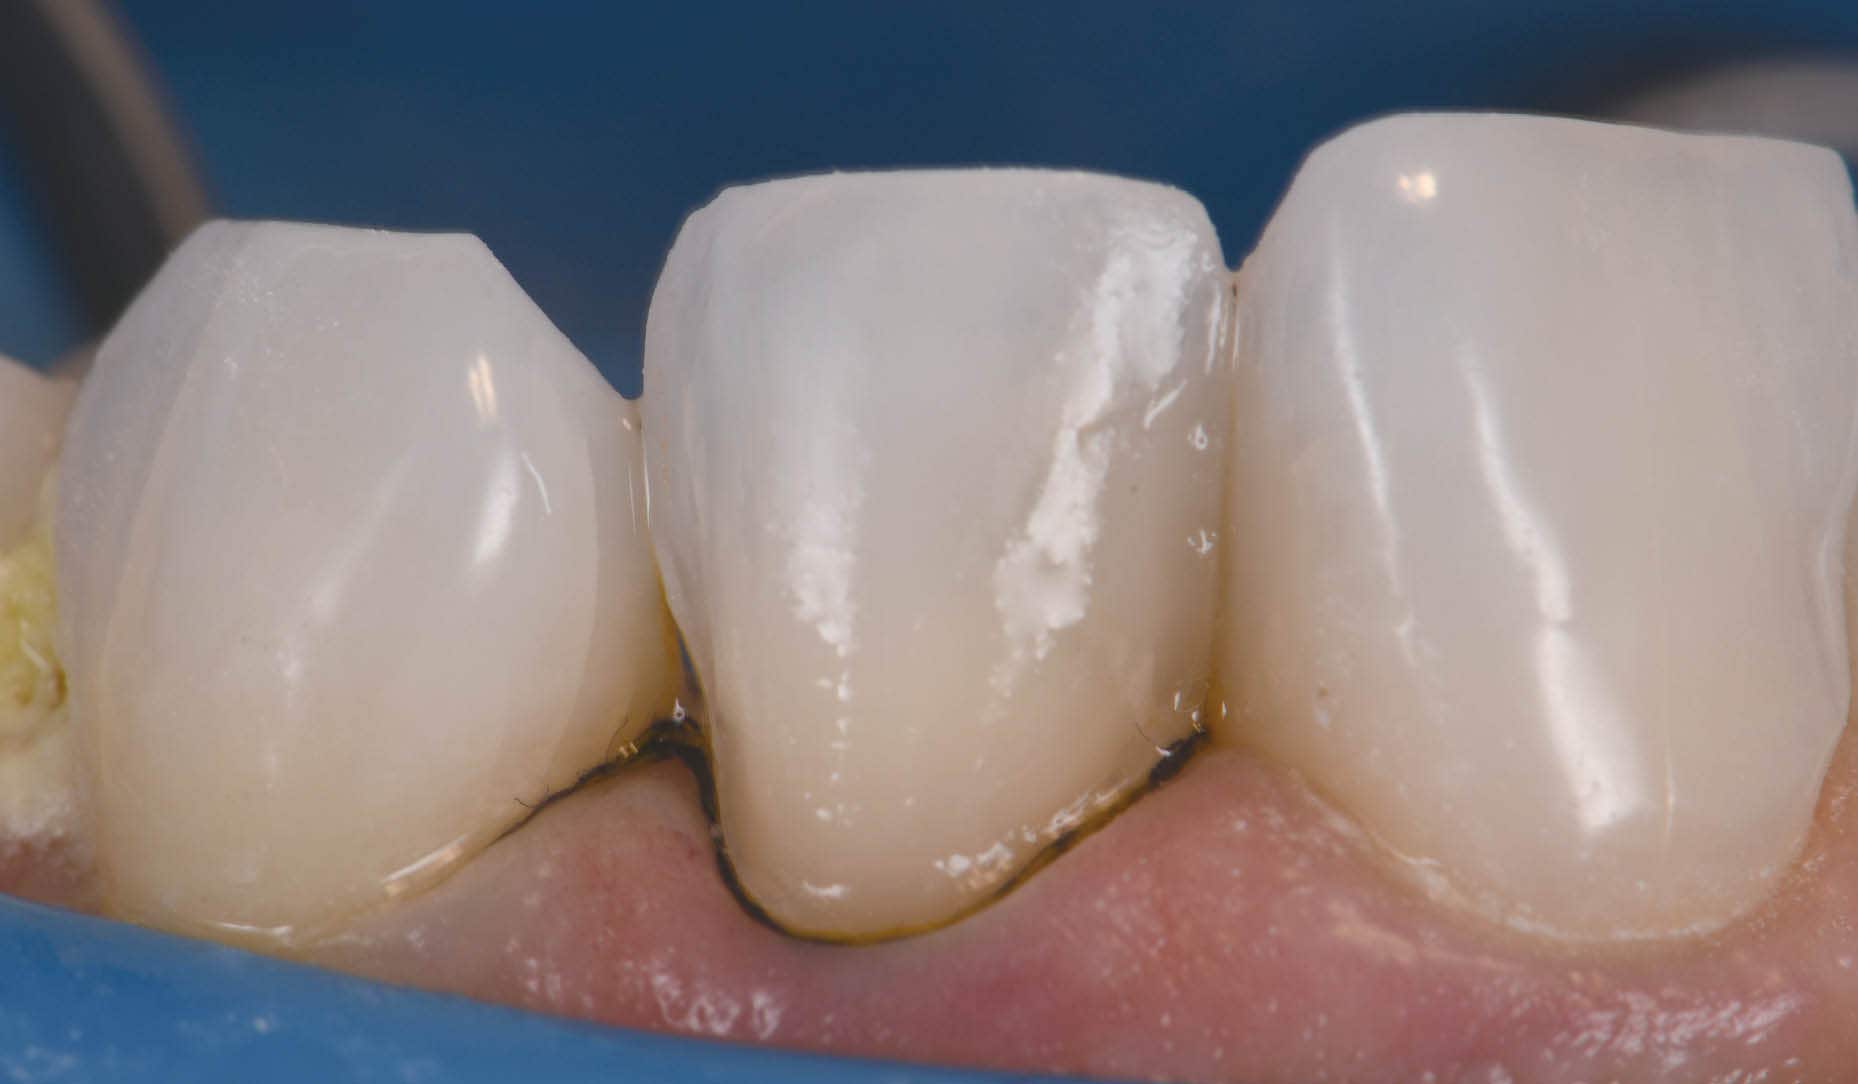
Fig. 2. Veneer preparation tooth 1.2, 2.2.
On receipt of the case, the patient was anesthetized and the provisionals removed. The preparations were debrided and prepared for bonding by abrading the surfaces using a 27 micron aluminum oxide powder at 30-40 psi. The veneers were assessed using a clear glycerin try-in paste (PANAVIA™ V5 Try-in Paste Clear, Kuraray Noritake Dental Inc.). Retraction cords were packed and the intaglio surface of the restorations treated using a 5% hydrofluoric acid for 20 seconds prior to application of a 10-MDP-containing silane coupling agent (CLEARFIL™ CERAMIC PRIMER PLUS, Kuraray Noritake Dental Inc.) (Fig. 3). The tooth surface was etched using 33% orthophosphoric acid for 20 seconds and rinsed. A 10-MDP-containing primer was applied to the tooth (PANAVIA™ V5 Tooth Primer, Kuraray Noritake Dental Inc.) (Fig. 4) and air dried as per manufacturer’s instructions. Veneer cement was loaded (PANAVIA™ Veneer LC Paste Clear, Kuraray Noritake Dental Inc.) (Fig. 5) and the veneer seated. The excess cement featured a non-slumpy character and maintained the veneer well in place during all margin verification exercises prior to a 1 second tack cure (Fig. 6).
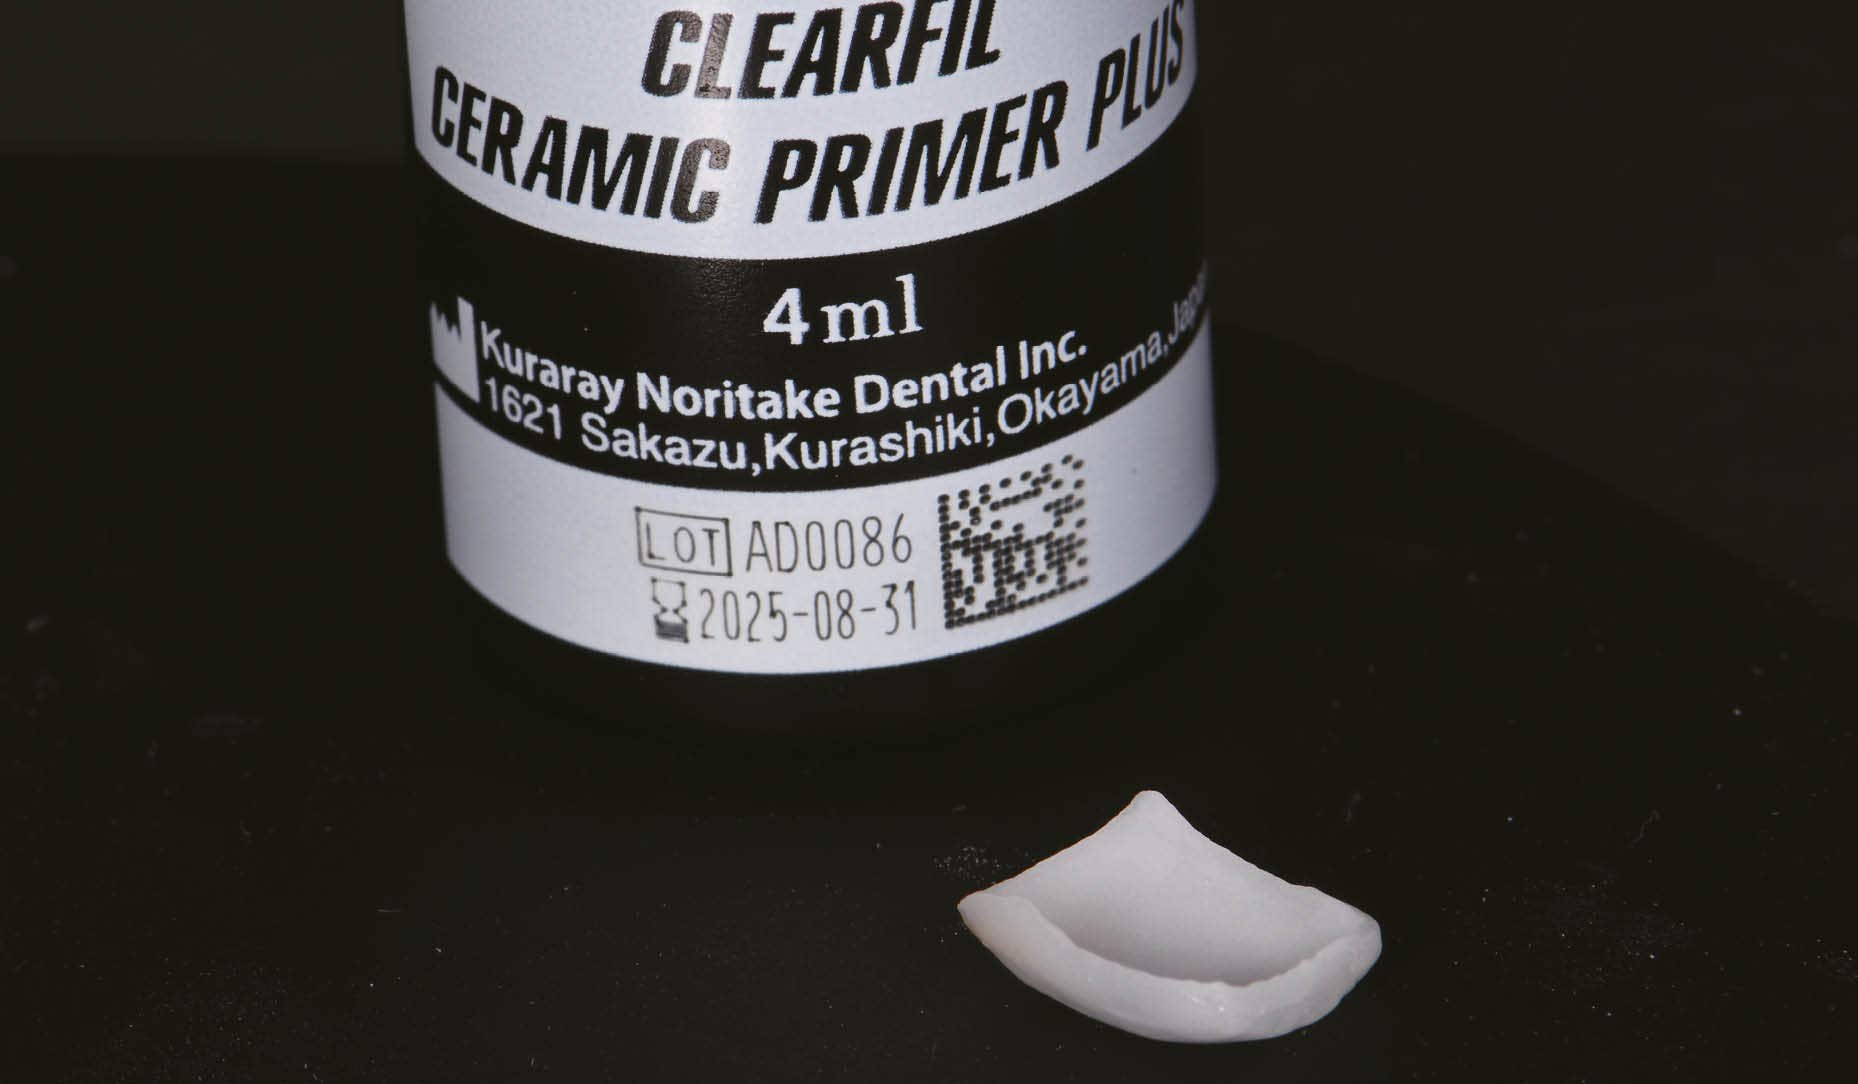
Fig. 3. CLEARFIL™ CERAMIC PRIMER PLUS applied to intaglio surfaces of veneers.
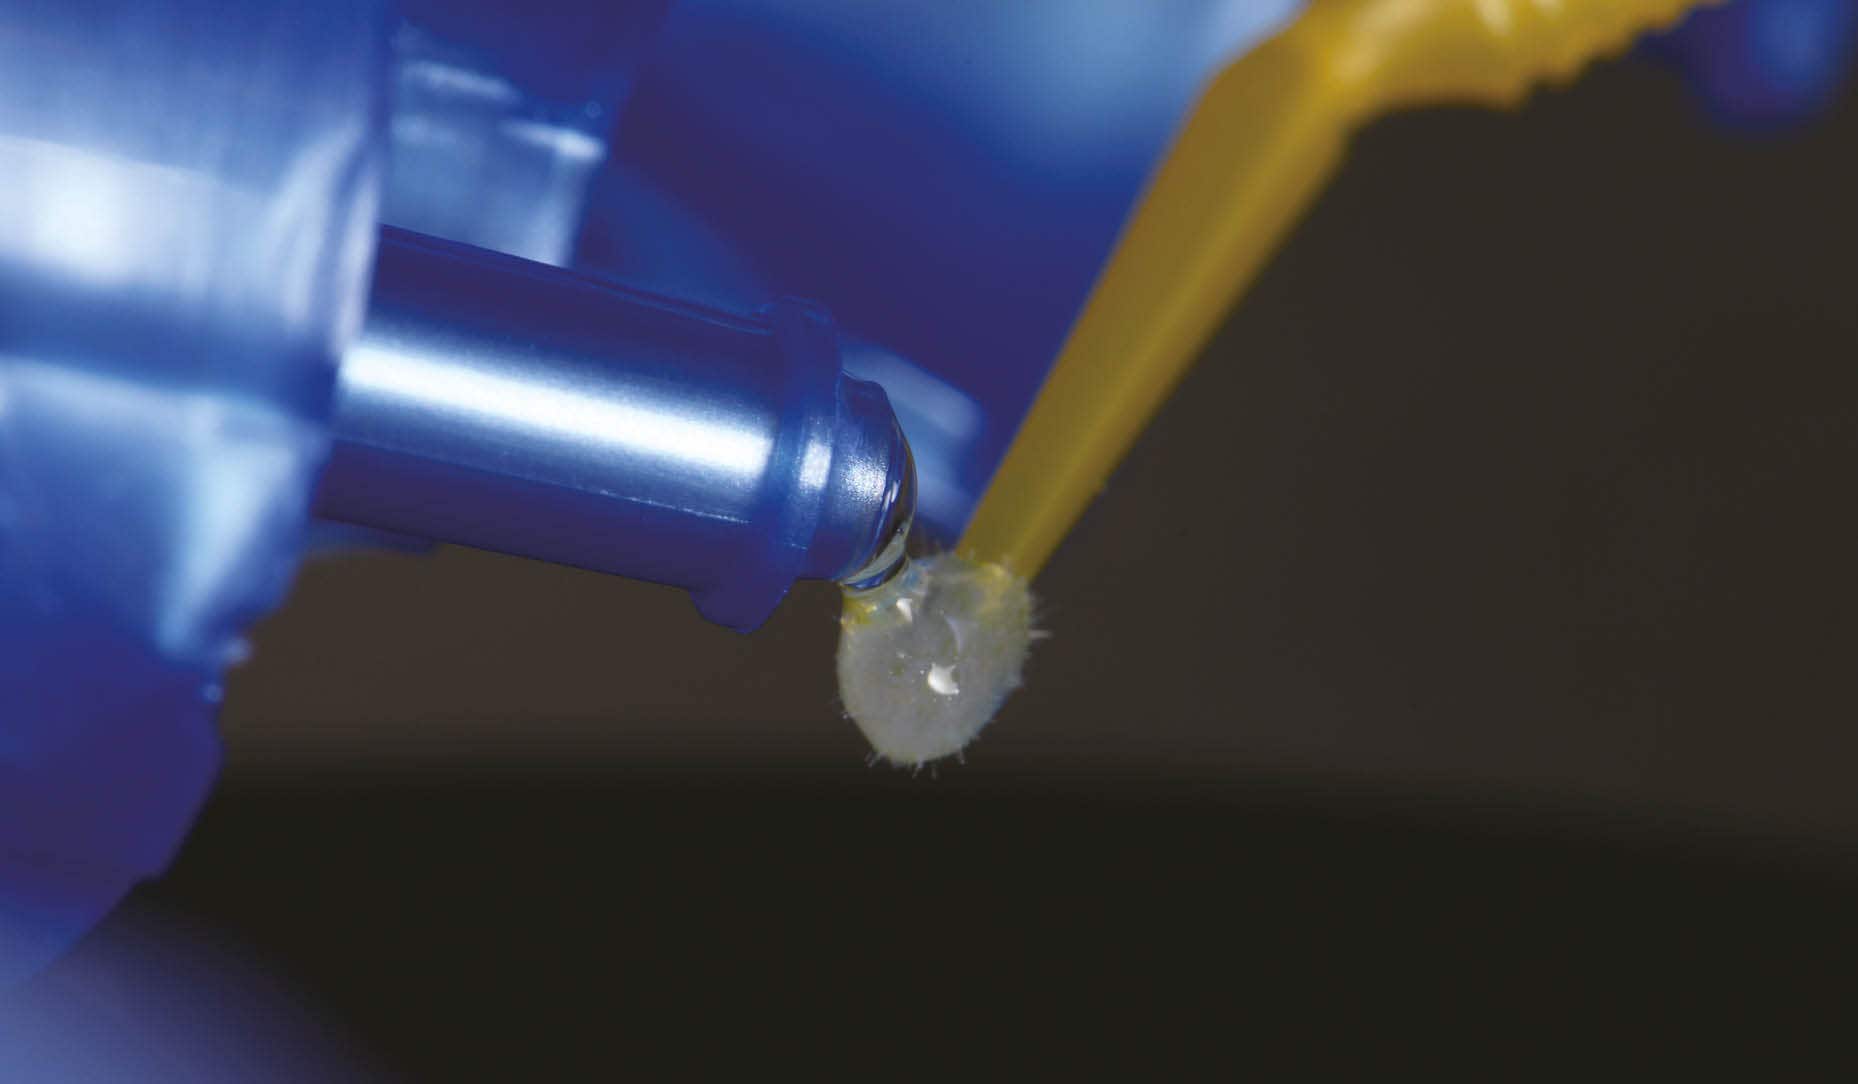
Fig. 4. PANAVIA™ V5 Tooth Primer application to etched tooth surfaces.
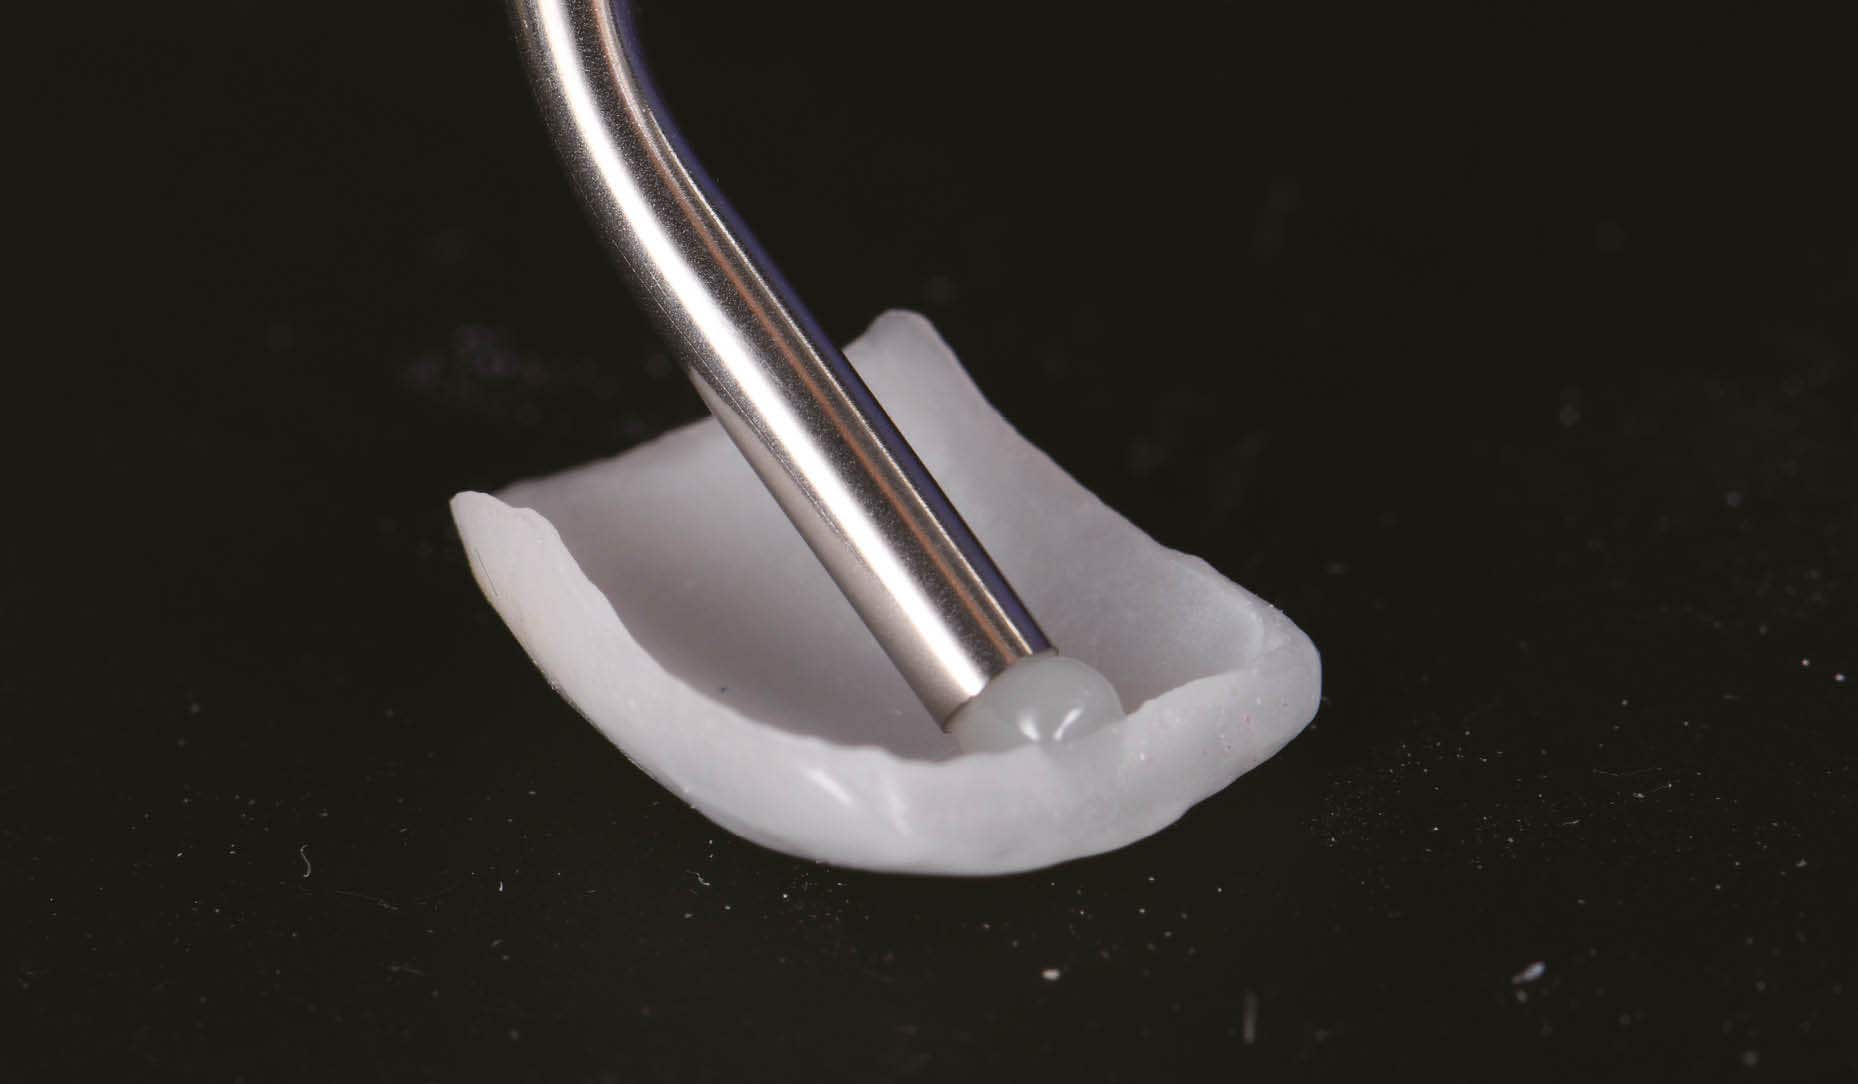
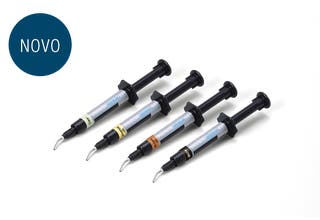
Fig. 5. PANAVIA™ Veneer LC Paste Clear shade loaded onto prepared intaglio surfaces of veneers.
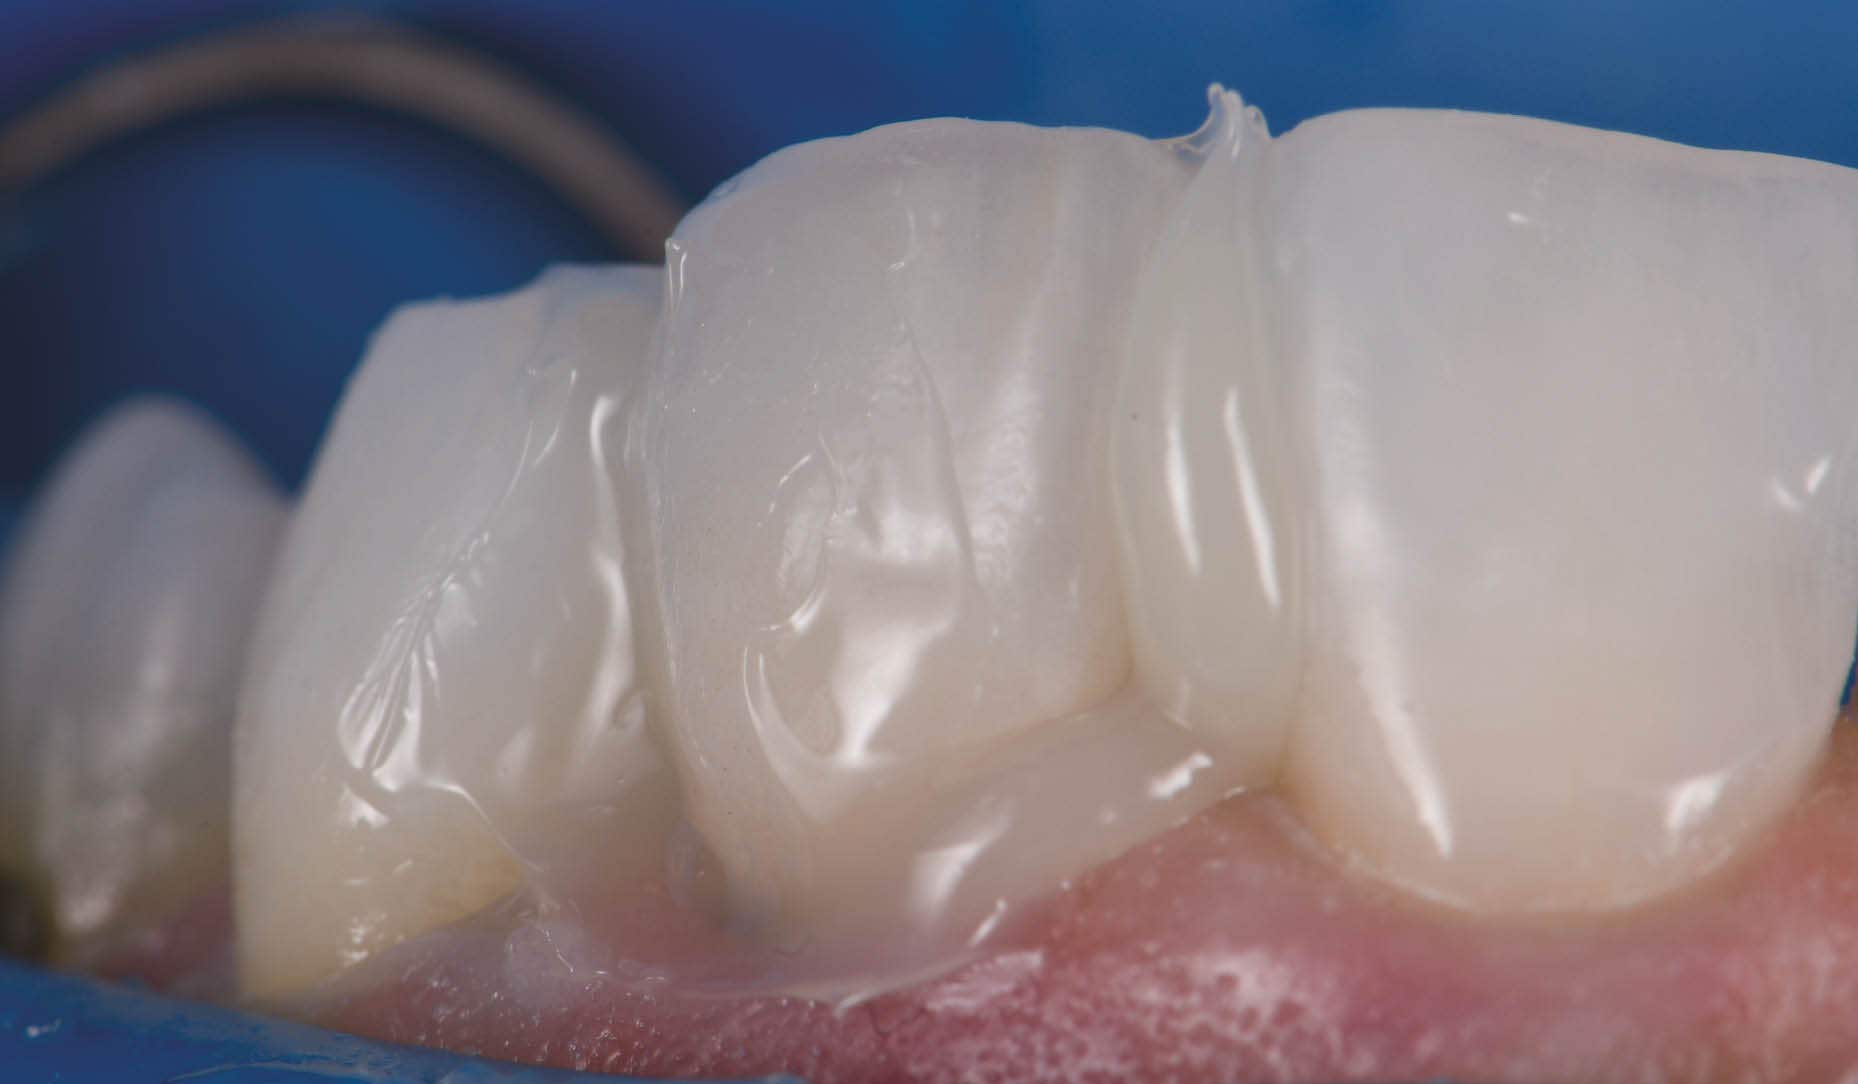
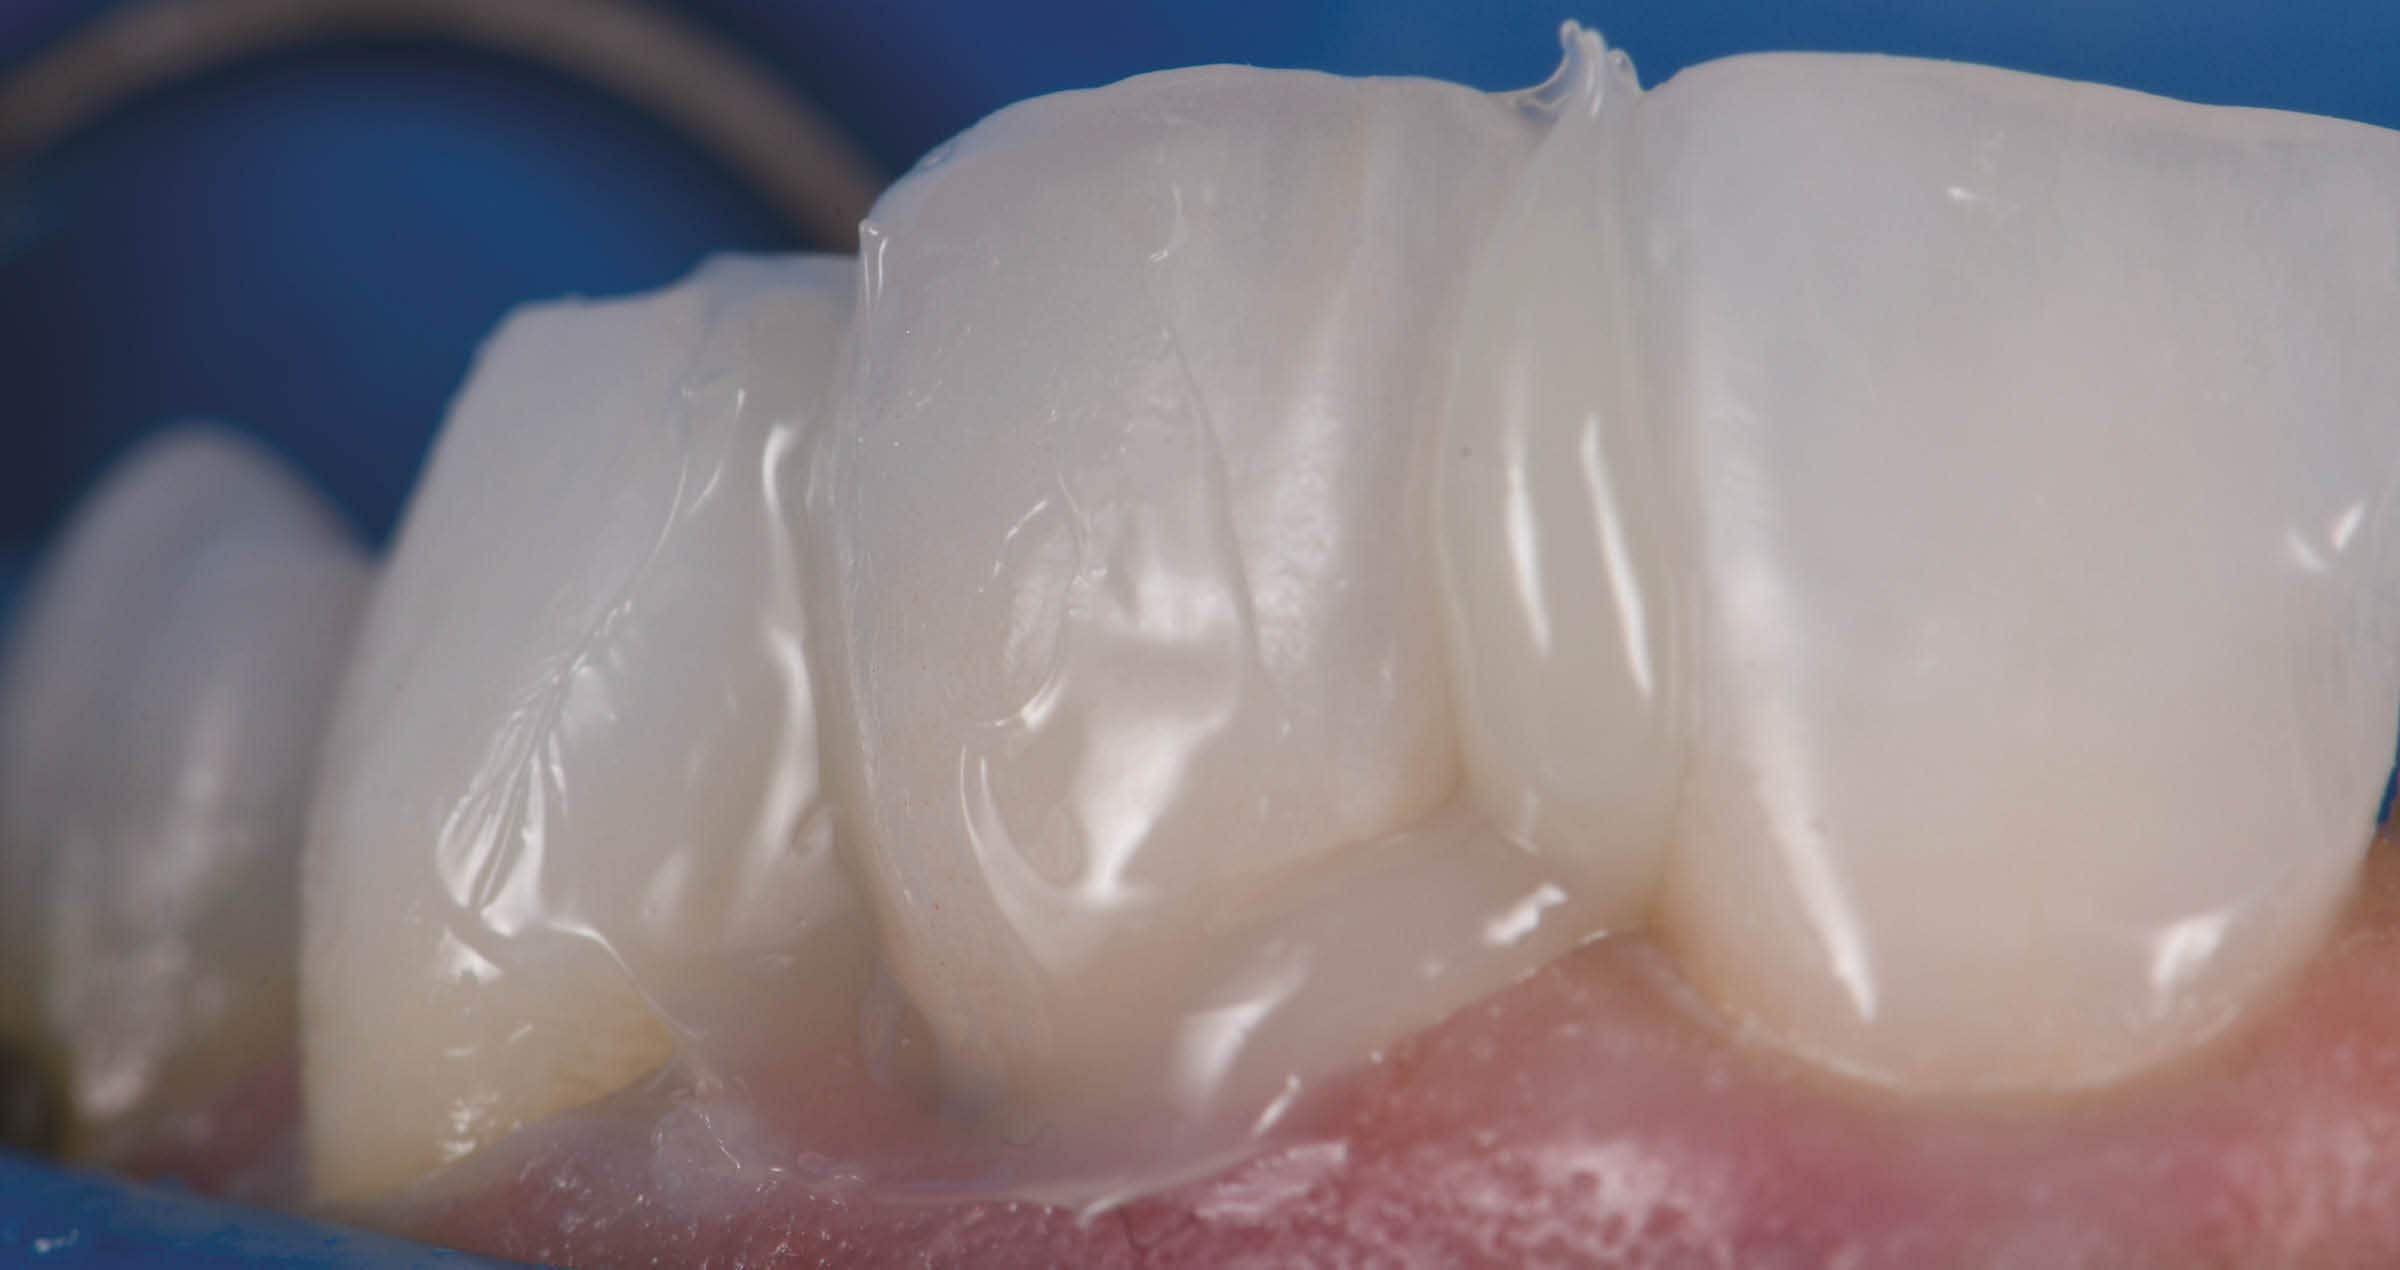
Fig. 6. PANAVIA™ Veneer LC Paste immediately after seating. Note the viscous, non-slumpy nature of the cement, which allows for ease of removal under both wet and gel-phase options.
The cement was rendered into a gel state, which facilitated “clump” or en masse removal of cement with minimal cleanup required (Fig. 7). The margins were coated using a clear glycerin gel prior to final curing to eliminate the oxygen inhibition layer (Fig. 8).
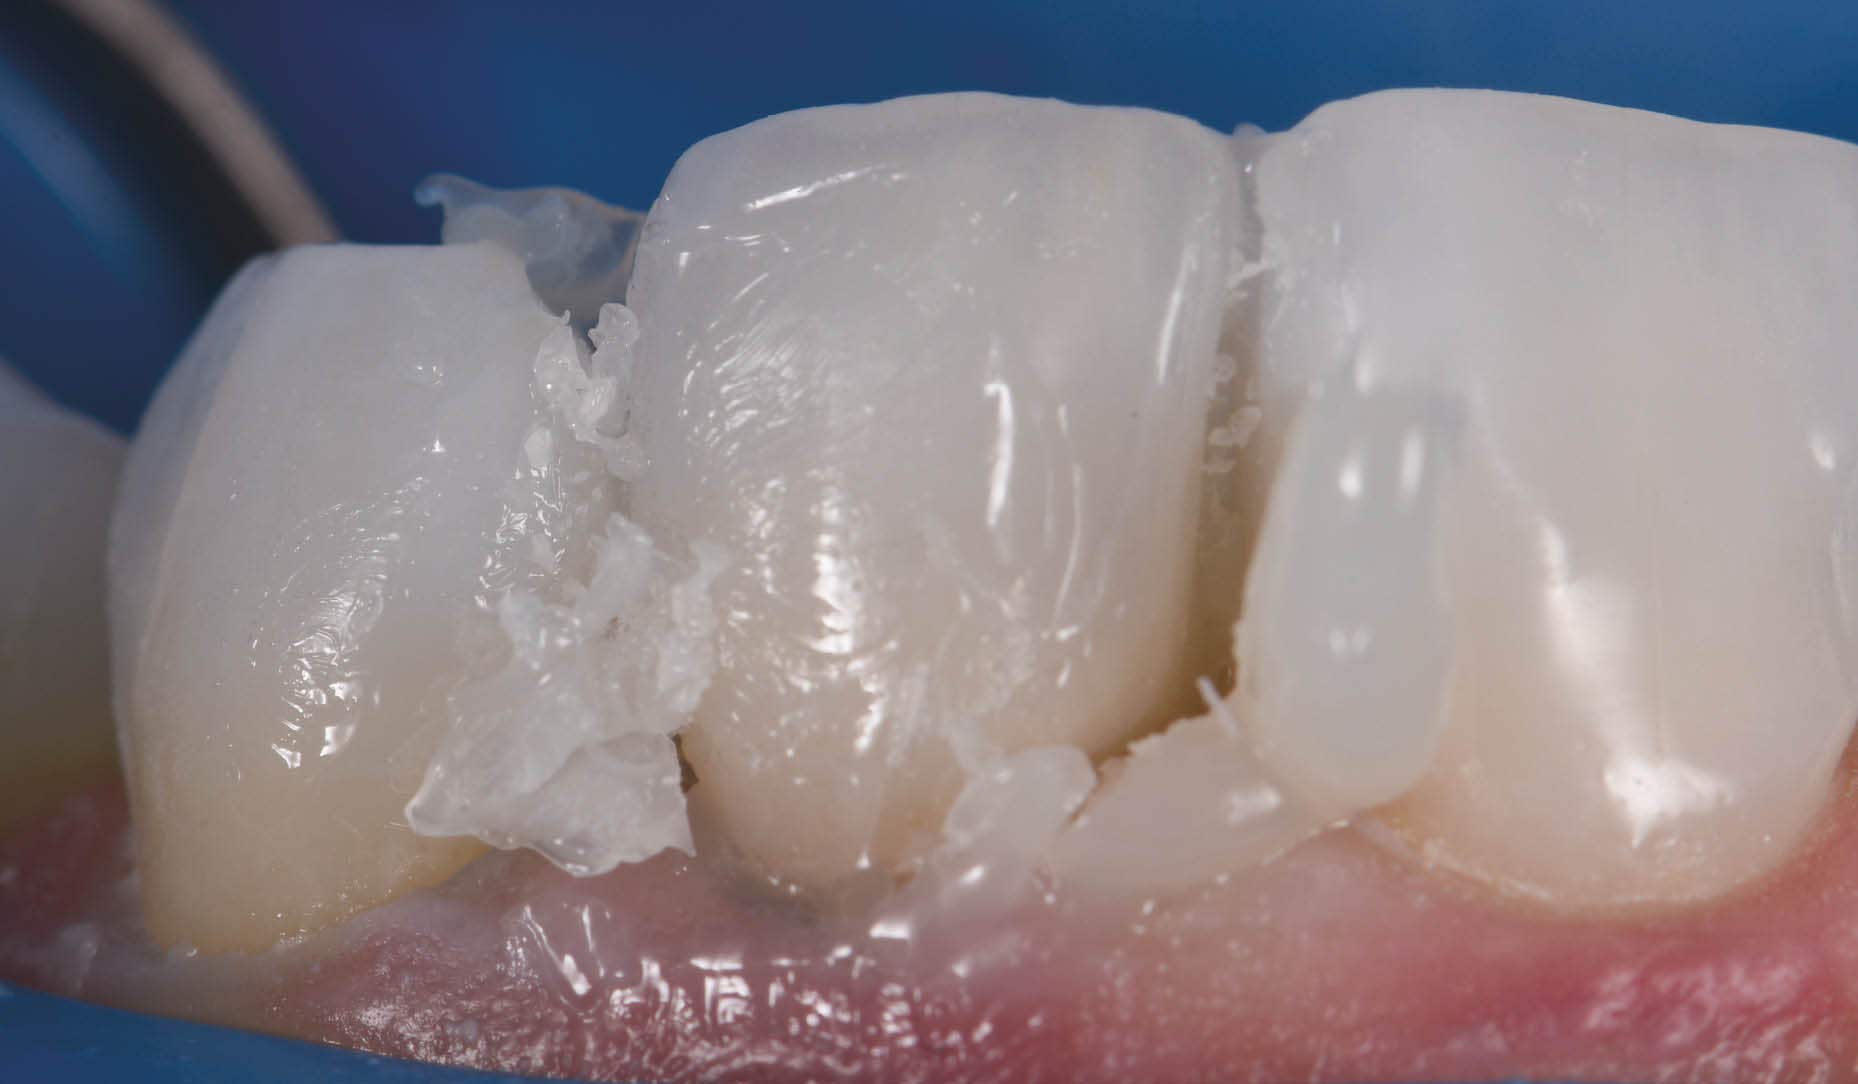
Fig. 7. Excess cement removal after tack curing for 1 second.
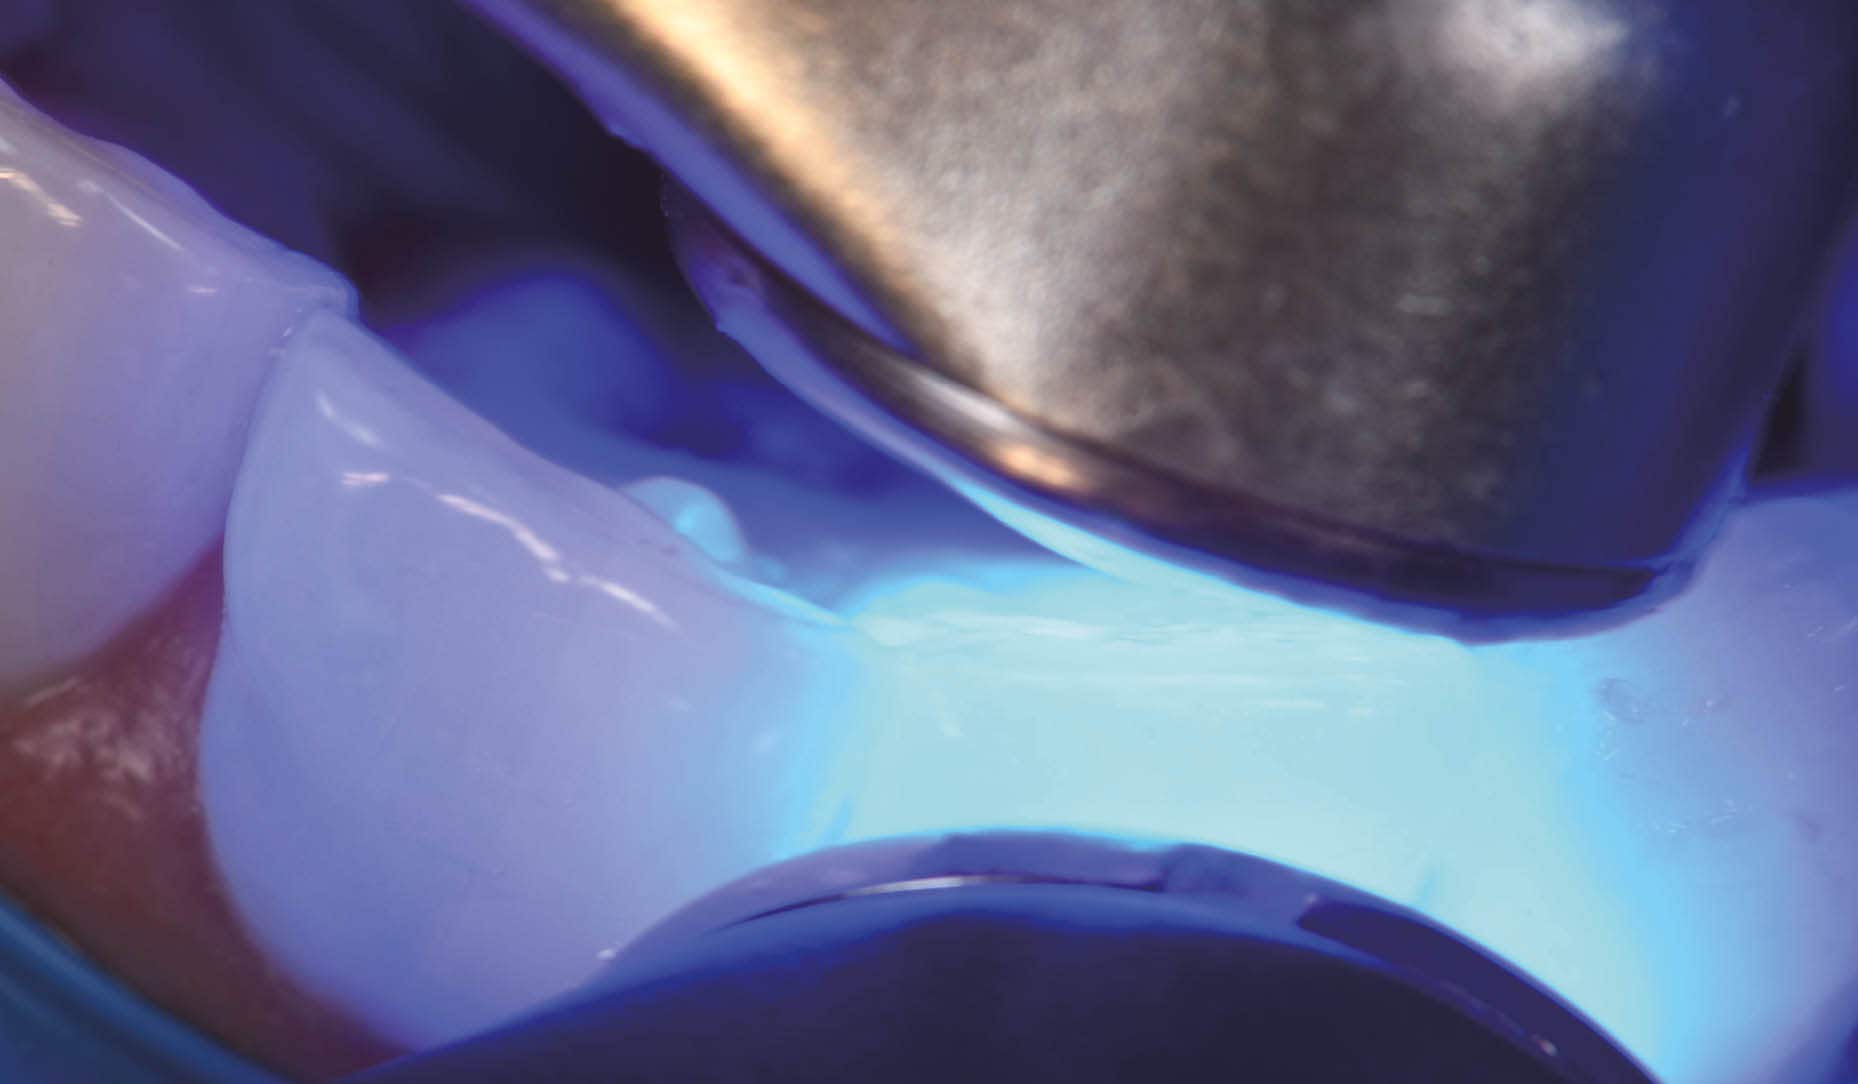
Fig. 8. Final curing of veneers from both palatal and facial aspects simultaneously.
The margins were finished and polished to high shine and the occlusion of the restorations verified as conformative. The post-operative views show excellent esthetic marginal integration (Fig. 9).
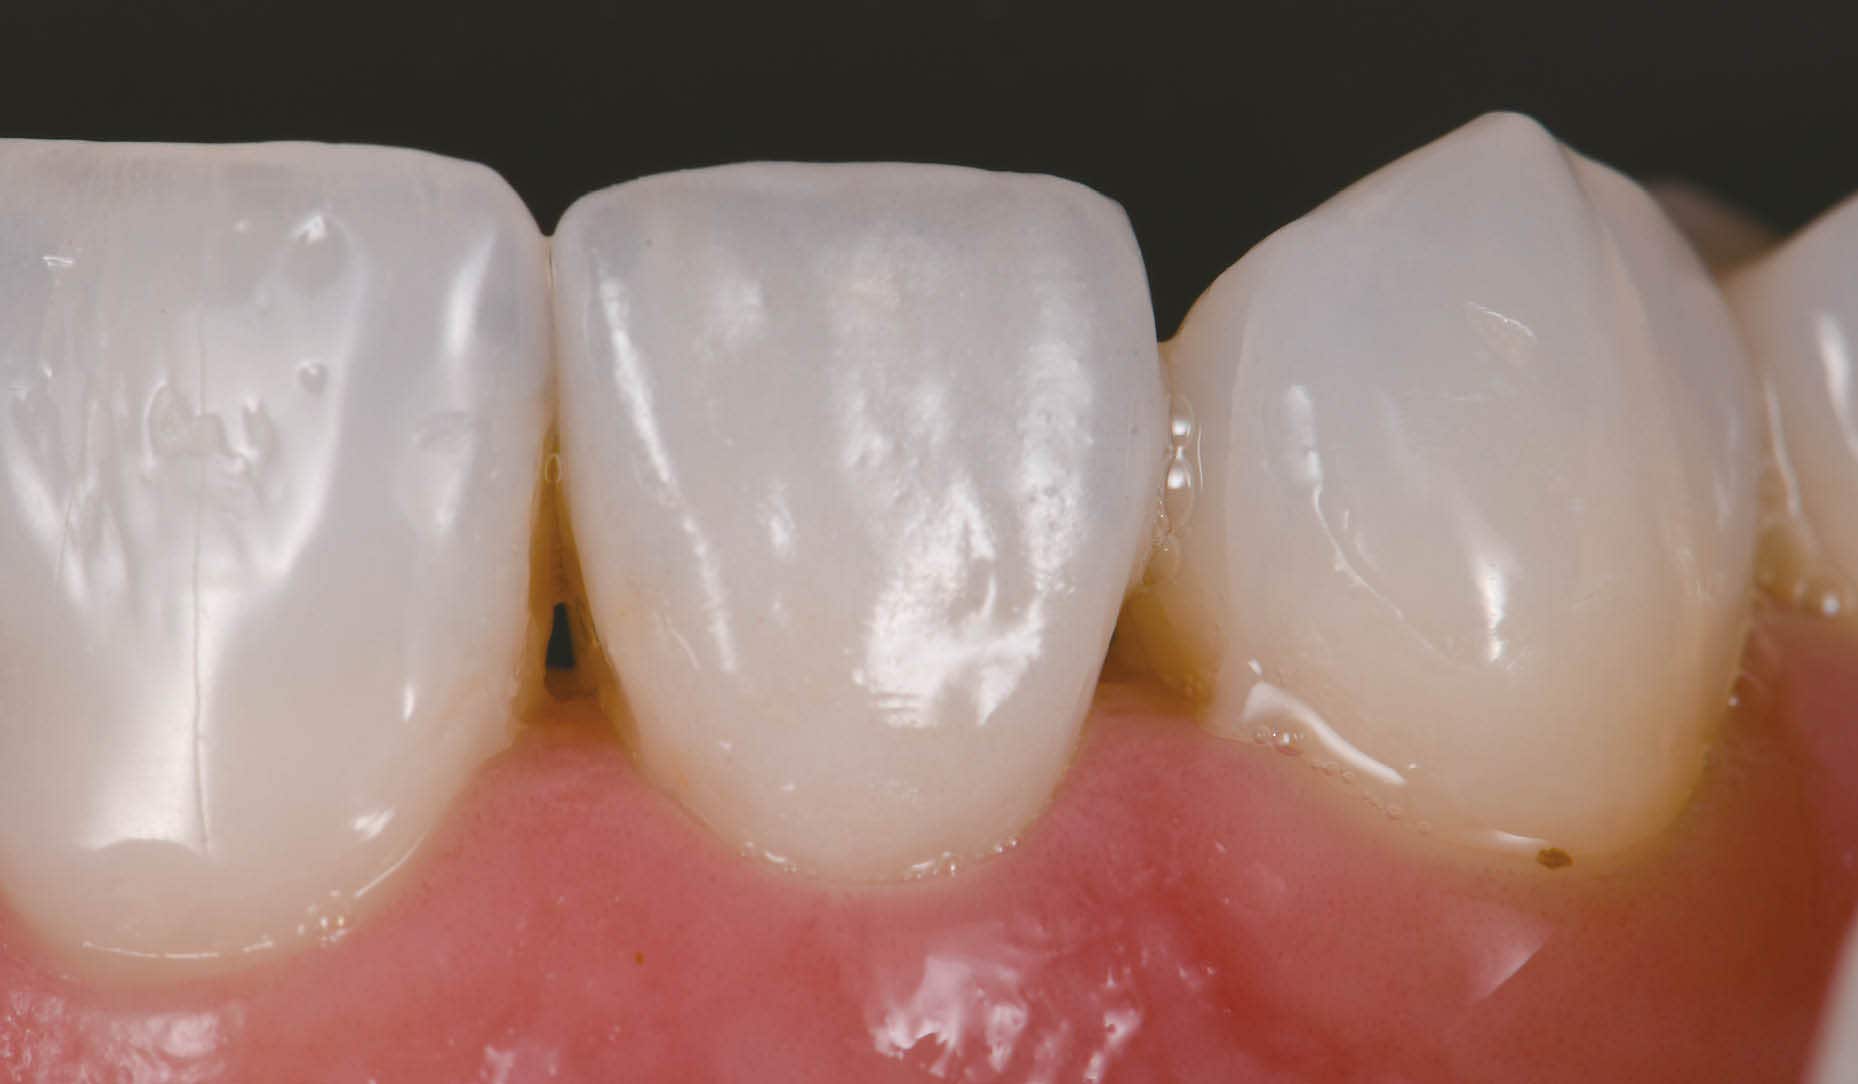
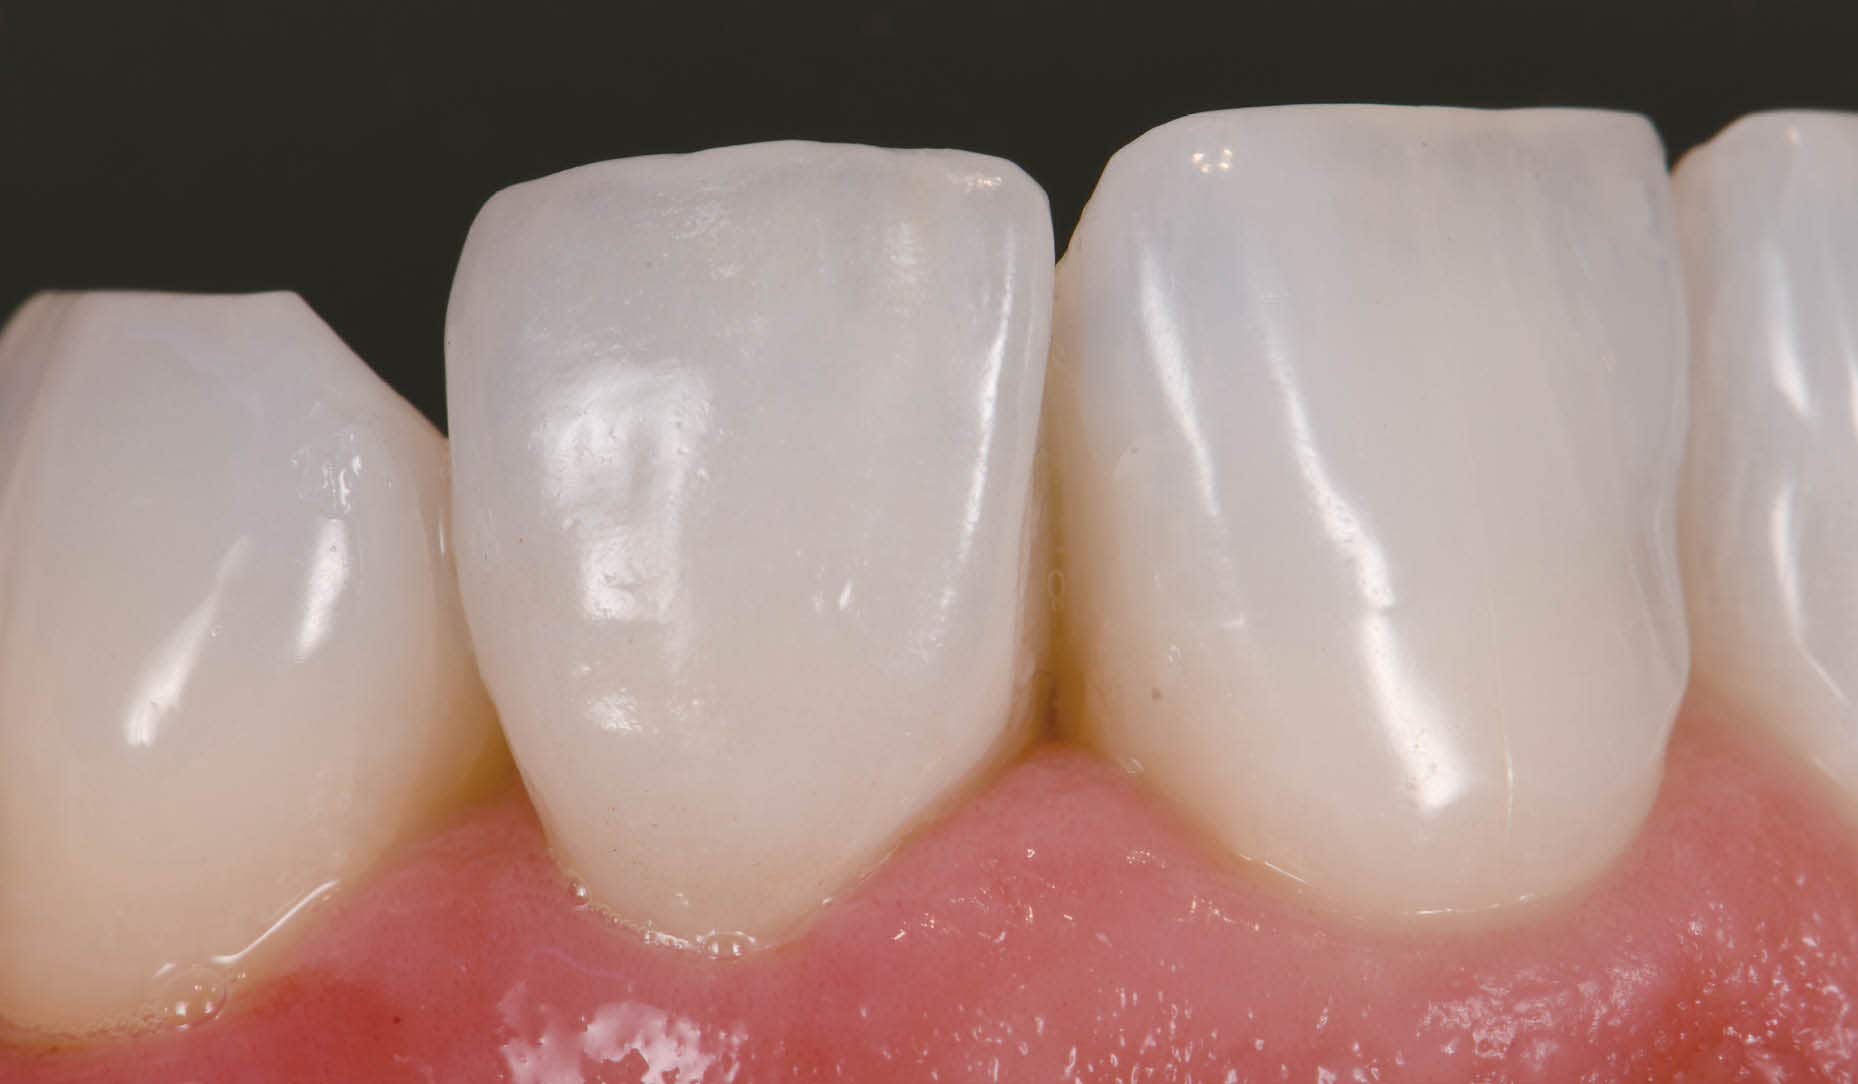
Fig. 9. Post-operative esthetic integration of veneers on 1.2 and 2.2.
On polarized photograph reassessment, the restorations are well-integrated into the new smile esthetically and functionally (Fig. 10), now awaiting esthetic augmentation of tooth 2.3 to match the contralateral canine.
FINAL SITUATION
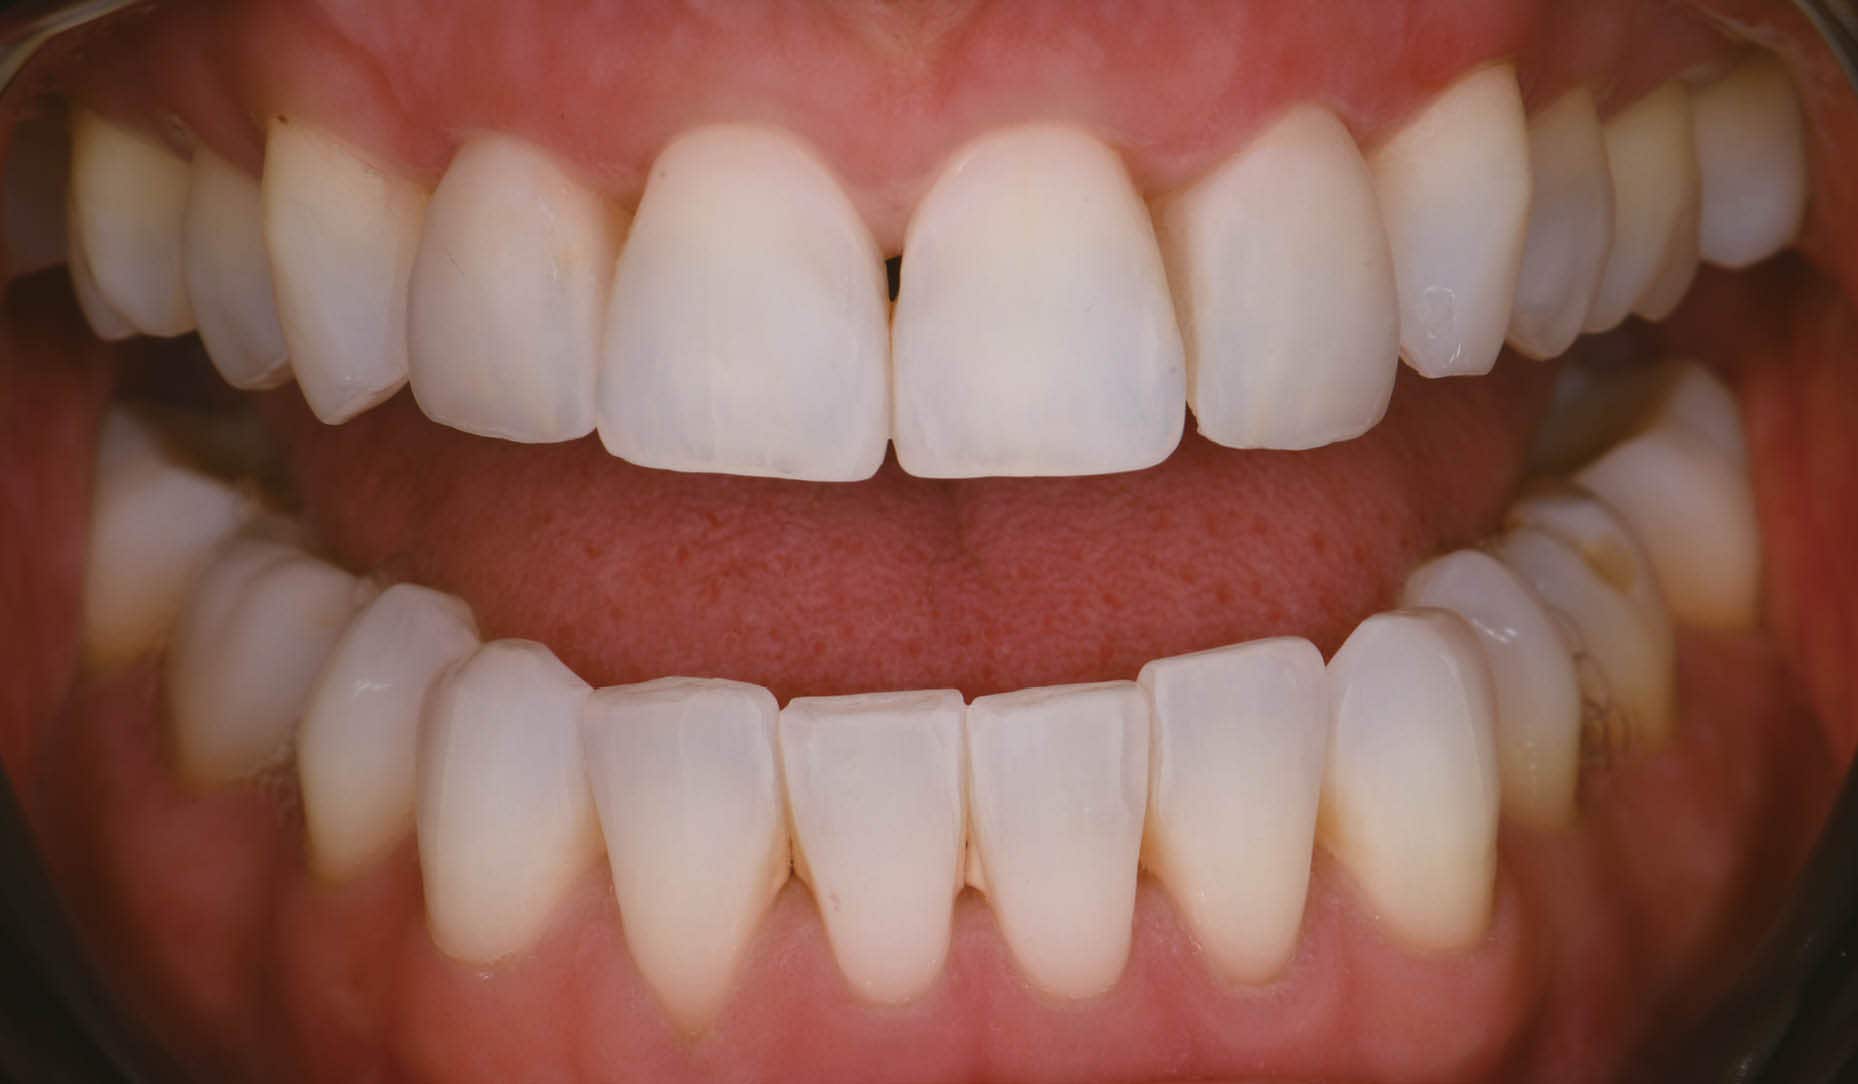
Fig. 10. Final result with polarized photography on reassessment.
RATIONALE FOR MATERIAL SELECTION
Porcelain is often the chosen material for prosthetic dental veneers due to its innate stiffness in thin cross section, ability to modify and transmit light for optimal internal refraction and its bondability by way of adhesive protocols to composite resin. This trifecta allows for a maximal preservation of residual tooth structure whilst bolstering its physical function relative to flexural performance1. The elastic modulus of a tooth can be restored to 96% of its control virgin value if the facial enamel is replaced with a bonded porcelain laminate veneer2. The elastic modulus of lithium disilicate is 94 GPa whereas that of intact enamel is 84 GPa. The elastic modulus of dentin has been found to range from 10-25 GPa, whereas that of the hybrid layer can vary widely, indeed from 7.5 GPa to 13.5 GPa in a study by Pongprueska et al3. This low flexural resistance range reflects that of deep dentin and not that of superficial dentin, which does not reflect an ideal situation where a laminate veneer is bonded in as much enamel as possible, or in the worst case to superficial dentin. Maximal flexural strength of the hybrid layer is invaluable from a biomimetic standpoint. PANAVIA™ V5 Tooth Primer (Kuraray Noritake Dental Inc.) incorporates the use of the original 10-methacryloyloxydecyl dihydrogen phosphate (10-MDP) monomer, which elicits a pattern of stable calcium-phosphate nanolayering known as Superdentin, an acid-base resistant zone that is about 600x more insoluble than the monomer 4-MET, which is found in many other adhesives. Indeed, PANAVIA™ V5 Tooth Primer is used solely in conjunction with Kuraray Noritake Dental Inc. PANAVIA™ V5 cement and PANAVIA™ Veneer LC which both allow the primer to act as a bond without the need to cure the layer prior to cementation of the indirect restoration due to its dual cure potential when married together. If a bonding agent would be preferred, CLEARFIL™ Universal Bond Quick (Kuraray Noritake Dental Inc.), a multi-modal adhesive that also contains the essential amide monomer and 10-MDP components created by Kuraray Noritake Dental Inc., can be used. Of note, CLEARFIL™ Universal Bond Quick features exceptional flexural strength due to the accentuated cross-linking during polymerization afforded by the amide monomers, on the order of 120 MPa by itself4. PANAVIA™ Veneer LC is a cement system that features cutting edge technology that provides excellent esthetics and adhesive stability of your indirect restorations, whilst allowing a stress free workflow. It is a cement system that is a game changer; one that allows you to restore confidence in the patient, strength in the tooth-restoration interface, and bolsters your clinical confidence in the delivery of biomimetic excellence.
Dentist:

CLARENCE TAM
References
1. Magne P, Douglas WH. Rationalization of esthetic restorative dentistry based on biomimetics. J Esthet Dent. 1999;11(1):5-15. doi: 10.1111/j.1708-8240.1999.tb00371.x. PMID: 10337285.
2. Magne P, Douglas WH. Porcelain veneers: dentin bonding optimization and biomimetic recovery of the crown. Int J Prosthodont. 1999 Mar-Apr;12(2):111-21. PMID: 10371912.
3. Pongprueksa P, Kuphasuk W, Senawongse P. The elastic moduli across various types of resin/dentin interfaces. Dent Mater. 2008 Aug;24(8):1102-6. doi: 10.1016/j.dental.2007.12.008. Epub 2008 Mar 4. PMID: 18304626.
4. Source: Kuraray Noritake Dental Inc. Samples (beam shape; 25 x 2 x 2 mm): The solvents of each material were removed by blowing mild air prior to the test.
- 29 de ago. de 2023
